
:max_bytes(150000):strip_icc():format(webp)/GettyImages-155096051-5b1bf60d43a1030036cfac94.jpg)
Updated YouTube Thumbnail Secrets Boost Views with the Right Size, Design, and Strategy
YouTube Thumbnail Secrets: Boost Views with the Right Size, Design, and Strategy
YouTube Thumbnail Size Template & Practical Tactics for You
An easy yet powerful editor
Numerous effects to choose from
Detailed tutorials provided by the official channel
A YouTube thumbnail is like a cover page of your video that creates the first impression. Though a default thumbnail is created for each video by YouTube, you can always customize it and make it more appealing and attractive.

More in detail about Youtube thumbnail size template, tips, and others can be learned from the following content.
In this article
01 [Youtube Thumbnail Specifications ](#Part 1)
02 [Youtube Thumbnail Templates](#Part 2)
03 [Top 5 Tips for Creating Effective Thumbnails](#Part 3)
04 [How to Add a Customized Thumbnail to a Youtube Video](#Part 4)
Part 1 YouTube Thumbnail Specifications
To stand out from the crowd and create an impact over the viewers, a well-customized thumbnail works great. A customized thumbnail proves effective in ways more than one like encouraging attention, increasing engagement, giving a professional look, portraying your personality, and much more. The right size of the thumbnail is an important consideration and the following are the suggested YouTube video thumbnail dimensions.
● An ideal width and height of YouTube thumbnail size is 1280 X 720 pixels
● The size of the thumbnail should be kept under 2MB.
● Use the thumbnail in JPEG, PNG, BMP, or GIF format.
● The ideal thumbnail ratio for YouTube has to be kept at 16:9.
● The width of the thumbnail should not be less than 640 pixels.

Part 2 YouTube Thumbnail Templates
If you are struggling to find the right thumbnail for your video, templates are a great rescue. There are several sites and programs where you can find multiple templates that can be customized and edited to suit your requirements. We have shortlisted a few sites where you can check different types of interesting templates for the YouTube thumbnails.
● Canva: This online site has a huge collection of free as well as paid video thumbnails in different categories, and types. You can filter the collection of templates based on style and theme. The templates can be further customized as needed after which they can be downloaded to be used on YouTube.

● VistaCreate: Interesting template designs are available at this site to be used as a YouTube video thumbnail. You can even create your own design or customize the ones available. The site also has an option to choose the desired thumbnail design using the search bar.

● Postermywall: YouTube templates in an array of designs, themes, and genres are available at this site. There are also Youtube Thumbnail Size Template and from these you can choose the one that matches the personality of your video and customize it as per the requirements. The search bar to look for your choice of template is also available.

● Visme: Templates for all types of video thumbnails are available at this site to choose from. You simply need to choose the template as per your choice and you are all set to have an impressive thumbnail for your video. You can even look for your choice of design using the search bar.

● Snappa: There is a wide selection of templates in different categories at this site that can be used for creating a customized thumbnail for your YouTube videos. The templates are free and you need to create a free account on the site to use them.

Part 3 Top 5 Tips For Creating Effective Thumbnails
To make your thumbnails interesting and effective we have shortlisted a few useful tips as below.
● Keep it clutter-free: It’s always good to keep your thumbnail simple and clean without any clutter. If you use too many elements in a thumbnail, they will look messy when watched on a mobile device.
● Using a still image from the video: Though you can set a customized thumbnail for your videos, an automatic image is also selected by YouTube. It might be a possibility that the image automatically selected is good enough and effective and thus creating a customized thumbnail is not required.
● Using editing software like Wondershare Filmora Video Editor for creating customized graphics: A good editing software can be used for creating an effective and impressive image. Wondershare Filmora is one such professional tool that can be considered. This Windows and Mac-based program can let you edit your images using multiple features. Simple and fast to use, the software also supports batch processing so that multiple files as thumbnails for multiple videos can be created at a time. Additional features supported by the software include motion tracking, adding text and tiles, adding overlays and filters, adding transitions and elements, color tuning, and more.
Wondershare Filmora
Get started easily with Filmora’s powerful performance, intuitive interface, and countless effects!
Try It Free Try It Free Try It Free Learn More >

● Use eye-catchy titles: Using catchy titles in your thumbnails is an effective way to grab the attention of the viewers. A title will give a glimpse to the viewers of the content of the video.
● Try different designs: If you are not sure about a thumbnail design, create multiple ones and then add them to the video one by one. Select the design that goes best and looks attractive.

Part 4 How to Add A Customized Thumbnail To A Youtube Video
Once a customized thumbnail image is created, the next step is to add it to the video on your YouTube. The process is simple and quick and involves the following steps.
Step 1. Open your YouTube account and add the new video using the camera-plus icon. Alternatively, to add a thumbnail to the already uploaded video, go to the Studio dashboard and tap on the video for editing the settings.
Step 2. At the bottom of the video settings window, you can see the 3 thumbnails generated automatically. To upload the customized image, click on the Custom thumbnail box at the bottom right-hand side.
Step 3. Browse and import the created thumbnail image and click on the Upload button.
The selected image will not be used as the thumbnail for the video.

Key Takeaways from This Episode
● A YouTube thumbnail works as the cover for your video and is the first thing that will get the attention and the interest of the viewer.
● YouTube video thumbnail dimensions as recommended must be used.
● Several pre-designed templates are available for creating interesting thumbnails.
● To create an effective thumbnail, several tips and tricks can be used like using editing software like Wondershare Filmora.
A YouTube thumbnail is like a cover page of your video that creates the first impression. Though a default thumbnail is created for each video by YouTube, you can always customize it and make it more appealing and attractive.
More in detail about Youtube thumbnail size template, tips, and others can be learned from the following content.
In this article
01 [Youtube Thumbnail Specifications ](#Part 1)
02 [Youtube Thumbnail Templates](#Part 2)
03 [Top 5 Tips for Creating Effective Thumbnails](#Part 3)
04 [How to Add a Customized Thumbnail to a Youtube Video](#Part 4)
Part 1 YouTube Thumbnail Specifications
To stand out from the crowd and create an impact over the viewers, a well-customized thumbnail works great. A customized thumbnail proves effective in ways more than one like encouraging attention, increasing engagement, giving a professional look, portraying your personality, and much more. The right size of the thumbnail is an important consideration and the following are the suggested YouTube video thumbnail dimensions.
● An ideal width and height of YouTube thumbnail size is 1280 X 720 pixels
● The size of the thumbnail should be kept under 2MB.
● Use the thumbnail in JPEG, PNG, BMP, or GIF format.
● The ideal thumbnail ratio for YouTube has to be kept at 16:9.
● The width of the thumbnail should not be less than 640 pixels.
Part 2 YouTube Thumbnail Templates
If you are struggling to find the right thumbnail for your video, templates are a great rescue. There are several sites and programs where you can find multiple templates that can be customized and edited to suit your requirements. We have shortlisted a few sites where you can check different types of interesting templates for the YouTube thumbnails.
● Canva: This online site has a huge collection of free as well as paid video thumbnails in different categories, and types. You can filter the collection of templates based on style and theme. The templates can be further customized as needed after which they can be downloaded to be used on YouTube.
● VistaCreate: Interesting template designs are available at this site to be used as a YouTube video thumbnail. You can even create your own design or customize the ones available. The site also has an option to choose the desired thumbnail design using the search bar.
● Postermywall: YouTube templates in an array of designs, themes, and genres are available at this site. There are also Youtube Thumbnail Size Template and from these you can choose the one that matches the personality of your video and customize it as per the requirements. The search bar to look for your choice of template is also available.
● Visme: Templates for all types of video thumbnails are available at this site to choose from. You simply need to choose the template as per your choice and you are all set to have an impressive thumbnail for your video. You can even look for your choice of design using the search bar.
● Snappa: There is a wide selection of templates in different categories at this site that can be used for creating a customized thumbnail for your YouTube videos. The templates are free and you need to create a free account on the site to use them.
Part 3 Top 5 Tips For Creating Effective Thumbnails
To make your thumbnails interesting and effective we have shortlisted a few useful tips as below.
● Keep it clutter-free: It’s always good to keep your thumbnail simple and clean without any clutter. If you use too many elements in a thumbnail, they will look messy when watched on a mobile device.
● Using a still image from the video: Though you can set a customized thumbnail for your videos, an automatic image is also selected by YouTube. It might be a possibility that the image automatically selected is good enough and effective and thus creating a customized thumbnail is not required.
● Using editing software like Wondershare Filmora Video Editor for creating customized graphics: A good editing software can be used for creating an effective and impressive image. Wondershare Filmora is one such professional tool that can be considered. This Windows and Mac-based program can let you edit your images using multiple features. Simple and fast to use, the software also supports batch processing so that multiple files as thumbnails for multiple videos can be created at a time. Additional features supported by the software include motion tracking, adding text and tiles, adding overlays and filters, adding transitions and elements, color tuning, and more.
Wondershare Filmora
Get started easily with Filmora’s powerful performance, intuitive interface, and countless effects!
Try It Free Try It Free Try It Free Learn More >
● Use eye-catchy titles: Using catchy titles in your thumbnails is an effective way to grab the attention of the viewers. A title will give a glimpse to the viewers of the content of the video.
● Try different designs: If you are not sure about a thumbnail design, create multiple ones and then add them to the video one by one. Select the design that goes best and looks attractive.
Part 4 How to Add A Customized Thumbnail To A Youtube Video
Once a customized thumbnail image is created, the next step is to add it to the video on your YouTube. The process is simple and quick and involves the following steps.
Step 1. Open your YouTube account and add the new video using the camera-plus icon. Alternatively, to add a thumbnail to the already uploaded video, go to the Studio dashboard and tap on the video for editing the settings.
Step 2. At the bottom of the video settings window, you can see the 3 thumbnails generated automatically. To upload the customized image, click on the Custom thumbnail box at the bottom right-hand side.
Step 3. Browse and import the created thumbnail image and click on the Upload button.
The selected image will not be used as the thumbnail for the video.
Key Takeaways from This Episode
● A YouTube thumbnail works as the cover for your video and is the first thing that will get the attention and the interest of the viewer.
● YouTube video thumbnail dimensions as recommended must be used.
● Several pre-designed templates are available for creating interesting thumbnails.
● To create an effective thumbnail, several tips and tricks can be used like using editing software like Wondershare Filmora.
Say Goodbye to Vegas Pro: 10 Top Mac Video Editing Software
For creating high-grade dynamic videos, simply shooting or recording a clip is not enough. Finding the best Sony Ve gas alternatives for Mac is essential since the software mainly targets Windows users.
Thanks to developers, there are many free and paid options to start your video editing journey on a Mac. Let’s first have a look at alternative software you could consider.
- Lightworks
- Wondershare Filmora
- Adobe Premiere Pro
- HitFilm Express
- Kdenlive
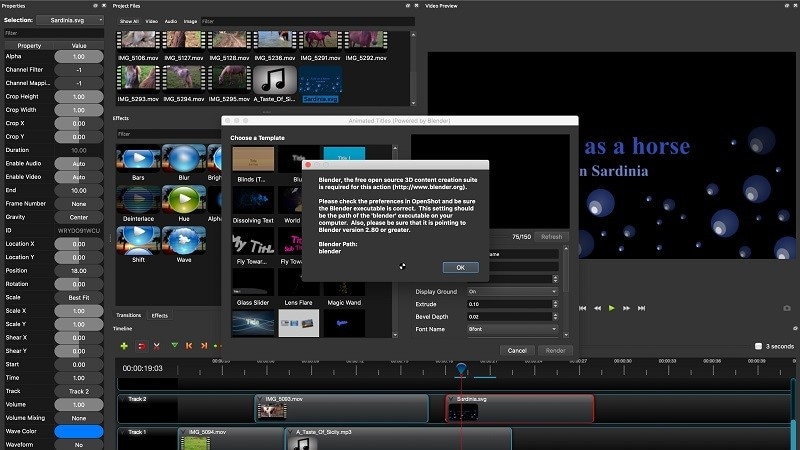
- OpenShot
- Blender
- Jahshaka
- Final Cut Pro
- Cyberlink PowerDirector 365
- What are the limitations when using Sony Vegas (Vegas Pro) on Mac?
- Hot FAQs about Vegas Pro Alternatives
Part 1: Sony Vegas Pro Alternatives & Competitors Overview
Here is a list of the top 10 tools we found after research. For an easier understanding, the following are the essential points of difference between alternative video editing software types for Sony Vegas Pro in a tabular form.
| Software | Supported OS | Price | Editor’s Verdict |
|---|---|---|---|
| Lightworks | Windows, Mac, Linux | Create-$9.99/month, Pro-$23.99/month | Medium-Difficult |
| Wondershare Filmora | Windows, Mac | Annual-$49.99, Perpetual-$79.99 | Easy |
| Adobe Premiere Pro | Windows, Mac | $20.99/month | Easy-Medium |
| HitFilm Express | Windows, Mac | Free | Easy |
| Kdenlive | Windows, Mac, Linux | Free | Medium-Difficult |
| OpenShot | Windows, Mac, Linux, OsX | Free | Medium-Difficult |
| Blender | Windows, Mac, Linux | Free | Easy |
| Jahshaka | Windows, Linux, OsX | Free | Easy-Medium |
| Final Cut Pro | Mac | Lifetime-$299.99 | Easy-Medium |
| Cyberlink PowerDirector 365 | Windows, Mac | Lifetime-$52.50 | Easy-Medium |
Part 2: Top 10 Sony Vegas (Vegas Pro) Alternatives & Competitors
Now that you know the primary differences between the Sony Vegas Pro alternatives. Are you find anything you like? Let’s move on to more details for your further consideration.
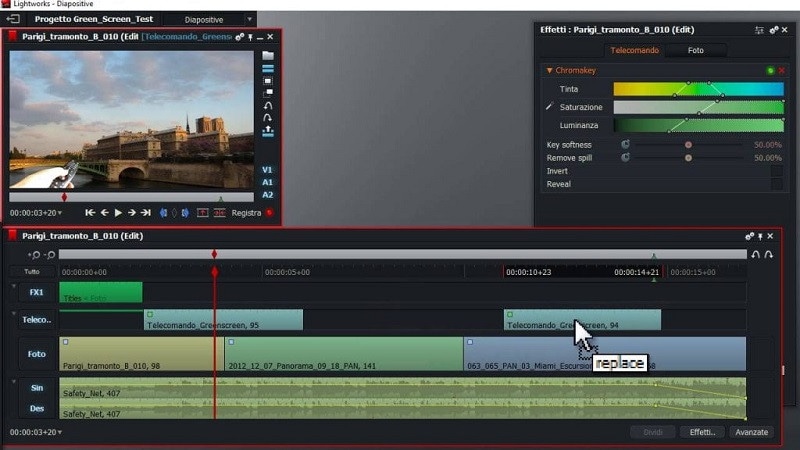
1. Lightworks
With Lightworks, using the independent timeline codec, format, and resolution alteration in videos is extremely simple. In addition, you can use the multi-cam editing feature for real-time, high-quality editing work. Moreover, drag and drop elements into videos for optimized video editing work, including pre-existing Storyboard points.
Main Features:
- Industry-grade features like QC, transcoding, and automated transfer are available.
- Edit files at different FPS limits and use three-point editing for recording/source files.
- Insert files and overwrite on a new project, replace, backfill, and fit to fill your video clips.
- Attach Storyboard tiles and match-frame clips/sub-clips easily.
Pros
- Flexible functionality and speedy transfers
- Edit files with professional movie-like quality
- Auto Sync feature for automatic timeline re-syncing is available
Cons
- Direct X is only available on the Windows version
- TotalFX plugin is not available for free- you have to upgrade to use them
OS Compatibility: Windows , Mac , Linux
Best For: Editing experts creating visually animated and professional-looking short videos can work with Lightworks.
What users say:
For professional-level video editing work, Lightworks brings a lot of resources and elements to users. According to reviews , people who have tried it have experienced better video editing functionality with these resources.
2. Wondershare Filmora
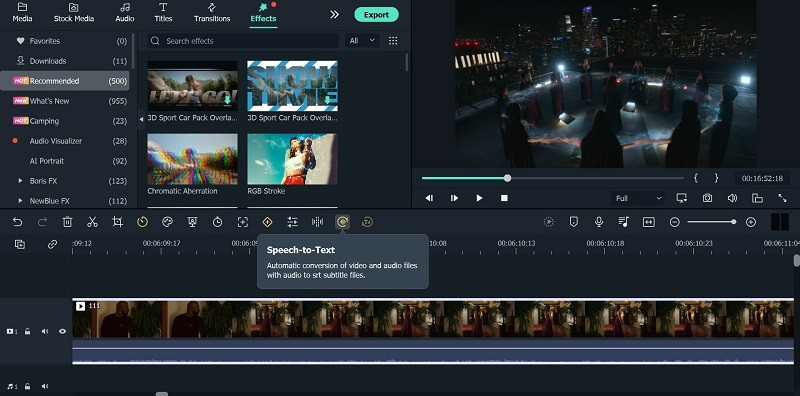
The top Vegas Pro alternative that both Windows and Mac users can opt for is Filmora. The software has advanced AI-incorporated editing functions for automated editing work, including preset effects from FX plugins. Besides that, you can easily add pre-set transitions, audio clips, text, images, and more.
Beginners find it simple to navigate through its interface and can opt for the Instant Mode function for automatic video edits .
Free Download For Win 7 or later(64-bit)
Free Download For macOS 10.14 or later

For a better idea of how this works, you should check out this tutorial video: https://filmora.wondershare.com/get-creative/make-a-video-quickly.html
Main Features:
- Instant Mode is available for automatic video/audio project editing out of 6 shorter clips.
- Support Advanced editing tools like Chroma Key and AI Portrait.
- Record voiceover, apply speech-to-text/text-to-speech functions, and more audio editing features.
- OpenFX plugins like BorisFX and NewBlue FX for a better list of pre-set effects.
Pros
- Simple to use and navigate on the editor timeline, especially with drag-and-drop support
- Output your editing files in different video/audio formats
- Quickly share the file on Vimeo or YouTube, besides downloading it on the local hard drive
Cons
- Free trial users cannot bring their Instant Mode-created videos into the editor timeline
- 4K support only with selected MKV, MOV, M4V (for Mac), and MP4 codecs
OS Compatibility: Windows , Mac
G2 Rating: 4.4 out of 5
Best For: All types of users like educators, students, homeowners, businesses, and video editors for comprehensive video editing tools and uses.
What users say:
Filmora is extremely simple to use, with advanced features available for top-level video editing work. Users mention in reviews how they have benefitted from the simple functionality and dynamic AI-based features available here for video editing.
3. Adobe Premiere Pro
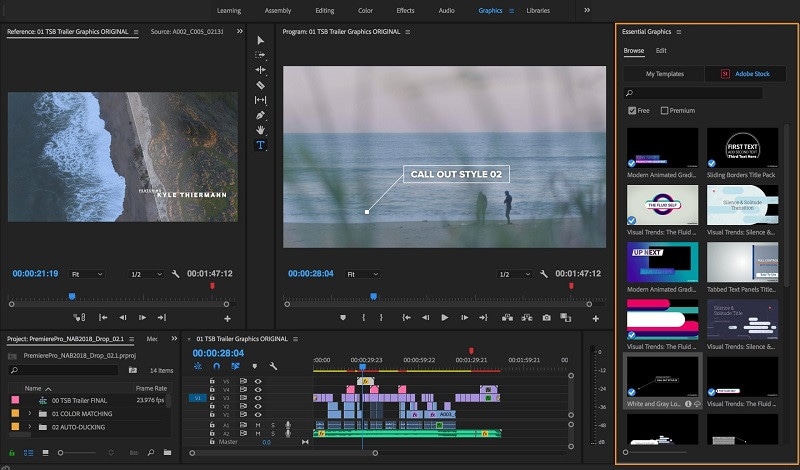
If you are looking for high-quality programs like Sony Vegas, Adobe Premiere Pro is a reliable choice. This editing software allows you to easily create, delete, and move big video projects. Moreover, you can work on multiple files simultaneously and use shortcuts for faster editing work.
Preset filters and editing features are also available here, especially if they choose the Adobe Creative Cloud option.
Main Features:
- Multiple pre-set transitions and effects are available for quick thematic changes.
- Add graphics, titles, and captions.
- Color grading and correction tools are available.
- It is possible to add keyframing and animation elements.
Pros
- Opting for group plans for video editing practice and learning using Adobe Premiere Pro is possible
- Aligns audio with videos instantly during editing
- Utilize Quick Export functionality for video files in some taps
Cons
- Windows High Contrast Mode is supported but to a limited extent, like with menus and title bars
- HDR workflows can only be handled on the Windows version with DisplayHDR 400 support
OS Compatibility: Windows , Mac
G2 Rating: 4.5 out of 5
Best For: Professional editors and trainers can use the various plans under Adobe Premiere Pro for video/audio editing.
What users say:
Advertisers and videographers enjoy high-grade video editing features and like the simple effects and interface quality. The motion graphics support in Adobe Premiere Pro is high-grade as well.
4. HitFilm Express
A capable Sony Vegas free alternative that you should check out is HitFilm Express. With this, you can expect many prepared designs for quick video edits. Additionally, you can manually customize the video files you are working on with high-grade personalization features available in the timeline.

Main Features:
- Pre-set customizable designs are available.
- Built-in sound effects and soundtracks are usable for free.
- Cache renders in timelines are optimized.
- The New Grade Clips feature allows users to apply varying effects to many video clips.
Pros
- Stable process of switching between timelines with an active orbit tool
- Easy to switch between 2D/3D timelines while using the text tool
- Simple to use for an unlimited period
Cons
- Does not work on older versions than Windows 10 and macOS 10.14
- Users cannot integrate this with Vegas Pro like before
OS Compatibility: Windows , Mac
TechRadar Rating: 4.5 out of 5
Best For: This software is a high-quality video editor for custom video editing work, fit for beginners and professionals alike.
What users say:
HitFilm Express is easy to use and efficient in the market for professional-level editing. The tutorial is available here for quick learning about the steps, and expandable features are well-admired by users.
5. Kdenlive
A high-quality Sony Vegas open-source variety that you should seriously consider is Kdenlive. The video editor comes with MLT framework support and holds many tools for optimizing video editing.
To simplify, you can arrange and adjust various video/audio tracks and mute or lock specific ones as needed. Add everything from filters, texts, and transitions using this editor for high-grade video projects.
Main Features:
- Get an automatic backup of your video project while you are editing it.
- Use proxy editing to create low-resolution source clip copies and render them later on computers.
- Multiple video/audio scopes are available for monitoring projects like vectorscope, waveform, and RDB Parade.
- Many transition and effect choices to use.
Pros
- Flexibility with themes to add with multiple options
- Pre-render specific timeline parts for preview
- Effects are simple to use with keyframing quality
Cons
- Complex for completely non-technical users to adapt to
- Only supports 64-bit versions in regards to Windows-based compatibility
Trustpilot Rating: 3.7 out of 5
Best For: High-level editing experts who need strong video editing and monitoring features in an open-source platform.
What users say:
Kdenlive, as an open-source video editing software, assures quick and straightforward usability with projects. Per reviews , users like the ability to make simple video edits without bugs in this editor and quickly export finished projects.
6. OpenShot
OpenShot is a high-quality cross-platform video editor that you can use on different devices for quick but dynamic video project edits. Use keyframing ability here to adjust the animated elements you add to the file.
Moreover, cut the videos with simple steps and add many audio tracks/background videos/watermarks in layers. Also, get several video effects to optimize the video look easily.
Main Features:
- Adjust video speed in reverse motion, fast forward, and slow motion.
- Render effects and 3D animated elements into the video project.
- Get title templates and edit them as needed.
- Visualize the background audio beats with waveform support.
Pros
- Very user-friendly interface with a simple navigation guarantee
- Supports more than 70 languages that you can translate as well using LaunchPad
- Drag-and-drop functionality is supported for adding images, audio, and videos into the OpenShot editor timeline
Cons
- Some bug issues can occur
- Slightly complex learning curve
OS Compatibility: Windows , Linux , OsX
G2 Rating: 4.4 out of 5
Best For: Professional-level video editing experts can opt for this cross-platform free software for high-quality video creations.
What users say:
The OpenShot software is suitable for high-quality video editing across different devices and operating systems. Users like the lack of automated watermarks on all videos, its simple dashboard, and its multi-track editing ability, all available for free.
7. Blender
Blender is free video editing software like Sony Vegas that users can use for video editing, but it is also effective for game development with animations. Indeed, you can create and render dynamic-looking scenes with features like Cycles.
Furthermore, the software has a rich modelling toolset with solutions like curves and sculpting tools.

Main Features:
- Completely customization-friendly UI, shortcuts, and window layout here.
- Customization and scripting are possible to do with this software due to the Python API support.
- Supports access and integration of many pipeline tools for projects.
- Comes with advanced simulation-based features available in MantaFlow and Bullet libraries.
Pros
- Basic and advanced tools for quick video edits
- Strong composition and masking ability with object-based motion tracking benefits
- Easily create short animations with Blender
Cons
- Data under the standalone games created here fall under GPL conditions
- Strict licensing rules are applicable here
OS Compatibility: Windows , Mac , Linux
G2 Rating: 4.5 out of 5
Best For: Game developers and videographers for companies can use this open-source platform for creation and editing.
What users say:
Blender is a capable software for animation-based editing, with high-quality game-based features and interactive elements that make editing simple. As per reviews , users like the simple animation-based tools and fast rendering it offers.
8. Jahshaka
Users of Jahshaka can experience an inclusive, collaborative environment for metaverse-level editing work. This free editing software, like Sony Vegas, focuses mainly on VR-based editing functions and comes with powerful tools for project management and content creation.
Take the help of other team members to collaborate on dynamic virtual world building, editing, and publishing.
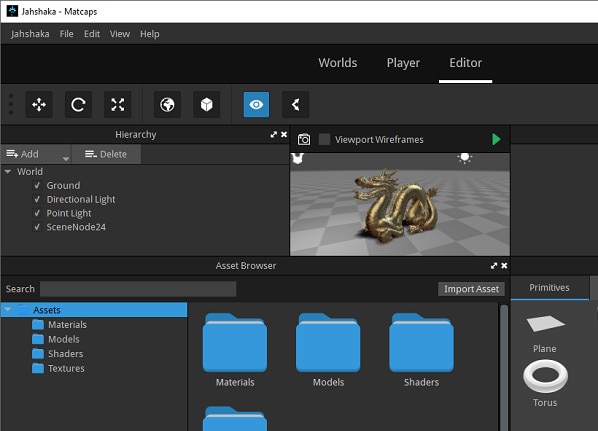
Main Features:
- Compatible player for different desktop and mobile devices.
- Create diversified worlds and scenes with one comprehensive platform.
- Immersive software 3D video development.
- Access to pre-built content and libraries of scenes and assets
Pros
- Easily share and distribute your virtual projects
- Deliver final projects offline and online
- An interactive multi-user engine is available
Cons
- Usable for a niche audience and does not include standard video editing tools
- Jahshaka V2 legacy support is no longer active
OS Compatibility: Windows , Linux , OsX
SourceForge Rating: 4.4 out of 5
Best For: Professional video editors who want a collaborative experience in VR-based development and publishing.
What users say:
Jahshaka is a suitable program for optimized VR-based editing with many preset features and themes to choose from. Most users enjoy the new features and worlds and can work with them efficiently.
9. Final Cut Pro
One of the top Sony Vegas alternatives Mac users can safely turn to is Final Cut Pro, which has powerful modern video editing features. With this software, you will access Cinematic Mode, which you can use to create stylish and thematic video scenes.
Similarly, the Object Tracker features utilize ML technology to automatically detect objects and faces in moving videos. It can align effects and titles accurately with the graphical elements in videos.

Main Features:
- Object Tracker feature for using color correction and adding texts into moving videos.
- Accelerated functional for motion tracking with Apple Neural Engine.
- Add high-quality effects and titles into videos with Cinematic Mode support.
- Preset audio tracks and royalty-free sound effects are available for editing.
Pros
- Handle color grading for optimized scene quality
- Adjust the field depth and focus depth in clips
- Share projects across iOS and macOS platforms
Cons
- Not valid for Windows users
- Relatively high cost to avail the paid version with all advanced features
OS Compatibility: Mac
TrustRadius Rating: 4.8 out of 5
Best For: Professional video editors, students, and filmmakers who want to create cinematic-quality video projects.
What users say:
Final Cut Pro is an efficient Mac-based video editing tool with easy sharing and editing capabilities, rich effects/transitions options, and fast rendering ability. Customers enjoy the intuitive non-linear editor, easy accessibility to social media platforms for file exporting, and live scrubbing, as noted in one review .
10. Cyberlink PowerDirector 365
Another Sony Vegas mac alternative for Windows you should give a try is PowerDirector 365 from Cyberlink. This software removes or compiles video clips and uses masking features like image/custom masks.
Preset special effects, blending modes, and sound effects are available here for quick editing. Additionally, the AI-powered Motion Tracking traces objects in clips and adds graphics, animations, and text quickly in line with it.

Main Features:
- You can create and remove videos with masking features.
- Drag and drop the pre-set effects and texts into videos.
- Adjust video clips with tools for border, gradation, and shadowing.
- Multiple animations, callouts, graphics, and stickers to add to videos.
Pros
- Use green screen functionality for quick background removal or editing
- Automatic audio mastering and mixing functionality are available
- Keyframing benefits for customized animations like scaling and positioning
Cons
- Dolby Digital-centric audio codec is not available for users
- Users can try features like Room Echo Removal and NVIDIA A/V Denoise only on Windows 11
OS Compatibility: Windows
TechRadar Rating: 4.5 out of 5
Best For: Professional videographers and regular users who want a Windows-based video editing software for standard video clip editing.
What users say:
Cyberlink PowerDirector is a powerful video editor with standard editing functions many users have tried and benefited from. According to customers , the program has high-quality video and audio editing benefits for presentations, with additional effects/splitting/cropping features.
Part 3: What are the limitations when using Sony Vegas (Vegas Pro) on Mac?
Yes, with the given Sony Vegas alternatives, Mac and Windows users can benefit heavily. But why is it important to try for a replacement when Sony Vegas Pro is relatively efficient software?
To know the answer, you should take the time to understand its limitations, which do exist.
It only works for Windows users
The Sony Vegas Pro software is not available for Mac or other operating systems besides Windows. In addition, it’ll be really complex and time-consuming, even if you opt for virtual machine software or handle dual booting techniques to configure the software on your Mac or Linux.
You need to invest in other hardware
Sony Vegas Pro does do not work within one comprehensive platform like other capable video editing software types, like Wondershare Filmora . You have to acquire a powerful PC and tools to operate it separately. The software works very slowly on older devices.
Not incredibly unique
The functions of Sony Vegas Pro match somewhat with other options in the market. So, users would not expect much value in purchasing this software’s plans that they want to upgrade from their previous system, but on the other hand, the available features are mostly standard-level in functionality as well.
Hot FAQs about Vegas Pro Alternatives
After knowing these details, many users still have specific common queries about opting for a Sony Vegas Pro alternatively. So these are some common FAQs about this- answered.
1. Can Sony Vegas be used on a Mac?
No, it is impossible to directly use Sony Vegas on macOS devices since it does not support it. Instead, you have to separately use a dual boot strategy or virtual machine software to activate the video editor on Mac devices, but the process for that is complex.
2. Is Wondershare Filmora or Vegas Pro better?
Wondershare Filmora and Vegas Pro are top-level options in video and audio editing projects with professional-level editing accuracy. However, Filmora has a cohesive ecosystem with rich AI and standard functions and comes with Mac/Windows support. So, in that sense, Filmora is comparatively a better choice.
Final Words
In place of Sony Vegas Pro, any of these options would also give you a great user experience. Out of them, Filmora is one that we will recommend due to its multi-faceted benefits and features for Mac and Windows users. Ultimately, make your decision based on your particular needs.
Free Download For Win 7 or later(64-bit)
Free Download For macOS 10.14 or later
Part 1: Sony Vegas Pro Alternatives & Competitors Overview
Here is a list of the top 10 tools we found after research. For an easier understanding, the following are the essential points of difference between alternative video editing software types for Sony Vegas Pro in a tabular form.
| Software | Supported OS | Price | Editor’s Verdict |
|---|---|---|---|
| Lightworks | Windows, Mac, Linux | Create-$9.99/month, Pro-$23.99/month | Medium-Difficult |
| Wondershare Filmora | Windows, Mac | Annual-$49.99, Perpetual-$79.99 | Easy |
| Adobe Premiere Pro | Windows, Mac | $20.99/month | Easy-Medium |
| HitFilm Express | Windows, Mac | Free | Easy |
| Kdenlive | Windows, Mac, Linux | Free | Medium-Difficult |
| OpenShot | Windows, Mac, Linux, OsX | Free | Medium-Difficult |
| Blender | Windows, Mac, Linux | Free | Easy |
| Jahshaka | Windows, Linux, OsX | Free | Easy-Medium |
| Final Cut Pro | Mac | Lifetime-$299.99 | Easy-Medium |
| Cyberlink PowerDirector 365 | Windows, Mac | Lifetime-$52.50 | Easy-Medium |
Part 2: Top 10 Sony Vegas (Vegas Pro) Alternatives & Competitors
Now that you know the primary differences between the Sony Vegas Pro alternatives. Are you find anything you like? Let’s move on to more details for your further consideration.
1. Lightworks
With Lightworks, using the independent timeline codec, format, and resolution alteration in videos is extremely simple. In addition, you can use the multi-cam editing feature for real-time, high-quality editing work. Moreover, drag and drop elements into videos for optimized video editing work, including pre-existing Storyboard points.
Main Features:
- Industry-grade features like QC, transcoding, and automated transfer are available.
- Edit files at different FPS limits and use three-point editing for recording/source files.
- Insert files and overwrite on a new project, replace, backfill, and fit to fill your video clips.
- Attach Storyboard tiles and match-frame clips/sub-clips easily.
Pros
- Flexible functionality and speedy transfers
- Edit files with professional movie-like quality
- Auto Sync feature for automatic timeline re-syncing is available
Cons
- Direct X is only available on the Windows version
- TotalFX plugin is not available for free- you have to upgrade to use them
OS Compatibility: Windows , Mac , Linux
Best For: Editing experts creating visually animated and professional-looking short videos can work with Lightworks.
What users say:
For professional-level video editing work, Lightworks brings a lot of resources and elements to users. According to reviews , people who have tried it have experienced better video editing functionality with these resources.
2. Wondershare Filmora
The top Vegas Pro alternative that both Windows and Mac users can opt for is Filmora. The software has advanced AI-incorporated editing functions for automated editing work, including preset effects from FX plugins. Besides that, you can easily add pre-set transitions, audio clips, text, images, and more.
Beginners find it simple to navigate through its interface and can opt for the Instant Mode function for automatic video edits .
Free Download For Win 7 or later(64-bit)
Free Download For macOS 10.14 or later
For a better idea of how this works, you should check out this tutorial video: https://filmora.wondershare.com/get-creative/make-a-video-quickly.html
Main Features:
- Instant Mode is available for automatic video/audio project editing out of 6 shorter clips.
- Support Advanced editing tools like Chroma Key and AI Portrait.
- Record voiceover, apply speech-to-text/text-to-speech functions, and more audio editing features.
- OpenFX plugins like BorisFX and NewBlue FX for a better list of pre-set effects.
Pros
- Simple to use and navigate on the editor timeline, especially with drag-and-drop support
- Output your editing files in different video/audio formats
- Quickly share the file on Vimeo or YouTube, besides downloading it on the local hard drive
Cons
- Free trial users cannot bring their Instant Mode-created videos into the editor timeline
- 4K support only with selected MKV, MOV, M4V (for Mac), and MP4 codecs
OS Compatibility: Windows , Mac
G2 Rating: 4.4 out of 5
Best For: All types of users like educators, students, homeowners, businesses, and video editors for comprehensive video editing tools and uses.
What users say:
Filmora is extremely simple to use, with advanced features available for top-level video editing work. Users mention in reviews how they have benefitted from the simple functionality and dynamic AI-based features available here for video editing.
3. Adobe Premiere Pro
If you are looking for high-quality programs like Sony Vegas, Adobe Premiere Pro is a reliable choice. This editing software allows you to easily create, delete, and move big video projects. Moreover, you can work on multiple files simultaneously and use shortcuts for faster editing work.
Preset filters and editing features are also available here, especially if they choose the Adobe Creative Cloud option.
Main Features:
- Multiple pre-set transitions and effects are available for quick thematic changes.
- Add graphics, titles, and captions.
- Color grading and correction tools are available.
- It is possible to add keyframing and animation elements.
Pros
- Opting for group plans for video editing practice and learning using Adobe Premiere Pro is possible
- Aligns audio with videos instantly during editing
- Utilize Quick Export functionality for video files in some taps
Cons
- Windows High Contrast Mode is supported but to a limited extent, like with menus and title bars
- HDR workflows can only be handled on the Windows version with DisplayHDR 400 support
OS Compatibility: Windows , Mac
G2 Rating: 4.5 out of 5
Best For: Professional editors and trainers can use the various plans under Adobe Premiere Pro for video/audio editing.
What users say:
Advertisers and videographers enjoy high-grade video editing features and like the simple effects and interface quality. The motion graphics support in Adobe Premiere Pro is high-grade as well.
4. HitFilm Express
A capable Sony Vegas free alternative that you should check out is HitFilm Express. With this, you can expect many prepared designs for quick video edits. Additionally, you can manually customize the video files you are working on with high-grade personalization features available in the timeline.
Main Features:
- Pre-set customizable designs are available.
- Built-in sound effects and soundtracks are usable for free.
- Cache renders in timelines are optimized.
- The New Grade Clips feature allows users to apply varying effects to many video clips.
Pros
- Stable process of switching between timelines with an active orbit tool
- Easy to switch between 2D/3D timelines while using the text tool
- Simple to use for an unlimited period
Cons
- Does not work on older versions than Windows 10 and macOS 10.14
- Users cannot integrate this with Vegas Pro like before
OS Compatibility: Windows , Mac
TechRadar Rating: 4.5 out of 5
Best For: This software is a high-quality video editor for custom video editing work, fit for beginners and professionals alike.
What users say:
HitFilm Express is easy to use and efficient in the market for professional-level editing. The tutorial is available here for quick learning about the steps, and expandable features are well-admired by users.
5. Kdenlive
A high-quality Sony Vegas open-source variety that you should seriously consider is Kdenlive. The video editor comes with MLT framework support and holds many tools for optimizing video editing.
To simplify, you can arrange and adjust various video/audio tracks and mute or lock specific ones as needed. Add everything from filters, texts, and transitions using this editor for high-grade video projects.
Main Features:
- Get an automatic backup of your video project while you are editing it.
- Use proxy editing to create low-resolution source clip copies and render them later on computers.
- Multiple video/audio scopes are available for monitoring projects like vectorscope, waveform, and RDB Parade.
- Many transition and effect choices to use.
Pros
- Flexibility with themes to add with multiple options
- Pre-render specific timeline parts for preview
- Effects are simple to use with keyframing quality
Cons
- Complex for completely non-technical users to adapt to
- Only supports 64-bit versions in regards to Windows-based compatibility
Trustpilot Rating: 3.7 out of 5
Best For: High-level editing experts who need strong video editing and monitoring features in an open-source platform.
What users say:
Kdenlive, as an open-source video editing software, assures quick and straightforward usability with projects. Per reviews , users like the ability to make simple video edits without bugs in this editor and quickly export finished projects.
6. OpenShot
OpenShot is a high-quality cross-platform video editor that you can use on different devices for quick but dynamic video project edits. Use keyframing ability here to adjust the animated elements you add to the file.
Moreover, cut the videos with simple steps and add many audio tracks/background videos/watermarks in layers. Also, get several video effects to optimize the video look easily.
Main Features:
- Adjust video speed in reverse motion, fast forward, and slow motion.
- Render effects and 3D animated elements into the video project.
- Get title templates and edit them as needed.
- Visualize the background audio beats with waveform support.
Pros
- Very user-friendly interface with a simple navigation guarantee
- Supports more than 70 languages that you can translate as well using LaunchPad
- Drag-and-drop functionality is supported for adding images, audio, and videos into the OpenShot editor timeline
Cons
- Some bug issues can occur
- Slightly complex learning curve
OS Compatibility: Windows , Linux , OsX
G2 Rating: 4.4 out of 5
Best For: Professional-level video editing experts can opt for this cross-platform free software for high-quality video creations.
What users say:
The OpenShot software is suitable for high-quality video editing across different devices and operating systems. Users like the lack of automated watermarks on all videos, its simple dashboard, and its multi-track editing ability, all available for free.
7. Blender
Blender is free video editing software like Sony Vegas that users can use for video editing, but it is also effective for game development with animations. Indeed, you can create and render dynamic-looking scenes with features like Cycles.
Furthermore, the software has a rich modelling toolset with solutions like curves and sculpting tools.
Main Features:
- Completely customization-friendly UI, shortcuts, and window layout here.
- Customization and scripting are possible to do with this software due to the Python API support.
- Supports access and integration of many pipeline tools for projects.
- Comes with advanced simulation-based features available in MantaFlow and Bullet libraries.
Pros
- Basic and advanced tools for quick video edits
- Strong composition and masking ability with object-based motion tracking benefits
- Easily create short animations with Blender
Cons
- Data under the standalone games created here fall under GPL conditions
- Strict licensing rules are applicable here
OS Compatibility: Windows , Mac , Linux
G2 Rating: 4.5 out of 5
Best For: Game developers and videographers for companies can use this open-source platform for creation and editing.
What users say:
Blender is a capable software for animation-based editing, with high-quality game-based features and interactive elements that make editing simple. As per reviews , users like the simple animation-based tools and fast rendering it offers.
8. Jahshaka
Users of Jahshaka can experience an inclusive, collaborative environment for metaverse-level editing work. This free editing software, like Sony Vegas, focuses mainly on VR-based editing functions and comes with powerful tools for project management and content creation.
Take the help of other team members to collaborate on dynamic virtual world building, editing, and publishing.
Main Features:
- Compatible player for different desktop and mobile devices.
- Create diversified worlds and scenes with one comprehensive platform.
- Immersive software 3D video development.
- Access to pre-built content and libraries of scenes and assets
Pros
- Easily share and distribute your virtual projects
- Deliver final projects offline and online
- An interactive multi-user engine is available
Cons
- Usable for a niche audience and does not include standard video editing tools
- Jahshaka V2 legacy support is no longer active
OS Compatibility: Windows , Linux , OsX
SourceForge Rating: 4.4 out of 5
Best For: Professional video editors who want a collaborative experience in VR-based development and publishing.
What users say:
Jahshaka is a suitable program for optimized VR-based editing with many preset features and themes to choose from. Most users enjoy the new features and worlds and can work with them efficiently.
9. Final Cut Pro
One of the top Sony Vegas alternatives Mac users can safely turn to is Final Cut Pro, which has powerful modern video editing features. With this software, you will access Cinematic Mode, which you can use to create stylish and thematic video scenes.
Similarly, the Object Tracker features utilize ML technology to automatically detect objects and faces in moving videos. It can align effects and titles accurately with the graphical elements in videos.
Main Features:
- Object Tracker feature for using color correction and adding texts into moving videos.
- Accelerated functional for motion tracking with Apple Neural Engine.
- Add high-quality effects and titles into videos with Cinematic Mode support.
- Preset audio tracks and royalty-free sound effects are available for editing.
Pros
- Handle color grading for optimized scene quality
- Adjust the field depth and focus depth in clips
- Share projects across iOS and macOS platforms
Cons
- Not valid for Windows users
- Relatively high cost to avail the paid version with all advanced features
OS Compatibility: Mac
TrustRadius Rating: 4.8 out of 5
Best For: Professional video editors, students, and filmmakers who want to create cinematic-quality video projects.
What users say:
Final Cut Pro is an efficient Mac-based video editing tool with easy sharing and editing capabilities, rich effects/transitions options, and fast rendering ability. Customers enjoy the intuitive non-linear editor, easy accessibility to social media platforms for file exporting, and live scrubbing, as noted in one review .
10. Cyberlink PowerDirector 365
Another Sony Vegas mac alternative for Windows you should give a try is PowerDirector 365 from Cyberlink. This software removes or compiles video clips and uses masking features like image/custom masks.
Preset special effects, blending modes, and sound effects are available here for quick editing. Additionally, the AI-powered Motion Tracking traces objects in clips and adds graphics, animations, and text quickly in line with it.
Main Features:
- You can create and remove videos with masking features.
- Drag and drop the pre-set effects and texts into videos.
- Adjust video clips with tools for border, gradation, and shadowing.
- Multiple animations, callouts, graphics, and stickers to add to videos.
Pros
- Use green screen functionality for quick background removal or editing
- Automatic audio mastering and mixing functionality are available
- Keyframing benefits for customized animations like scaling and positioning
Cons
- Dolby Digital-centric audio codec is not available for users
- Users can try features like Room Echo Removal and NVIDIA A/V Denoise only on Windows 11
OS Compatibility: Windows
TechRadar Rating: 4.5 out of 5
Best For: Professional videographers and regular users who want a Windows-based video editing software for standard video clip editing.
What users say:
Cyberlink PowerDirector is a powerful video editor with standard editing functions many users have tried and benefited from. According to customers , the program has high-quality video and audio editing benefits for presentations, with additional effects/splitting/cropping features.
Part 3: What are the limitations when using Sony Vegas (Vegas Pro) on Mac?
Yes, with the given Sony Vegas alternatives, Mac and Windows users can benefit heavily. But why is it important to try for a replacement when Sony Vegas Pro is relatively efficient software?
To know the answer, you should take the time to understand its limitations, which do exist.
It only works for Windows users
The Sony Vegas Pro software is not available for Mac or other operating systems besides Windows. In addition, it’ll be really complex and time-consuming, even if you opt for virtual machine software or handle dual booting techniques to configure the software on your Mac or Linux.
You need to invest in other hardware
Sony Vegas Pro does do not work within one comprehensive platform like other capable video editing software types, like Wondershare Filmora . You have to acquire a powerful PC and tools to operate it separately. The software works very slowly on older devices.
Not incredibly unique
The functions of Sony Vegas Pro match somewhat with other options in the market. So, users would not expect much value in purchasing this software’s plans that they want to upgrade from their previous system, but on the other hand, the available features are mostly standard-level in functionality as well.
Hot FAQs about Vegas Pro Alternatives
After knowing these details, many users still have specific common queries about opting for a Sony Vegas Pro alternatively. So these are some common FAQs about this- answered.
1. Can Sony Vegas be used on a Mac?
No, it is impossible to directly use Sony Vegas on macOS devices since it does not support it. Instead, you have to separately use a dual boot strategy or virtual machine software to activate the video editor on Mac devices, but the process for that is complex.
2. Is Wondershare Filmora or Vegas Pro better?
Wondershare Filmora and Vegas Pro are top-level options in video and audio editing projects with professional-level editing accuracy. However, Filmora has a cohesive ecosystem with rich AI and standard functions and comes with Mac/Windows support. So, in that sense, Filmora is comparatively a better choice.
Final Words
In place of Sony Vegas Pro, any of these options would also give you a great user experience. Out of them, Filmora is one that we will recommend due to its multi-faceted benefits and features for Mac and Windows users. Ultimately, make your decision based on your particular needs.
Free Download For Win 7 or later(64-bit)
Free Download For macOS 10.14 or later
Unboxing Splice: A Detailed Examination of the Video Editing App
Create High-Quality Video - Wondershare Filmora
An easy and powerful YouTube video editor
Numerous video and audio effects to choose from
Detailed tutorials provided by the official channel
Video creation is on the increase, especially with smartphones and easy-to-reach tablets. Simply take a video to share with your loved ones. However, it would make a great difference if you edited your video and added other lovely precepts for detailed expression. Unfortunately, most people find it challenging to create quality videos on their phones.
In most cases, they’ll need to move them to their desktops for polishing and advanced editing. That’s not the case anymore, especially, with the rise of mobile editing applications like the Splice app. It lets you easily create high-quality video content with just a few clicks.

In this article
02 What Can You Do with Splice?
03 Does Splice have a desktop version?
What Exactly Is Splice?
The Splice video editor is a mobile editing tool initially developed by the GoPro Company but recently landed at the doors of Bending Spoons Company. After its update in September 2020, this app gained thousands of customer ratings, close to five-star ratings. It is a mobile video editor compatible with Android and iPhone mobile devices. The numerous effects and tools make it possible for you to create eye-catching videos for use and export.
More so, Splice contains several features that are ready to turn your video into an imaginary piece of work. The user interface is quite intuitive, and you can easily navigate even if you are a beginner. Its library is quite extensive, with tons of royalty-free music. You are also not limited to adding any of your favorite sound effects. And when it comes to uploading your video, do it directly to media sites like Facebook, YouTube, and Twitter, among other sites. The only drawback is occasional crashing, especially if handling bulky videos.
Splice App Advantages
- It is simple to use and has an intuitive user interface.
- Splice has an extensive audio library to extract your music for background listening on videos.
- Directly upload your completed video to social media sites like YouTube and Instagram.
Splice App Disadvantages
- It may crash.
- It is also under copyright.
- Spice lacks a desktop version.
You May Be Interested in
- Best Mobile Video Editing Apps for iPhone And Android
- Best GoPro Editing Apps for iPhone and Android Phone
What Can You Do with Splice?
The Splice app is at your service to explore its features and make compelling videos. Check out some of the creative things you can do with Splice.
1) Add Music
Besides adding effects, borders, sound effects, and transitions to your video, you can spice it up with some background music. You can either pick a track from a streaming service or create some voiceovers. The Splice app also provides a wide array of music from its library.
Step 1. To access music, tap on the “Audio” tab in the editor.
Step 2. Then select one of the “+” symbols to add a category. Alternatively, import music from your “iTunes” library if you operate an iOS device.
Step 3. Choose which part of the video to add your music for background listening.

2) Edit videos
You can apply simple edits like merging, adjusting speed, and trimming, among other basic editing functions.
Step 1. First, tap a video on the project screen.
Step 2. The “Plus” and “Pencil” buttons will appear shortly. Then tap on the pencil to unleash several options.
Step 3. To trim your video, adjust the starting and ending points located at the slider that is beneath the video.

3) Add text
You can also include text in your video to explain a particular scenario.
Step 1. First, tap on the title icon at the bottom of the timeline.
Step 2. Delete the blank background to make the text a subtitle. If you don’t then Splice will treat all texts as titles.
Step 3. Lastly, double-tap the media screen and type the title of your video.

4) Add video or image overlays
You can increase your creativity level by adding image overlays.
Step 1. Ensure the video or image you wish to add to the overlay is in the timeline.
Step 2. Then press and hold on to the video or image you wish to add as an overlay.
Step 3. Drag the video or image to the “Drop here to turn it into an overlay” tab.
Step 4: Finally, trim your clip and make other necessary adjustments.
5) Apply advanced effects
It doesn’t have to be plain. Your video needs some elevating additions to it to make it stand out. With Splice, you can trim, cut, and even merge your videos. Likewise, you can add titles, adjust the speed, and even point out specific moments such as slowing down your clips. It also lets you add effects for more appealing looks.
Step 1. Click on the “Edit video” icon.
Step 2. Pick a tool depending on the effect you want to achieve, like a blur, mixing multiple audio tracks, etc.
Step 3. Click on the “Apply” tab to apply the effects to your clip.
6) Share your video on social media platforms
This feature is quite useful when it comes to showing your friends and potential customers what you are capable of composing. Here is how to share your videos on social media sites once you complete the editing process. Remember to save your project first.
Step 1: From your phone, locate the video you want to share.
Step 2. Then click on the “Share” button found at the top-right corner of the screen.
Step 3. Choose the site to upload your video. You’ll then be able to upload it directly to Facebook, Instagram, and Twitter, among many other platforms.

Does Splice have a desktop version?
Among the cons of the Splice editing app is that it lacks a desktop version. However, other editing apps can serve as a substitute for using them on your PC. The Filmora video editor is one of its kind with adequate effects and plugins. With an intuitive user interface, Filmora lets you quickly edit any video to a professional level. Use its massive resource packs to turn your video into an explicit outcome.
For Win 7 or later (64-bit)
For macOS 10.12 or later
Features of the Filmora video editor
Filmora unleashed some new features for advanced editing capabilities.
- Instant mode: Filmora 11 has encompassed an instant mode feature that’s also time-saving. With this, you can quickly edit your videos with just a few clicks.
- Speed ramping: This feature lets you quickly edit speed ramping effects on your video. Instantly increase, reduce, or go slow-motion, among other options.
- Masking: This has been improved to let you animate the mask and customize it as per your desire.
- Automontage maker: With this feature, you can now automatically create video montages with just a few clicks.
- Creative Center: You now don’t need to go round to get your tools. The Creative Center is the tool page where you can instantly get your favorite too.
- Stock Media: The improved Filmora 11 comes with an inbuilt stock media feature where you can download and use up to 100% free copyright stock footage. These include Pixabay and Giphy, among others.
Conclusion
● The Splice video editor works earnestly on your mobile phone to edit and create compelling videos. The fact that it doesn’t support a desktop version is a major drawback.
● However, the Filmora video editor comes in handy for editing videos on both Windows and Mac OS computers. Nonetheless, the latest Filmora 11 version has added advanced features that improve its instant video editing ability.
Video creation is on the increase, especially with smartphones and easy-to-reach tablets. Simply take a video to share with your loved ones. However, it would make a great difference if you edited your video and added other lovely precepts for detailed expression. Unfortunately, most people find it challenging to create quality videos on their phones.
In most cases, they’ll need to move them to their desktops for polishing and advanced editing. That’s not the case anymore, especially, with the rise of mobile editing applications like the Splice app. It lets you easily create high-quality video content with just a few clicks.
In this article
02 What Can You Do with Splice?
03 Does Splice have a desktop version?
What Exactly Is Splice?
The Splice video editor is a mobile editing tool initially developed by the GoPro Company but recently landed at the doors of Bending Spoons Company. After its update in September 2020, this app gained thousands of customer ratings, close to five-star ratings. It is a mobile video editor compatible with Android and iPhone mobile devices. The numerous effects and tools make it possible for you to create eye-catching videos for use and export.
More so, Splice contains several features that are ready to turn your video into an imaginary piece of work. The user interface is quite intuitive, and you can easily navigate even if you are a beginner. Its library is quite extensive, with tons of royalty-free music. You are also not limited to adding any of your favorite sound effects. And when it comes to uploading your video, do it directly to media sites like Facebook, YouTube, and Twitter, among other sites. The only drawback is occasional crashing, especially if handling bulky videos.
Splice App Advantages
- It is simple to use and has an intuitive user interface.
- Splice has an extensive audio library to extract your music for background listening on videos.
- Directly upload your completed video to social media sites like YouTube and Instagram.
Splice App Disadvantages
- It may crash.
- It is also under copyright.
- Spice lacks a desktop version.
You May Be Interested in
- Best Mobile Video Editing Apps for iPhone And Android
- Best GoPro Editing Apps for iPhone and Android Phone
What Can You Do with Splice?
The Splice app is at your service to explore its features and make compelling videos. Check out some of the creative things you can do with Splice.
1) Add Music
Besides adding effects, borders, sound effects, and transitions to your video, you can spice it up with some background music. You can either pick a track from a streaming service or create some voiceovers. The Splice app also provides a wide array of music from its library.
Step 1. To access music, tap on the “Audio” tab in the editor.
Step 2. Then select one of the “+” symbols to add a category. Alternatively, import music from your “iTunes” library if you operate an iOS device.
Step 3. Choose which part of the video to add your music for background listening.
2) Edit videos
You can apply simple edits like merging, adjusting speed, and trimming, among other basic editing functions.
Step 1. First, tap a video on the project screen.
Step 2. The “Plus” and “Pencil” buttons will appear shortly. Then tap on the pencil to unleash several options.
Step 3. To trim your video, adjust the starting and ending points located at the slider that is beneath the video.
3) Add text
You can also include text in your video to explain a particular scenario.
Step 1. First, tap on the title icon at the bottom of the timeline.
Step 2. Delete the blank background to make the text a subtitle. If you don’t then Splice will treat all texts as titles.
Step 3. Lastly, double-tap the media screen and type the title of your video.
4) Add video or image overlays
You can increase your creativity level by adding image overlays.
Step 1. Ensure the video or image you wish to add to the overlay is in the timeline.
Step 2. Then press and hold on to the video or image you wish to add as an overlay.
Step 3. Drag the video or image to the “Drop here to turn it into an overlay” tab.
Step 4: Finally, trim your clip and make other necessary adjustments.
5) Apply advanced effects
It doesn’t have to be plain. Your video needs some elevating additions to it to make it stand out. With Splice, you can trim, cut, and even merge your videos. Likewise, you can add titles, adjust the speed, and even point out specific moments such as slowing down your clips. It also lets you add effects for more appealing looks.
Step 1. Click on the “Edit video” icon.
Step 2. Pick a tool depending on the effect you want to achieve, like a blur, mixing multiple audio tracks, etc.
Step 3. Click on the “Apply” tab to apply the effects to your clip.
6) Share your video on social media platforms
This feature is quite useful when it comes to showing your friends and potential customers what you are capable of composing. Here is how to share your videos on social media sites once you complete the editing process. Remember to save your project first.
Step 1: From your phone, locate the video you want to share.
Step 2. Then click on the “Share” button found at the top-right corner of the screen.
Step 3. Choose the site to upload your video. You’ll then be able to upload it directly to Facebook, Instagram, and Twitter, among many other platforms.
Does Splice have a desktop version?
Among the cons of the Splice editing app is that it lacks a desktop version. However, other editing apps can serve as a substitute for using them on your PC. The Filmora video editor is one of its kind with adequate effects and plugins. With an intuitive user interface, Filmora lets you quickly edit any video to a professional level. Use its massive resource packs to turn your video into an explicit outcome.
For Win 7 or later (64-bit)
For macOS 10.12 or later
Features of the Filmora video editor
Filmora unleashed some new features for advanced editing capabilities.
- Instant mode: Filmora 11 has encompassed an instant mode feature that’s also time-saving. With this, you can quickly edit your videos with just a few clicks.
- Speed ramping: This feature lets you quickly edit speed ramping effects on your video. Instantly increase, reduce, or go slow-motion, among other options.
- Masking: This has been improved to let you animate the mask and customize it as per your desire.
- Automontage maker: With this feature, you can now automatically create video montages with just a few clicks.
- Creative Center: You now don’t need to go round to get your tools. The Creative Center is the tool page where you can instantly get your favorite too.
- Stock Media: The improved Filmora 11 comes with an inbuilt stock media feature where you can download and use up to 100% free copyright stock footage. These include Pixabay and Giphy, among others.
Conclusion
● The Splice video editor works earnestly on your mobile phone to edit and create compelling videos. The fact that it doesn’t support a desktop version is a major drawback.
● However, the Filmora video editor comes in handy for editing videos on both Windows and Mac OS computers. Nonetheless, the latest Filmora 11 version has added advanced features that improve its instant video editing ability.
Free Green Screen Apps You Need to Try on Your Android or iOS Device
FREE Top 10 Green Screen APPs for Android/iOS

Liza Brown
Mar 27, 2024• Proven solutions


The background effects you use are largely likely to determine the quality of your videos and photos. Most of the award-winning videos use green screen apps to edit their still images as well as short video clips. Have you ever asked yourself; Are the movies and photos featuring Golden Gate or The White House as their backgrounds shot at those exact scenes?
It’s surprising to see how the internet is flooded with poorly edited videos, movies, and photos despite the huge number of free green screen apps.
In order to learn how to use green screen effectively in all movie and photo scenarios, this article is subdivided into the following parts:
- Part 1: What Is a Green Screen App and Its Uses?
- Part 2: How to Use Filmora9 to Edit Green Screen [Recommended Tool]
- Part 3: 10 Best Free/Paid Green Screen Apps For Androids/iOS
Part 1: What Is a Green Screen App and Its Uses?
The green screen app is an application that’s used by filmmakers, videographers, and photographers to create unique backgrounds. Many great apps work perfectly well with Windows, Mac, Androids, and iOS. Whereas a few can be used online, the majority are can only be used upon download. The green screen is also known as the Chroma key.
So, what are the uses of green screen apps? To replace the background of your videos and photos, you require a green screen app. Other uses include:
- During weather forecasts, television producers use green screen apps to shade regions of interest.
- In case of extensive use of single color in videos, you can use these apps to cut the color pixels from the video.
- Green screen apps feature many editing effects that can be used to enhance the quality of videos.
Part 2: How to Use Filmora to Edit Green Screen [Recommended Tool]
If you want to get the best green-screen effect, Filmora is the tool to use. The green screen editor involves the superimposing of different virtual backgrounds during the video-making process. The combination of Filmora’s green screen feature and the thousands of HD royalty-free video backgrounds in Filmstock makes it the perfect video editor for you. Learn more from Wondershare Video Community .
Besides the green screen feature, Filmora offers many useful features like Instant Mode, Speed Ramping, Auto Beat Maker, and more to help you edit the video you want.
How to Edit Green Screen Using Filmora?
Editing the green screen with Filmora is easy. In this article, we offer two types of tutorials here. You can check the video or follow the step-by-step guide to create your own green screen video.
Step 1: Launch Filmora.
In order to launch this software, start by clicking any of the buttons below to download and install to your Mac or desktop. It’s compatible with Windows7/8/10.
Once you’ve successfully installed it, double-click the icon to open it.
Step 2: Import your green screen video footage and background to the timeline.
There are plenty of websites with wonderful green screen videos for you to download. To select a video background, go to Filmstock on the Wondershare website and download.
For your green screen video to appear on top, drag it onto track 2 and the background footage to track 1.
Step 3: Start editing.
The Chroma Key editing features are hidden in this part. To open the editing effects, double-click on the green screen video.
On the pop-up menu, just click the Chroma key option.

Use the editing panel to set the appearance that best fascinates your audience.
Step 4: Save your video.
Click Export to save your created green screen. If you don’t have an account, create one for you to be able to access the Find Target. Tap the Find Target to choose where to save the video.
Try Filmora for Smartphone
![]()
![]()
Try Filmora for iPad
![]()
Part 3: 10 Best Free/Paid Green Screen Apps For Androids/iOS
After days of downloading and testing both the free/paid green screen apps for Windows, Mac, and smartphones, here is a complete comparison chart of the findings.
Watch Video! Top Free Green Screen App in 2022
Here is now the detailed elaboration of the green screen apps features, pros, and cons above:
1. Chromavid – Easiest for shooting and sharing photos and videos using Chroma Key

Compatibility: Androids 5.0+, iPhone, iPod touch, iPad (iOS 12 or later)
Price: $2.99
This app works pretty well with both photos and videos.
If you’ve been looking for the best green screen app for iPad this is the right app for you. Despite the low pricing, Chromavid has top-notch Chroma Key effects like more Chroma colors, unlimited recording time, and image merge functions. It’s the social sharing button and the option to shoot videos on the Chroma key that makes Chromavid stand out.
To access the advanced Chromavid commercial use, you need to subscribe to the specific commercial version indicated on the License page.
Pros:
- Chromavid green screen app is simple and easy to use.
- Also, the Chromavid plus plan produces watermark-free videos and photos.
- You can save edited videos directly into your device.
Cons:
- Only real-time photos and videos can be edited using this app.
- Too much personal detail is required to open an account.
2. Kinemaster – Best app for smartphones and a powerful tool for video editing

Compatibility: Androids 5.0+, Chrome OS, iPhone, iPod , iPad
Price: Free
Kinemaster’s Chroma Key function can be used to overlay texts, photos, and videos.
Any person searching for the top free green screen app should consider Kinemaster. The supported multilayer effect allows users to lay video clips, images, texts, and many more at once. The alpha mask feature found in this app can hardly be found in other apps. To eliminate the watermark and get unlimited export of 4K resolution backgrounds, just subscribe to the Kinemaster premium plan.
Pros:
- Good for sharing to social media platforms like Instagram, Youtube, TikTok, and Facebook.
- 100s of weekly updated stickers, video backgrounds, video clips, transitions, and music clips.
- Can create multiple layer videos.
- Availability of EQ presets, speed controls, and preview features.
Cons:
- The current versions are malfunctioning
- Not compatible with PCs and mac
3. Green Screen by Do Ink – This is probably the best green screen app for iPad users

Compatible: iOS 9.0 or later and iPad
Price: $4.99
It’s best for both photos and videos.
Green Screen by Do Ink prides itself on simplicity and is highly suitable for beginners, experts, and even doodlers. When using the green screen editor, you’ll find the interface to be more friendly and easy to understand. It has only four simple elements that include:
- Source selector -Where to export images and videos.
- Preview window -For reviewing completed projects.
- Timeline – For arranging exported images and videos.
- Toolbar – This is where you’ll find all the Chroma Key tools and buttons.
Pros:
- Supports any videos aspect ratio.
- Plenty of drawing tools.
- Ability to import images and videos from the camera.
Cons:
- The pricing is a bit high compared to other apps.
- Only limited to iPhone and iPad.
4. Veescope Live Green Screen App – Highly suitable for editing real-time videos and creating QuickTime videos

Compatible: iOS devices
Price: Free
The green Screen feature/ Chroma Key allows editing of real-time images from the camera, photos, and videos.
Any journalist specializing in weather forecasts should use Veescope Live to bring live forecasts and change backgrounds to fit any location. For high-quality videos, use the Remote feature to switch backgrounds as you desire. With the camera, shoot or record Ultra HD and 4K resolution photos and videos.
Pros:
- Easy to use the adjustable white balance and light exposure.
- Ability to overlay up to 20 different backgrounds.
- The new Pinch Zooming feature helps preview every detail of the project.
- Best for any background green screen color.
Cons:
- The free plan has a permanent watermark.
- Cannot undo or redo on the timeline.
5. Stop Motion Studio - This is the most versatile green screen app

Compatibility: Mac, iOS, Android, and Windows
Price: For iOS-$4.99, Windows- $1.99, Mac- $9.99 and Android - $4.99
Suitable for both photos and videos.
Finding a green screen app for Windows and Mac with stunning features that are easy to use has been the most daunting task. With Stop Motion Studio, you can export edited videos directly to YouTube, work on a single project from mobile, export it to a computer, and create 4K Ultra HD videos. When using the Chroma Key/ green screen feature, you can automatically change the background by importing from any source.
Pros:
- Can enhance videos quality by using different backgrounds, foregrounds, and transitions.
- The built-in music helps improve the sound quality of the created green screen.
- Can be used by beginners and is also suitable for all family use.
- The Rotoscoping feature helps create unique videos.
Cons:
- No free plan
6. Chroma key Studio Pro – Highly recommended for TV productions and cinematic movies

Compatibility: iOS 7.0 or later (iPhone, iPad, iPod touch)
Price: $4.99
Used for creating a green screen for both photos and videos.
Chroma Key Studio Pro is probably the easiest green screen app for iPhone to understand and the simplest to use due to its limited number of features. The Intelligent auto-enhance filter, color keying, and the selfie mode camera feature make this app good for creating quick green screen images. Other top features are a huge gallery of photos and videos, 100s of effects and filters, and high-quality backgrounds.
Pros:
- Faster video editing.
- Easy color separation.
Cons:
- Limited to only iOS devices.
7. PocketVideo – Preferred for Video Blogging

Compatibility: iOS 12.0 or later and Android 4.4 or later, PC and Mac
Price: Free
PocketVideo can only be used to edit videos and photos.
After years of searching for apps that can create YouTube vlogs, video bloggers have something to smile about -PocketVideo green screen app. Even though the number of features is numerous, this green screen app for Mac and other devices is simple and highly suitable for videos making experts and beginners. The Animated Doodle Tool is the children’s go-to tool.
Pros:
- Can record and edit up to 10 minutes of Ultra HD video.
- Self-explanatory user interface.
- Huge collection of free stickers, PNGs, and GIFs.
Cons:
- No training tutorials.
8. Green Screen Wizard Pro Studio Editor - Best for professional photographers

Compatibility: Windows7,8,10, Mac, Android and iPhone
Price: Windows/Mac- $199.95, Android- $4.99
This app is more suitable for editing photos.
Even though Green Screen Studio is costly, professional photographers continue to applaud it for its extraordinary features. There are currently over 25,000 users. Using the color and brightness correction features for foregrounds and backgrounds, you can create stunning silhouettes and green screens.
Pros:
- Advanced Chroma Key features.
- In-depth tutorials for each version.
- Suitable for all children and professional experts.
Cons:
- Extremely expensive to PC and Mac users.
- No image resizing feature.
9. Green Screen Studio - This is the photographers’ photo green screen app
Compatibility: iOS 9.0 or later
Price: $4.99
Works pretty well with both photos and videos.
Besides the obvious effects and transitions, this app has Extra photo editing features, blemish, red-eye, and additional photo effects for editing photos. It also has an automatic green screen feature. To preview every detail of the edited video, use the Zoom feature.
Pros:
- Simple and easy to use.
- You can manually apply backgrounds in this app.
- Friendly interface.
Cons:
- Not compatible with PCs and Mac.
10. iMovie – Best for making Hollywood-style trailers

Compatibility: iOS 13 and MacOS
Price: Free
iMovie green screen app was developed to create a photo and video green screen.
iMovie is the most popular free green screen app. Using the AirDrop or iCloud Drive features, you can share your videos to any social media platform in a second. Its 10 Apple-designed photo and video filters are enough to make your edited videos win every award.
Pros:
- Has the best Apple-designed features.
- Free to all iOS users.
- Has Dark mode features and 8 unique themes.
Cons:
- Requires an expert to perfectly use this app.
- Only limited to iPhone and iPad.
Comparison Table of Top 10 Green Screen Software
| No. | Product Name | Compatibility | Pricing | Rating |
|---|---|---|---|---|
| 1. | Chromavid | Android 5.0+, iOS 12 or later, | $2.99 /year | 4.0 |
| 2. | Kinemaster | Androids 5.0+, Chrome OS, iPhone, iPad | Free | 4.4 |
| 3. | Green Screen by Do Ink | iOS 9.0 or later, iPad | $4.99 /year | 3.9 |
| 4. | Veescope Live | iOS 11.0 or later (iPod touch iPhone and iPad) | Free | 3.8 |
| 5. | Stop Motion Studio | Mac, iOS, Android, and Windows | iOS-$4.99, Windows- $1.99, Mac- $9.99, Android - $4.99 | 4.5 |
| 6. | A Chroma key Studio Pro | iOS 7.0 or later | $4.99 /year | 4.0 |
| 7. | PocketVideo | iOS 12.0 or later, Android 4.4 or later, Mac and Windows | Free | 3.2 |
| 8. | Green Screen Wizard Pro | Windows, Mac, Android, and iPhone | Windows/ Mac - $199.95, Android - $4.99 | 3.0 |
| 9. | Green Screen Studio | iOS 9.0 or later | $4.99 | 3.3 |
| 10. | iMovie | iOS 13 and MacOS | Free | 3.9 |
Conclusion
There are many green screen apps claiming to create award-winning Hollywood-like videos and the most admired photos. Caution: If you are not using any of the above-listed green screen apps, kindly read user reviews and research widely!
Using tried, tested and proven apps on your PCS, Mac, and smartphones is the only sure way of protecting your device. Which of the above apps have you used? Or, which one would you prefer? Share your comments or opinion on our social media platform.
Liza Brown
Liza Brown is a writer and a lover of all things video.
Follow @Liza Brown
Liza Brown
Mar 27, 2024• Proven solutions
The background effects you use are largely likely to determine the quality of your videos and photos. Most of the award-winning videos use green screen apps to edit their still images as well as short video clips. Have you ever asked yourself; Are the movies and photos featuring Golden Gate or The White House as their backgrounds shot at those exact scenes?
It’s surprising to see how the internet is flooded with poorly edited videos, movies, and photos despite the huge number of free green screen apps.
In order to learn how to use green screen effectively in all movie and photo scenarios, this article is subdivided into the following parts:
- Part 1: What Is a Green Screen App and Its Uses?
- Part 2: How to Use Filmora9 to Edit Green Screen [Recommended Tool]
- Part 3: 10 Best Free/Paid Green Screen Apps For Androids/iOS
Part 1: What Is a Green Screen App and Its Uses?
The green screen app is an application that’s used by filmmakers, videographers, and photographers to create unique backgrounds. Many great apps work perfectly well with Windows, Mac, Androids, and iOS. Whereas a few can be used online, the majority are can only be used upon download. The green screen is also known as the Chroma key.
So, what are the uses of green screen apps? To replace the background of your videos and photos, you require a green screen app. Other uses include:
- During weather forecasts, television producers use green screen apps to shade regions of interest.
- In case of extensive use of single color in videos, you can use these apps to cut the color pixels from the video.
- Green screen apps feature many editing effects that can be used to enhance the quality of videos.
Part 2: How to Use Filmora to Edit Green Screen [Recommended Tool]
If you want to get the best green-screen effect, Filmora is the tool to use. The green screen editor involves the superimposing of different virtual backgrounds during the video-making process. The combination of Filmora’s green screen feature and the thousands of HD royalty-free video backgrounds in Filmstock makes it the perfect video editor for you. Learn more from Wondershare Video Community .
Besides the green screen feature, Filmora offers many useful features like Instant Mode, Speed Ramping, Auto Beat Maker, and more to help you edit the video you want.
How to Edit Green Screen Using Filmora?
Editing the green screen with Filmora is easy. In this article, we offer two types of tutorials here. You can check the video or follow the step-by-step guide to create your own green screen video.
Step 1: Launch Filmora.
In order to launch this software, start by clicking any of the buttons below to download and install to your Mac or desktop. It’s compatible with Windows7/8/10.
Once you’ve successfully installed it, double-click the icon to open it.
Step 2: Import your green screen video footage and background to the timeline.
There are plenty of websites with wonderful green screen videos for you to download. To select a video background, go to Filmstock on the Wondershare website and download.
For your green screen video to appear on top, drag it onto track 2 and the background footage to track 1.
Step 3: Start editing.
The Chroma Key editing features are hidden in this part. To open the editing effects, double-click on the green screen video.
On the pop-up menu, just click the Chroma key option.
Use the editing panel to set the appearance that best fascinates your audience.
Step 4: Save your video.
Click Export to save your created green screen. If you don’t have an account, create one for you to be able to access the Find Target. Tap the Find Target to choose where to save the video.
Try Filmora for Smartphone
![]()
![]()
Try Filmora for iPad
![]()
Part 3: 10 Best Free/Paid Green Screen Apps For Androids/iOS
After days of downloading and testing both the free/paid green screen apps for Windows, Mac, and smartphones, here is a complete comparison chart of the findings.
Watch Video! Top Free Green Screen App in 2022
Here is now the detailed elaboration of the green screen apps features, pros, and cons above:
1. Chromavid – Easiest for shooting and sharing photos and videos using Chroma Key
Compatibility: Androids 5.0+, iPhone, iPod touch, iPad (iOS 12 or later)
Price: $2.99
This app works pretty well with both photos and videos.
If you’ve been looking for the best green screen app for iPad this is the right app for you. Despite the low pricing, Chromavid has top-notch Chroma Key effects like more Chroma colors, unlimited recording time, and image merge functions. It’s the social sharing button and the option to shoot videos on the Chroma key that makes Chromavid stand out.
To access the advanced Chromavid commercial use, you need to subscribe to the specific commercial version indicated on the License page.
Pros:
- Chromavid green screen app is simple and easy to use.
- Also, the Chromavid plus plan produces watermark-free videos and photos.
- You can save edited videos directly into your device.
Cons:
- Only real-time photos and videos can be edited using this app.
- Too much personal detail is required to open an account.
2. Kinemaster – Best app for smartphones and a powerful tool for video editing
Compatibility: Androids 5.0+, Chrome OS, iPhone, iPod , iPad
Price: Free
Kinemaster’s Chroma Key function can be used to overlay texts, photos, and videos.
Any person searching for the top free green screen app should consider Kinemaster. The supported multilayer effect allows users to lay video clips, images, texts, and many more at once. The alpha mask feature found in this app can hardly be found in other apps. To eliminate the watermark and get unlimited export of 4K resolution backgrounds, just subscribe to the Kinemaster premium plan.
Pros:
- Good for sharing to social media platforms like Instagram, Youtube, TikTok, and Facebook.
- 100s of weekly updated stickers, video backgrounds, video clips, transitions, and music clips.
- Can create multiple layer videos.
- Availability of EQ presets, speed controls, and preview features.
Cons:
- The current versions are malfunctioning
- Not compatible with PCs and mac
3. Green Screen by Do Ink – This is probably the best green screen app for iPad users
Compatible: iOS 9.0 or later and iPad
Price: $4.99
It’s best for both photos and videos.
Green Screen by Do Ink prides itself on simplicity and is highly suitable for beginners, experts, and even doodlers. When using the green screen editor, you’ll find the interface to be more friendly and easy to understand. It has only four simple elements that include:
- Source selector -Where to export images and videos.
- Preview window -For reviewing completed projects.
- Timeline – For arranging exported images and videos.
- Toolbar – This is where you’ll find all the Chroma Key tools and buttons.
Pros:
- Supports any videos aspect ratio.
- Plenty of drawing tools.
- Ability to import images and videos from the camera.
Cons:
- The pricing is a bit high compared to other apps.
- Only limited to iPhone and iPad.
4. Veescope Live Green Screen App – Highly suitable for editing real-time videos and creating QuickTime videos
Compatible: iOS devices
Price: Free
The green Screen feature/ Chroma Key allows editing of real-time images from the camera, photos, and videos.
Any journalist specializing in weather forecasts should use Veescope Live to bring live forecasts and change backgrounds to fit any location. For high-quality videos, use the Remote feature to switch backgrounds as you desire. With the camera, shoot or record Ultra HD and 4K resolution photos and videos.
Pros:
- Easy to use the adjustable white balance and light exposure.
- Ability to overlay up to 20 different backgrounds.
- The new Pinch Zooming feature helps preview every detail of the project.
- Best for any background green screen color.
Cons:
- The free plan has a permanent watermark.
- Cannot undo or redo on the timeline.
5. Stop Motion Studio - This is the most versatile green screen app
Compatibility: Mac, iOS, Android, and Windows
Price: For iOS-$4.99, Windows- $1.99, Mac- $9.99 and Android - $4.99
Suitable for both photos and videos.
Finding a green screen app for Windows and Mac with stunning features that are easy to use has been the most daunting task. With Stop Motion Studio, you can export edited videos directly to YouTube, work on a single project from mobile, export it to a computer, and create 4K Ultra HD videos. When using the Chroma Key/ green screen feature, you can automatically change the background by importing from any source.
Pros:
- Can enhance videos quality by using different backgrounds, foregrounds, and transitions.
- The built-in music helps improve the sound quality of the created green screen.
- Can be used by beginners and is also suitable for all family use.
- The Rotoscoping feature helps create unique videos.
Cons:
- No free plan
6. Chroma key Studio Pro – Highly recommended for TV productions and cinematic movies
Compatibility: iOS 7.0 or later (iPhone, iPad, iPod touch)
Price: $4.99
Used for creating a green screen for both photos and videos.
Chroma Key Studio Pro is probably the easiest green screen app for iPhone to understand and the simplest to use due to its limited number of features. The Intelligent auto-enhance filter, color keying, and the selfie mode camera feature make this app good for creating quick green screen images. Other top features are a huge gallery of photos and videos, 100s of effects and filters, and high-quality backgrounds.
Pros:
- Faster video editing.
- Easy color separation.
Cons:
- Limited to only iOS devices.
7. PocketVideo – Preferred for Video Blogging
Compatibility: iOS 12.0 or later and Android 4.4 or later, PC and Mac
Price: Free
PocketVideo can only be used to edit videos and photos.
After years of searching for apps that can create YouTube vlogs, video bloggers have something to smile about -PocketVideo green screen app. Even though the number of features is numerous, this green screen app for Mac and other devices is simple and highly suitable for videos making experts and beginners. The Animated Doodle Tool is the children’s go-to tool.
Pros:
- Can record and edit up to 10 minutes of Ultra HD video.
- Self-explanatory user interface.
- Huge collection of free stickers, PNGs, and GIFs.
Cons:
- No training tutorials.
8. Green Screen Wizard Pro Studio Editor - Best for professional photographers
Compatibility: Windows7,8,10, Mac, Android and iPhone
Price: Windows/Mac- $199.95, Android- $4.99
This app is more suitable for editing photos.
Even though Green Screen Studio is costly, professional photographers continue to applaud it for its extraordinary features. There are currently over 25,000 users. Using the color and brightness correction features for foregrounds and backgrounds, you can create stunning silhouettes and green screens.
Pros:
- Advanced Chroma Key features.
- In-depth tutorials for each version.
- Suitable for all children and professional experts.
Cons:
- Extremely expensive to PC and Mac users.
- No image resizing feature.
9. Green Screen Studio - This is the photographers’ photo green screen app
Compatibility: iOS 9.0 or later
Price: $4.99
Works pretty well with both photos and videos.
Besides the obvious effects and transitions, this app has Extra photo editing features, blemish, red-eye, and additional photo effects for editing photos. It also has an automatic green screen feature. To preview every detail of the edited video, use the Zoom feature.
Pros:
- Simple and easy to use.
- You can manually apply backgrounds in this app.
- Friendly interface.
Cons:
- Not compatible with PCs and Mac.
10. iMovie – Best for making Hollywood-style trailers
Compatibility: iOS 13 and MacOS
Price: Free
iMovie green screen app was developed to create a photo and video green screen.
iMovie is the most popular free green screen app. Using the AirDrop or iCloud Drive features, you can share your videos to any social media platform in a second. Its 10 Apple-designed photo and video filters are enough to make your edited videos win every award.
Pros:
- Has the best Apple-designed features.
- Free to all iOS users.
- Has Dark mode features and 8 unique themes.
Cons:
- Requires an expert to perfectly use this app.
- Only limited to iPhone and iPad.
Comparison Table of Top 10 Green Screen Software
| No. | Product Name | Compatibility | Pricing | Rating |
|---|---|---|---|---|
| 1. | Chromavid | Android 5.0+, iOS 12 or later, | $2.99 /year | 4.0 |
| 2. | Kinemaster | Androids 5.0+, Chrome OS, iPhone, iPad | Free | 4.4 |
| 3. | Green Screen by Do Ink | iOS 9.0 or later, iPad | $4.99 /year | 3.9 |
| 4. | Veescope Live | iOS 11.0 or later (iPod touch iPhone and iPad) | Free | 3.8 |
| 5. | Stop Motion Studio | Mac, iOS, Android, and Windows | iOS-$4.99, Windows- $1.99, Mac- $9.99, Android - $4.99 | 4.5 |
| 6. | A Chroma key Studio Pro | iOS 7.0 or later | $4.99 /year | 4.0 |
| 7. | PocketVideo | iOS 12.0 or later, Android 4.4 or later, Mac and Windows | Free | 3.2 |
| 8. | Green Screen Wizard Pro | Windows, Mac, Android, and iPhone | Windows/ Mac - $199.95, Android - $4.99 | 3.0 |
| 9. | Green Screen Studio | iOS 9.0 or later | $4.99 | 3.3 |
| 10. | iMovie | iOS 13 and MacOS | Free | 3.9 |
Conclusion
There are many green screen apps claiming to create award-winning Hollywood-like videos and the most admired photos. Caution: If you are not using any of the above-listed green screen apps, kindly read user reviews and research widely!
Using tried, tested and proven apps on your PCS, Mac, and smartphones is the only sure way of protecting your device. Which of the above apps have you used? Or, which one would you prefer? Share your comments or opinion on our social media platform.
Liza Brown
Liza Brown is a writer and a lover of all things video.
Follow @Liza Brown
Also read:
- Video Editing on a Budget Free Software for 32-Bit Windows for 2024
- Updated In 2024, The Art of Time Manipulation in Final Cut Pro X
- New 2024 Approved 3 Ways To Add Transitions In Final Cut Pro
- Updated In 2024, Best Free Online Video Editors for Movie Creation
- New In 2024, Create Stunning Intros 10 Website Recommendations
- 2024 Approved The Future of Video Editing Fast, Reliable, and 64-Bit Compatible
- Updated 2024 Approved Video to Cartoon Conversion Made Easy A Beginners Guide
- New Virtualdub A Review of Its Capabilities and Limitations, Plus Top Alternative Video Editors for 2024
- New 2024 Approved Aspect Ratio Conversion in Final Cut Pro Tips and Tricks
- Updated In 2024, Effortless Video Editing Top Picks for You
- New Sleek and Powerful The Best Lightweight Video Editing Tools for 2024
- New 2024 Approved Slideshow Mastery A Step-by-Step Guide to Using Final Cut Pro
- Rotate Videos Online for Free Top Website Picks for 2024
- New 2024 Approved Free Online Subtitle Solutions Top 10 Picks
- New Windows 10 Photos Not Your Cup of Tea? Try These 8 Alternatives for 2024
- Updated 2024 Approved Free Filmora Alternative Similar Features at Zero Cost
- Updated Unleash Your Creativity The Best Animation Software for Mac and PC
- New S Hottest Video Editing Apps for iPhone Enthusiasts
- New VideoForge Mac Edition for 2024
- New 2024 Approved The Best Free MPEG Video Splitters A Comprehensive Guide
- In 2024, No More Shaky Cam Free Video Stabilization Software for Windows and macOS
- Updated In 2024, Unlocking Facebook Video Success The Aspect Ratio Essentials
- Updated Take Your Videos to the Next Level OS X Mavericks Editing Tips for 2024
- In 2024, The Ultimate Guide to Finding a Fast and Reliable YouTube Converter
- Revamp Your Videos Top Brightening and Enhancement Apps for Mobile for 2024
- Updated Top Mobile Apps for Converting Videos to Audio Files (2023 Update) for 2024
- Updated In 2024, Apple Video Editing Essentials Top Software Choices
- Updated Stop Motion Made Easy Cloud Software, Guidelines, and Inspiring Examples
- In 2024, How To Use Special Features - Virtual Location On Realme C33 2023? | Dr.fone
- In 2024, The Magnificent Art of Pokemon Go Streaming On Vivo S17? | Dr.fone
- Remove the Lock Screen Fingerprint Of Your Vivo Y78t
- CatchEmAll Celebrate National Pokémon Day with Virtual Location On Vivo V29e | Dr.fone
- In 2024, How to Use Life360 on Windows PC For Samsung Galaxy Z Fold 5? | Dr.fone
- 3 Solutions to Find Your OnePlus Nord CE 3 Lite 5G Current Location of a Mobile Number | Dr.fone
- In 2024, How To Activate and Use Life360 Ghost Mode On Sony Xperia 10 V | Dr.fone
- In 2024, How to Transfer Contacts from Infinix Note 30 Pro to Other Android Devices Devices? | Dr.fone
- How to Upgrade Apple iPhone 15 Pro Max to the Latest iOS Version? | Dr.fone
- In 2024, Best Vivo Y100 5G Pattern Lock Removal Tools Remove Android Pattern Lock Without Losing Data
- How to Vlog? A Ultimate Guide for Beginners
- In 2024, Hacks to do pokemon go trainer battles For Nokia C02 | Dr.fone
- Title: Updated YouTube Thumbnail Secrets Boost Views with the Right Size, Design, and Strategy
- Author: Ava
- Created at : 2024-05-19 14:42:06
- Updated at : 2024-05-20 14:42:06
- Link: https://video-content-creator.techidaily.com/updated-youtube-thumbnail-secrets-boost-views-with-the-right-size-design-and-strategy/
- License: This work is licensed under CC BY-NC-SA 4.0.
