
:max_bytes(150000):strip_icc():format(webp)/how-to-see-who-shared-your-tiktok-5271091-8fc5445938ed433d830a2b5275079c62.jpg)
Updated In 2024, Free Gaming Paradise Top 10 Download Sites for PC and Android
Free Gaming Paradise: Top 10 Download Sites for PC and Android
Top 10 Best Free Game Download Sites [PC & Android][2024]

Ollie Mattison
Mar 27, 2024• Proven solutions


We all know and firmly believe that games are an integral part of our life. But the world has progressed, and we yearn to achieve real-life experiences through virtual reality instead of experiencing the actual thing. Online games are not only mentally stimulating, but they are also very addictive. Not everyone wants to pay to play games for a couple of hours, so here is a list of top free game downloading sites. You can download full versions of your favorite games for free.
Recommended Video Recorder & Editor for Gameplay: Filmora
If you want to edit a video recorded from games with more effects and templates, we recommend using Filmora . It is an easy-to-use video editor. It offers various title templates. You can also use it to record game videos. Just download it to have a try. Don’t know how to make a video? Visit the Wondershare Video Community and get some inspiration in video creation.
Part 1: Best Free PC Game Download Sites
1 Acid Play
Platforms: OS X and Windows

Key Features:
- Huge gaming library
The acid play has a gigantic collection of games of various types. The games at acid play have been categorized into action, arcade, board games, RPG, card games, puzzles, driving games, simulation, etc.
- Custom Search
The customized search helps you find the exact game you are looking for. It saves time since you cannot browse through thousands of games.
- Ratings
If you are new to this site or looking for a new game to play, you can choose only without trying every game to decide the best one. Just check the ratings provided by other players, and it will solve your problem. You can also rate a game according to your liking.
Pros:
- The games are easily downloadable and free.
- There is a large variety of games available to play.
Cons:
- The site is not updated, and no new games are introduced.
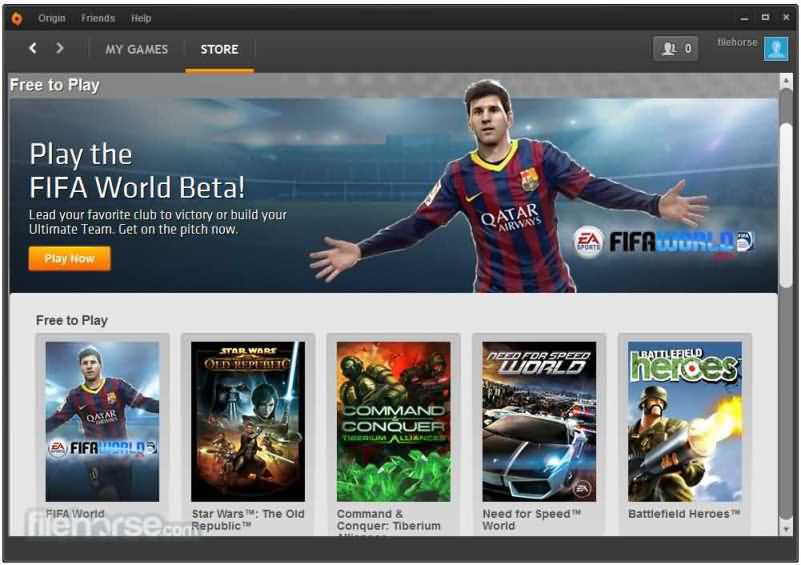
2 Origin Games
Platforms: OS X and Windows
Origin games are another best-known digital distribution platform for a free online gaming experience. It contains a fairly large library of premium games, but origin games provide links for free downloads for a limited time.
Key Features:
- Social Features
Origin provides its users with many social features like profile management, networking with friends through chatting, and video streaming via TwitchTV. You can also share your game library and community integration through social media and networking sites like Facebook, Xbox Live, PlayStation Network, and Nintendo Network.
- Variety in games
It provides various games, from PC games to Fifa and even classic games like Plant Vs. Zombies are also available.
- On-the-house games
The on-the-house features allow the customers to download a free trial of a premium game.
Pros:
- It provides great game streaming features.
- is developed by a renowned and successful company so that it can be trusted.
- The ‘on-the-house specials’ are appreciated by many gamers, allowing them to play a paid game for free now and then.
Cons:
- It has a lot of updates and takes an unreasonable amount of time to install and update the software.
- Customers have complained that they provide expired discount codes.
- Customer service needs to be improved as it is not very responsive.
3 AllGamesAtoZ
Platforms: OS X and Windows
If you want the best full version of a game for free, then AllGamesAtoZ is where you should go.
Key Features:
- The website is full of addictive games from different genres like action, arcade, shooting, role-playing, adventure, racing, simulation, etc.
- Multiple links for downloading a single game are available.
- A customized search bar is available so that you can locate the exact game you are looking for without having to browse through thousands of games.
- The games on AllGamesAtoZ are available on Windows, Linux, and Mac.
- A forum for game reviews is provided, so it is easier to decide which game you want to download without trying them all.
Pros:
- The gaming library is enormous.
- The game reviews make it easier to make a decision and save time.
- The website does not transfer viruses and is entirely safe from scams.
Cons:
- The downloading process is quite long.
- The website is not updated with new games.
4 Mega Games
Platforms: OS X and Windows
It is another highly recommended online gaming site. It not only provides PC games for free but also offers 3D PlayStation games to be downloaded on your PC without any charge.

Key Features:
- Search and download
Mega games allow a search and download option for every game published on their site.
- PlayStation games
It has provided its customers with not only PC games but also 3D PlayStation games that can be downloaded for free.
- Cheat codes
Apart from all the standard gaming features, mega games also provide free cheat codes for the games.
Pros:
- The games are easily downloaded.
- The games have variety.
Cons:
- The website stops working after a while, and the download gets interrupted
5 Caiman.us
Platforms: OS X and Windows
It is another digital distribution platform for free online gaming. After the death of the site’s developer, the site has gone offline.

Key Features:
- It has a vast collection of games and over twenty free games categories.
- 2D and 3D gaming experiences are also provided.
- A customized search is available to make it easier for players to find the game they are looking for.
Pros:
- There is a vast collection of free games to download and play.
Cons:
- The site is not well organized and confusing.
- The search bar is at the very bottom of the page, so a person might find it hard to locate.
- Since the site has gone offline, the games are not updated, so there are no new games.
Part 2: Best Android Game Download Sites to Download Free Android Games
Android is growing very fast; now, almost everyone uses it and prefers it over any other software. Here are the best websites from where you can download free android apps:
1 Google Play
Google Play is the most common website to download free android apps. It is free, it is fast, and it is efficient. You can not only use this from your android mobile but also operate it and download apps using your laptop.

Key Features:
- The apps are easily downloaded, depending upon your internet connection.
- The purchase methods are through credit cards, and the procedure is straightforward.
- The platform allows everyone and anyone to sell their games.
- Sign up through your Google account is necessary to access these features.
Pros:
- It is easily accessible.
- It is pre-installed on all android supported devices.
- It contains a massive collection of unique apps, from books to music, workout, and games of various types.
Cons:
- Since everyone and anyone can access it without paying any registration fee, it is exposed to scams and harassment.
- A few games do not function and keep crashing.
2 Android Games Room

It contains thousands of free gaming apps in different categories like action, arcade, adventure, simulation, song games, and puzzle games. The download links are readily available; you can even access this site from your mobile by scanning a QR code. This site is a pretty good platform to download free games but has certain flaws. It does not allow a multiplayer gaming experience, and no customer services are provided.
3 Android Apps
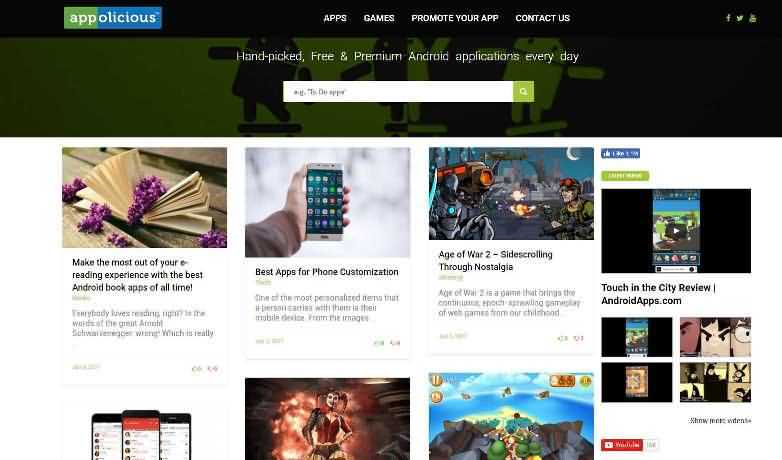
It is another platform to download android apps for free. This site is pretty good since it updates games that developers handpick almost daily. You can also promote your app using the ‘promote your app’ feature. The site has a lot of updates and takes an unreasonable amount of time to install and update the software. Furthermore, you can say that they do not have a customer service function because nobody ever responds to the customer’s queries.
4 1 Mobile
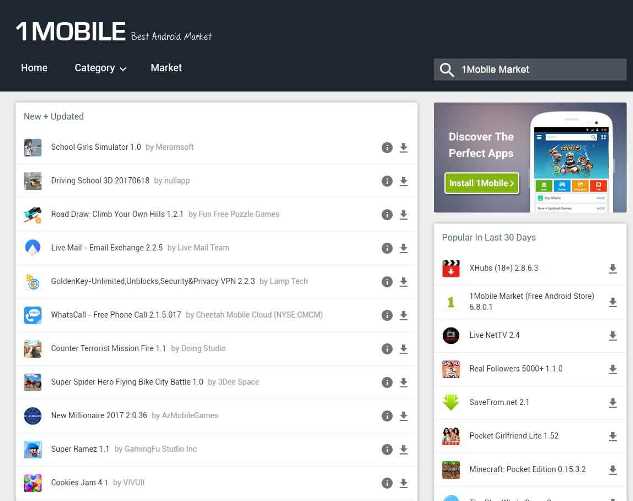
One mobile is a free android store. It provides its users the easiest way to locate, download and manage free apps. 1 Mobile has over eighty (80) million apps. One mobile has just been recently updated, has a brand new interface design, and operates much smoother. The content is more prosperous, smoother, and a thousand times better than before the latest update. All the apps and games are 100% free forever without hidden charges. It supports various languages like English, Korean, Chinese, French, Spanish, Japanese, and Portugal.
5 Approx
It provides the best free apps not only for android but OS as well. You can download it on your phone by scanning a QR code. This software has been functioning for the past six years and is free from viruses or malware.
To furnish your gameplay videos, Filmora also provides some cool effects, transitions, and elements, such as camera shake chaos effects, distortion effects, 3D change, speed blur transitions, and more. Moreover, you can always find some specially designed gaming effects in the Filmstock effects store.
Ollie Mattison
Ollie Mattison is a writer and a lover of all things video.
Follow @Ollie Mattison
Ollie Mattison
Mar 27, 2024• Proven solutions
We all know and firmly believe that games are an integral part of our life. But the world has progressed, and we yearn to achieve real-life experiences through virtual reality instead of experiencing the actual thing. Online games are not only mentally stimulating, but they are also very addictive. Not everyone wants to pay to play games for a couple of hours, so here is a list of top free game downloading sites. You can download full versions of your favorite games for free.
Recommended Video Recorder & Editor for Gameplay: Filmora
If you want to edit a video recorded from games with more effects and templates, we recommend using Filmora . It is an easy-to-use video editor. It offers various title templates. You can also use it to record game videos. Just download it to have a try. Don’t know how to make a video? Visit the Wondershare Video Community and get some inspiration in video creation.
Part 1: Best Free PC Game Download Sites
1 Acid Play
Platforms: OS X and Windows
Key Features:
- Huge gaming library
The acid play has a gigantic collection of games of various types. The games at acid play have been categorized into action, arcade, board games, RPG, card games, puzzles, driving games, simulation, etc.
- Custom Search
The customized search helps you find the exact game you are looking for. It saves time since you cannot browse through thousands of games.
- Ratings
If you are new to this site or looking for a new game to play, you can choose only without trying every game to decide the best one. Just check the ratings provided by other players, and it will solve your problem. You can also rate a game according to your liking.
Pros:
- The games are easily downloadable and free.
- There is a large variety of games available to play.
Cons:
- The site is not updated, and no new games are introduced.
2 Origin Games
Platforms: OS X and Windows
Origin games are another best-known digital distribution platform for a free online gaming experience. It contains a fairly large library of premium games, but origin games provide links for free downloads for a limited time.
Key Features:
- Social Features
Origin provides its users with many social features like profile management, networking with friends through chatting, and video streaming via TwitchTV. You can also share your game library and community integration through social media and networking sites like Facebook, Xbox Live, PlayStation Network, and Nintendo Network.
- Variety in games
It provides various games, from PC games to Fifa and even classic games like Plant Vs. Zombies are also available.
- On-the-house games
The on-the-house features allow the customers to download a free trial of a premium game.
Pros:
- It provides great game streaming features.
- is developed by a renowned and successful company so that it can be trusted.
- The ‘on-the-house specials’ are appreciated by many gamers, allowing them to play a paid game for free now and then.
Cons:
- It has a lot of updates and takes an unreasonable amount of time to install and update the software.
- Customers have complained that they provide expired discount codes.
- Customer service needs to be improved as it is not very responsive.
3 AllGamesAtoZ
Platforms: OS X and Windows
If you want the best full version of a game for free, then AllGamesAtoZ is where you should go.
Key Features:
- The website is full of addictive games from different genres like action, arcade, shooting, role-playing, adventure, racing, simulation, etc.
- Multiple links for downloading a single game are available.
- A customized search bar is available so that you can locate the exact game you are looking for without having to browse through thousands of games.
- The games on AllGamesAtoZ are available on Windows, Linux, and Mac.
- A forum for game reviews is provided, so it is easier to decide which game you want to download without trying them all.
Pros:
- The gaming library is enormous.
- The game reviews make it easier to make a decision and save time.
- The website does not transfer viruses and is entirely safe from scams.
Cons:
- The downloading process is quite long.
- The website is not updated with new games.
4 Mega Games
Platforms: OS X and Windows
It is another highly recommended online gaming site. It not only provides PC games for free but also offers 3D PlayStation games to be downloaded on your PC without any charge.
Key Features:
- Search and download
Mega games allow a search and download option for every game published on their site.
- PlayStation games
It has provided its customers with not only PC games but also 3D PlayStation games that can be downloaded for free.
- Cheat codes
Apart from all the standard gaming features, mega games also provide free cheat codes for the games.
Pros:
- The games are easily downloaded.
- The games have variety.
Cons:
- The website stops working after a while, and the download gets interrupted
5 Caiman.us
Platforms: OS X and Windows
It is another digital distribution platform for free online gaming. After the death of the site’s developer, the site has gone offline.
Key Features:
- It has a vast collection of games and over twenty free games categories.
- 2D and 3D gaming experiences are also provided.
- A customized search is available to make it easier for players to find the game they are looking for.
Pros:
- There is a vast collection of free games to download and play.
Cons:
- The site is not well organized and confusing.
- The search bar is at the very bottom of the page, so a person might find it hard to locate.
- Since the site has gone offline, the games are not updated, so there are no new games.
Part 2: Best Android Game Download Sites to Download Free Android Games
Android is growing very fast; now, almost everyone uses it and prefers it over any other software. Here are the best websites from where you can download free android apps:
1 Google Play
Google Play is the most common website to download free android apps. It is free, it is fast, and it is efficient. You can not only use this from your android mobile but also operate it and download apps using your laptop.
Key Features:
- The apps are easily downloaded, depending upon your internet connection.
- The purchase methods are through credit cards, and the procedure is straightforward.
- The platform allows everyone and anyone to sell their games.
- Sign up through your Google account is necessary to access these features.
Pros:
- It is easily accessible.
- It is pre-installed on all android supported devices.
- It contains a massive collection of unique apps, from books to music, workout, and games of various types.
Cons:
- Since everyone and anyone can access it without paying any registration fee, it is exposed to scams and harassment.
- A few games do not function and keep crashing.
2 Android Games Room
It contains thousands of free gaming apps in different categories like action, arcade, adventure, simulation, song games, and puzzle games. The download links are readily available; you can even access this site from your mobile by scanning a QR code. This site is a pretty good platform to download free games but has certain flaws. It does not allow a multiplayer gaming experience, and no customer services are provided.
3 Android Apps
It is another platform to download android apps for free. This site is pretty good since it updates games that developers handpick almost daily. You can also promote your app using the ‘promote your app’ feature. The site has a lot of updates and takes an unreasonable amount of time to install and update the software. Furthermore, you can say that they do not have a customer service function because nobody ever responds to the customer’s queries.
4 1 Mobile
One mobile is a free android store. It provides its users the easiest way to locate, download and manage free apps. 1 Mobile has over eighty (80) million apps. One mobile has just been recently updated, has a brand new interface design, and operates much smoother. The content is more prosperous, smoother, and a thousand times better than before the latest update. All the apps and games are 100% free forever without hidden charges. It supports various languages like English, Korean, Chinese, French, Spanish, Japanese, and Portugal.
5 Approx
It provides the best free apps not only for android but OS as well. You can download it on your phone by scanning a QR code. This software has been functioning for the past six years and is free from viruses or malware.
To furnish your gameplay videos, Filmora also provides some cool effects, transitions, and elements, such as camera shake chaos effects, distortion effects, 3D change, speed blur transitions, and more. Moreover, you can always find some specially designed gaming effects in the Filmstock effects store.
Ollie Mattison
Ollie Mattison is a writer and a lover of all things video.
Follow @Ollie Mattison
Free Glitch Art Makers: The Ultimate Online Generator List
The Best Free Online Glitch Effect Generators
Ollie Mattison
Mar 27, 2024• Proven solutions
The Glitch Art movement is gaining a lot of attention on social media, as the photos and videos that contain glitches gather thousands of views and likes. Some video editing software products don’t have preset glitch effects, and creating this effect from scratch can be a time-consuming task.
Online glitch effect generators enable you to add glitch effects to both photos and videos even if you have no previous video editing experience, which makes them a great option for all social media content creators who want to go through the editing process as quickly as possible. That’s why in this article we are going to take you through some of the best free online glitch effect generators you can use to edit photos and videos.
Add Glitch Effect to Video with Filmora Video Editor
Download Mac Version ](https://tools.techidaily.com/wondershare/filmora/download/ )
Check the guide to adding glitch effects to video with Filmora.
The Best Free Online Glitch Effect Generators
With so many online glitch effect generators to choose from, finding the one that fits all your needs may be difficult. We’ve selected some of the best online glitch effect generators you can use for free to create content for your social media channels. Let’s take a look at what they have to offer
1. GFTO
GFTO is an online text generator that offers hundreds of text templates, including the Glitch Text template. Customizing this template is easy as you just have to replace the generic text and adjust its on-screen position. Furthermore, you can choose the text’s color and size or select one of the available fonts.
![]()
The platform also lets you upload your own fonts, apply gradients, and change the text style. Optionally, you can add an outline to the text, pick the color of the text edges, or change the background. Once you are done editing the text you can save it to your computer as a PNG file and use it as an opening title for your video.
Pros
- Rich font selection
- Powerful text editing tools
- Allows users to upload their fonts
- Offers a broad range of text templates
Cons
- Outdated website design
- No photo or video editing features
2. EPHOTO 360
If you are looking for a tool that allows you to automatically generate the content you can share on TikTok, then you should consider using EPHOTO 360. You can use this glitch effect generator for free and you don’t even need an account in order to start making new content. Simply locate the Tik Tok Text Effects Online Generator option that is located in the Text Effect category and click on it.

Once the new page loads, you just have to insert the text into the text boxes and click on the GO button. EPHOTO 360 will then generate the image containing the text you entered. You can then choose if you want to save the picture to your computer, share it on social media, or copy the image’s link. However, all photos you create with EPHOTO 360 are going to be watermarked.
Pros
- A simple way of producing content for TikTok
- All images are exported as JPEG files
- Features hundreds of text templates
- Good file-sharing capabilities
Cons
- All images are generated automatically
- EPHOTO 360 watermarks all pictures
3. Photo Mosh
Photo Mosh grants you access to 27 different glitch effects you can apply to photos or short videos. The platform lets you choose if you want to create a JPEG, GIF, or WEBM file, although the videos you record with Photo Mosh cannot last more than a few seconds.

Applying the effects is easy, as you just have to expand the effect you want to use, click on the ON checkbox, and adjust the effect’s settings. All changes you make are visible in the preview screen so that you can see the results. In case you want to apply random effects to an image or video you uploaded, you just have to click on the Mosh button. All photos or short videos you create with this platform can be saved on your computer’s hard drive.
Pros
- Offers a variety of glitch effects
- Easy way to edit photos and short videos
- Mosh button enables the platform’s users to create random results
- Allow users to save videos in WEBM file format
Cons
- No file-sharing capabilities
- Creates low-resolution files
4. Glitchatron
Adding a glitch to a photo with Glitchatron is a straightforward task that can be completed in just a few moments. Once you’ve uploaded the photo to which you want to apply a glitch effect, you should choose from Low, Medium, High, Extreme, and Destroyed glitch level options.

Glitchatron also lets you apply a circular or triangular mask to the photo or add a text overlay. You can insert the text, adjust its size, pick an alignment option, or decide if you want the text to be black or white. However, other color options are unavailable, and you can’t change the font. You can save the photo in PNG file format to your computer or share it on Facebook, Twitter, and other popular social media networks.
Pros
- No photo editing skills required
- Users can adjust the intensity of the glitch effect
- Text overlays are available
- Good social sharing capabilities
Cons
- Text can be either black or white
- No photo editing tools
5. ImageGlitcher
You shouldn’t expect great results from this online glitch generator, as the website is poorly designed and it offers only a few basic glitch adjustment options. The size of the photo you upload to the website has an impact on how it is going to be displayed, which means that photos in large resolutions may be difficult to preview.

Furthermore, you can only adjust Glitchiness and Brightness options, while you can also toggle the Scan Line option on and off. You can’t do much else with ImageGlitcher, not even share your creations on social media. Applying the glitch effect to a photo may take a while, and the website might crash in the process. That’s why you shouldn’t use ImageGlitcher unless it is your only option to glitch a photo.
Pros
- It is free
- Support images saved in JPEG format
Cons
- Website crashes easily
- Only basic glitch effect settings
- Poorly designed and difficult to navigate
- Only works with photos that have resolution lower than 1024x1024
6. Image Glitch Tool
Image Glitch Tool is a simple glitch effect generator that allows you to upload a photo and adjust the effect’s settings quickly. The photo you upload to this platform is going to be displayed in the Preview Window, and the platform will also resize the photo automatically in case it exceeds its size limitations to avoid errors.

What’s more, Image Glitch Tool enables you to take photos with a webcam and apply glitch effect to them just moments after you captured them. The Amount, Seed, Iterations, and Quality sliders allow you to fine-tune the glitch effect so that it fits the image you are editing. However, creating a text overlay with this online glitch generator is not possible as you can only use it to apply the glitch effect to photos.
Pros
- Intuitive and functional design
- Allows users to take photos with a webcam
- Photos are adjusted automatically to the platform’s size requirements
- All photos can be uploaded to Imgur directly from Image Glitch Tool
Cons
- Doesn’t support video files
- Offers just one glitch effect
7. Mara
Mara is an online photo editing platform that lets its users crop photos, create image overlays, sharpen images, and much more. Its Glitcher feature provides an easy way to apply a glitch effect to a photo. You can upload a photo from your computer, via an URL or from Dropbox.

The photo will open in the Glitcher window as soon as you upload it, so you can use the Seed, Amount, Iterations, and Quality sliders to create a glitch effect. In addition, you can transfer the photo you’re editing with the Glitcher tool to other tools Mara photo editing platform offers and use them to polish the photo to which you applied the glitch effect. Besides saving the photo to your computer, you can also share it to Facebook and other social media platforms.
Pros
- Powerful glitch tool
- Customizing the glitch effect is easy and fun
- Mara is equipped with a broad range of photo editing tools
- Excellent social sharing options
Cons
- A limited selection of glitch effects
- Adding a text layer is only possible if you use Glitcher in combination with other tools
8. HTML5 Image Glitcher
You don’t need a lot of photo editing experience in order to create a glitch effect with this tool. Before you upload a photo, you should decide if you want to keep the file’s actual size or resize it to a lower resolution. Also, this tool lets you choose if you want to create a JPEG, PNG, or WEBP file.

Once you’ve adjusted these settings you can proceed to select how damaged the photo is going to be, and you should pick the 1-hit option if you want the damage to be minimal or 1000-hits option if you want the damage to be severe. The results will be displayed in the Preview Window immediately so that you can adjust this setting accordingly. You can save the photo you created by either clicking on Download JPEG or Download PNG file.
Pros
- Users can choose the resolution of the photos they upload
- The glitch effect generator is easy to use
- Adjusting the intensity of the glitch effect is easy
- Supports all common picture file formats
Cons
- No social sharing options
- Offers only basic glitch effect settings
Conclusion
Creating a glitch on a photo or even in a short video with any of the glitch effect generators we mentioned in this article is a routine task you can perform in just a few clicks. Each of these online glitch effect generators can help you produce captivating content for your social media accounts that is going to attract a lot of attention. Which online glitch effect generator are you going to choose? Leave a comment and let us know.
Ollie Mattison
Ollie Mattison is a writer and a lover of all things video.
Follow @Ollie Mattison
Ollie Mattison
Mar 27, 2024• Proven solutions
The Glitch Art movement is gaining a lot of attention on social media, as the photos and videos that contain glitches gather thousands of views and likes. Some video editing software products don’t have preset glitch effects, and creating this effect from scratch can be a time-consuming task.
Online glitch effect generators enable you to add glitch effects to both photos and videos even if you have no previous video editing experience, which makes them a great option for all social media content creators who want to go through the editing process as quickly as possible. That’s why in this article we are going to take you through some of the best free online glitch effect generators you can use to edit photos and videos.
Add Glitch Effect to Video with Filmora Video Editor
Download Mac Version ](https://tools.techidaily.com/wondershare/filmora/download/ )
Check the guide to adding glitch effects to video with Filmora.
The Best Free Online Glitch Effect Generators
With so many online glitch effect generators to choose from, finding the one that fits all your needs may be difficult. We’ve selected some of the best online glitch effect generators you can use for free to create content for your social media channels. Let’s take a look at what they have to offer
1. GFTO
GFTO is an online text generator that offers hundreds of text templates, including the Glitch Text template. Customizing this template is easy as you just have to replace the generic text and adjust its on-screen position. Furthermore, you can choose the text’s color and size or select one of the available fonts.
![]()
The platform also lets you upload your own fonts, apply gradients, and change the text style. Optionally, you can add an outline to the text, pick the color of the text edges, or change the background. Once you are done editing the text you can save it to your computer as a PNG file and use it as an opening title for your video.
Pros
- Rich font selection
- Powerful text editing tools
- Allows users to upload their fonts
- Offers a broad range of text templates
Cons
- Outdated website design
- No photo or video editing features
2. EPHOTO 360
If you are looking for a tool that allows you to automatically generate the content you can share on TikTok, then you should consider using EPHOTO 360. You can use this glitch effect generator for free and you don’t even need an account in order to start making new content. Simply locate the Tik Tok Text Effects Online Generator option that is located in the Text Effect category and click on it.
Once the new page loads, you just have to insert the text into the text boxes and click on the GO button. EPHOTO 360 will then generate the image containing the text you entered. You can then choose if you want to save the picture to your computer, share it on social media, or copy the image’s link. However, all photos you create with EPHOTO 360 are going to be watermarked.
Pros
- A simple way of producing content for TikTok
- All images are exported as JPEG files
- Features hundreds of text templates
- Good file-sharing capabilities
Cons
- All images are generated automatically
- EPHOTO 360 watermarks all pictures
3. Photo Mosh
Photo Mosh grants you access to 27 different glitch effects you can apply to photos or short videos. The platform lets you choose if you want to create a JPEG, GIF, or WEBM file, although the videos you record with Photo Mosh cannot last more than a few seconds.
Applying the effects is easy, as you just have to expand the effect you want to use, click on the ON checkbox, and adjust the effect’s settings. All changes you make are visible in the preview screen so that you can see the results. In case you want to apply random effects to an image or video you uploaded, you just have to click on the Mosh button. All photos or short videos you create with this platform can be saved on your computer’s hard drive.
Pros
- Offers a variety of glitch effects
- Easy way to edit photos and short videos
- Mosh button enables the platform’s users to create random results
- Allow users to save videos in WEBM file format
Cons
- No file-sharing capabilities
- Creates low-resolution files
4. Glitchatron
Adding a glitch to a photo with Glitchatron is a straightforward task that can be completed in just a few moments. Once you’ve uploaded the photo to which you want to apply a glitch effect, you should choose from Low, Medium, High, Extreme, and Destroyed glitch level options.
Glitchatron also lets you apply a circular or triangular mask to the photo or add a text overlay. You can insert the text, adjust its size, pick an alignment option, or decide if you want the text to be black or white. However, other color options are unavailable, and you can’t change the font. You can save the photo in PNG file format to your computer or share it on Facebook, Twitter, and other popular social media networks.
Pros
- No photo editing skills required
- Users can adjust the intensity of the glitch effect
- Text overlays are available
- Good social sharing capabilities
Cons
- Text can be either black or white
- No photo editing tools
5. ImageGlitcher
You shouldn’t expect great results from this online glitch generator, as the website is poorly designed and it offers only a few basic glitch adjustment options. The size of the photo you upload to the website has an impact on how it is going to be displayed, which means that photos in large resolutions may be difficult to preview.
Furthermore, you can only adjust Glitchiness and Brightness options, while you can also toggle the Scan Line option on and off. You can’t do much else with ImageGlitcher, not even share your creations on social media. Applying the glitch effect to a photo may take a while, and the website might crash in the process. That’s why you shouldn’t use ImageGlitcher unless it is your only option to glitch a photo.
Pros
- It is free
- Support images saved in JPEG format
Cons
- Website crashes easily
- Only basic glitch effect settings
- Poorly designed and difficult to navigate
- Only works with photos that have resolution lower than 1024x1024
6. Image Glitch Tool
Image Glitch Tool is a simple glitch effect generator that allows you to upload a photo and adjust the effect’s settings quickly. The photo you upload to this platform is going to be displayed in the Preview Window, and the platform will also resize the photo automatically in case it exceeds its size limitations to avoid errors.
What’s more, Image Glitch Tool enables you to take photos with a webcam and apply glitch effect to them just moments after you captured them. The Amount, Seed, Iterations, and Quality sliders allow you to fine-tune the glitch effect so that it fits the image you are editing. However, creating a text overlay with this online glitch generator is not possible as you can only use it to apply the glitch effect to photos.
Pros
- Intuitive and functional design
- Allows users to take photos with a webcam
- Photos are adjusted automatically to the platform’s size requirements
- All photos can be uploaded to Imgur directly from Image Glitch Tool
Cons
- Doesn’t support video files
- Offers just one glitch effect
7. Mara
Mara is an online photo editing platform that lets its users crop photos, create image overlays, sharpen images, and much more. Its Glitcher feature provides an easy way to apply a glitch effect to a photo. You can upload a photo from your computer, via an URL or from Dropbox.
The photo will open in the Glitcher window as soon as you upload it, so you can use the Seed, Amount, Iterations, and Quality sliders to create a glitch effect. In addition, you can transfer the photo you’re editing with the Glitcher tool to other tools Mara photo editing platform offers and use them to polish the photo to which you applied the glitch effect. Besides saving the photo to your computer, you can also share it to Facebook and other social media platforms.
Pros
- Powerful glitch tool
- Customizing the glitch effect is easy and fun
- Mara is equipped with a broad range of photo editing tools
- Excellent social sharing options
Cons
- A limited selection of glitch effects
- Adding a text layer is only possible if you use Glitcher in combination with other tools
8. HTML5 Image Glitcher
You don’t need a lot of photo editing experience in order to create a glitch effect with this tool. Before you upload a photo, you should decide if you want to keep the file’s actual size or resize it to a lower resolution. Also, this tool lets you choose if you want to create a JPEG, PNG, or WEBP file.
Once you’ve adjusted these settings you can proceed to select how damaged the photo is going to be, and you should pick the 1-hit option if you want the damage to be minimal or 1000-hits option if you want the damage to be severe. The results will be displayed in the Preview Window immediately so that you can adjust this setting accordingly. You can save the photo you created by either clicking on Download JPEG or Download PNG file.
Pros
- Users can choose the resolution of the photos they upload
- The glitch effect generator is easy to use
- Adjusting the intensity of the glitch effect is easy
- Supports all common picture file formats
Cons
- No social sharing options
- Offers only basic glitch effect settings
Conclusion
Creating a glitch on a photo or even in a short video with any of the glitch effect generators we mentioned in this article is a routine task you can perform in just a few clicks. Each of these online glitch effect generators can help you produce captivating content for your social media accounts that is going to attract a lot of attention. Which online glitch effect generator are you going to choose? Leave a comment and let us know.
Ollie Mattison
Ollie Mattison is a writer and a lover of all things video.
Follow @Ollie Mattison
Unlock Free Video Blurring: Easy Online Solution
How to Blur Video Online for Free

Liza Brown
Mar 27, 2024• Proven solutions
Sometimes it becomes important to blur the entire video or a particular part or section of it to draw the viewers’ attention or hide some sensitive or objectionable details from them respectively. Even though you can download and use any efficient app to get the job done, why take the pain when you can blur video online, and that too for free? Right?
With that said, in the following sections, you will learn about some portals available on the Internet that let you blur video background online. In addition, the options present in some of these web apps can also be exploited to blur part of video online free.
Best Online Tools to Blur Videos
A list of some of the best websites and their essential details are given below:
1. PickFrom
Visit: https://pickfrom.net/blur-video
PickFrom is a one-stop shop for almost all types of post-production tasks. For instance, you can blur a video or part of it, convert video to audio, add filters to the clips, and much more.
You Must Know About PickFrom Blur Tool
- No registration is required
- The free version adds a watermark while exporting
- Offers three pricing plans, namely Starter, Premium, and Enterprise
To blur video online with PickFrom:
- Go to the official website using your favorite Internet browser, and then click the Click to add files button
- Locate and upload the source video from your PC, and check the Blur part of the video box from the right pane
- Drag the selection box over the subject that you don’t want to get blurred, and resize the selection box as needed
- Turn off the Blur inside switch from the right pane, and choose a format from the Save As menu present at the bottom-left corner.
- Click Start, and then click Download or Copy the link to download the modified video to your PC or share it online, respectively.

Limitations
- Maximum acceptable video size is up to 2GB and 5GB for Starter and Premium subscriptions respectively.
- Enables you to blur either the full video or a part of it
- At the time of this writing, the ‘Blur video background’ feature isn’t smart enough to differentiate between the background and the main subject (humans)
2. WoFox
Visit: https://www.wofox.com/video-editing-tools/blur-an-object-in-video
WoFox is another website that offers almost every important tool for designing, post-production, and audio and video treatments. For example, you can create animation designs, GIF templates, infographic images, etc., with the web app.
You Must Know About Using WoFox to Blur Video
- No registration or credit card details are required
- Even the free access doesn’t add any watermark to the exported videos
- Offers three types of subscription plans, namely Free, Business Plan, Team Plan, and Virtual Assistant Plan
To blur part of video online free with WoFox:
- Launch your favorite web browser, and use the link given above to visit the portal;
- Click Upload and upload the source video, and then position and scale the selection box to cover the portion of the video that needs to be blurred.
- Optionally click the + button from the navigation pane on the left to add more selection boxes to cover multiple video portions. Click Download from the top-right corner of the page to download the modified clip.

Limitations of using Wo Fox to Blur Video Online
- In this writing, WoFox cannot differentiate between the normal background and humans.
- The free version can create videos only of up to 30 seconds
- The free version can export videos only in 360p resolution
3. Flixier
Visit: https://flixier.com/tools/blur-or-pixelate-video
This online portal offers many tools to make your source videos look more engaging and professional. With Flixier, you can create innovative adverts, slideshows, intros/outros, lyric videos, and even birthday clips. As for the social media part, you can create videos for YouTube, Twitch, Instagram, and Facebook.
Things You Must Know About Flixier
- Registration is required before you can start using Flixier
- The free access adds a watermark to the exported videos
- Offers three subscription plans, namely Creator, Business, and Enterprise
To blur video online with Flixier:
- Use your web browser to visit the URL given above, and then click Get Started;
- Sign up for a new account, or if you already have one, click login from the upper-right corner of the left section of the page;
- Right-click anywhere inside the Personal Library pane on the left, and then click Import;
- Choose your preferred method, and upload the source video to Flixier, and then click Import all when done;
- Close the Pick a layout box and drag the video from the Personal Library pane to the Timeline at the bottom;
- Position the Skimmer (Playhead) on the frame you want to start blurring the video from, and then click to select Shapes from the toolbox on the left;
- Click the Expand arrow next to the Square shape in the Shapes pane, and then click Square mask from the menu;
- Position and scale the square mask in the preview window, and then choose your preferred effect from the available options under the Masks section in the right pane;
- Drag the sides of the mask layer in the Timeline to specify for how long the mask should be applied in the video;
- Click Export from the top-right corner, and customize the output settings, and if need be, choose the target platform(s);
- Click Export Video from the lower area of the right pane, and wait while the video is rendered before you can start downloading it.

Limitations of using Flixier
- The free account can have only up to 2GB of storage
- It supports only 10 minutes of videos per month to be exported with a free account
- The maximum resolution for the videos exported with a free account is 720p
4. Kapwing
Visit: https://www.kapwing.com/studio
Kapwing is a trusted portal known to almost everyone who prefers online resources over PC applications. The website allows you to edit the videos, create memes for social media platforms, add audio and subtitles to the clips, resize them, etc.
Things You Must Know About Kapwing
- Registration is not necessary to blur video background online with Kapwing
- The free version does not add a watermark to the videos while exporting.
- Offers three subscription plans, namely Free, Pro, and For Teams
To blur video background online with Kapwing:
- Launch a web browser and visit the link given above
- Click Upload File, and upload the source video (or paste its URL if the clip is published online)
- Click Duplicate from the LAYER section of the right pane, and click to select the duplicate layer
- Click Crop from the top of the right pane, and crop the portion of the video that needs to be blurred
- Click Done Cropping, and then click Adjust from the top of the right pane
- Use the Blur slider to adjust the intensity of the blur effect
- Click Done Adjustingand use the Forward, Front, Backward, or Back buttons under the LAYER section to make the duplicate layer visible.
- Click Export Video from the top-right corner of the page, and wait while the modified video is rendered.
- Click the Download or Copy link to save the video to your PC or share it online, respectively.

Limitations
- You must register and sign in to a free account before exporting the videos to get rid of the watermark.
- Files of only up to 250MB can be uploaded while using a free account
- Videos of only up to 7 minutes each can be exported with a free account, while the total duration of the videos that can be exported is up to 3 hours.
5. Hippo Video
Visit: https://www.hippovideo.io/users/sign%5Fin
In addition to having various tools to edit the clips, including blur video online, Hippo Video can also record your PC screen and audio and even capture webcam footage. Creating engaging slideshows from the uploaded images is yet another feature that the web app offers.
You Must Know
- Registration is mandatory before you can start using Hippo Video
- The free/trial version doesn’t add a watermark to the exported videos
- Offers four subscription plans, namely Free, Personal, Classroom, and School
To blur video background online for free with Hippo Video:
- Use your favorite web browser to visit the URL given above
- Click Sign Up from the lower area of the Sign In to your account box (or sign in if you already have a Hippo Video account)
- Choose your preferred method to create an account, and then sign in
- Click Get Started and then populate the fields on the next couple of pages with the correct information on the next page.
- After completing the account creation process, click Import Video on the page that appears.
- On the Import Video box, choose your preferred method to locate and upload the source video, i.e., from your local computer or G-Drive.
- Click PROCEED from the bottom-right corner, and on the next page, add the necessary details related to the video (optional)
- Click IMPORT from the bottom-right corner to import the video and click EDIT VIDEO from the upper-right area of the preview window on the next page.
- Click Quick Edit from the list that appears, and then click the Blur tool from the bottom of the preview window.
- Click Add New Blur and position and scale the selection box in the preview window to cover the area that needs to be blurred.
- Drag the Blur marker in the progress bar to define the effect duration, and use the Strength slider to manage the intensity of the blur effect, and then click SAVE
- Back on the previous page, click EXPORT from the lower area of the preview window.
- Choose your preferred platform to export and publish the modified video to

Limitations
- The video resolution remains 480p while using a free account
- With the free version, you only get 1GB of bandwidth per month
6. YouTube Studio
Visit: https://studio.youtube.com/
Being one of the most viewed streaming media portals that offer free uploads and even lets you monetize your creations, YouTube has a separate section called YouTube Studio, where you can edit clips before publishing.
You Must Know
- A Gmail account is required to use YouTube Studio.
- All the videos can be uploaded without a watermark for free without any expiration date
- No subscription plans are enforced
To blur video online with YouTube Studio:
- Visit the URL given above using your favorite web browser (Google Chrome is recommended)
- If not already signed in, do so with your Gmail account when prompted for
- Click UPLOAD VIDEOS from the Channel dashboard section and on the Upload videos box, click SELECT FILES, and select and upload the source video from your PC
- While the video uploads, specify other publishing preferences using the options present on the box that appears
- Click NEXT from the bottom-right corner when done.
- On the Video elements box, add your preferred elements, click NEXT, review the details on the Checks box, click NEXT, choose your visibility preferences on the Visibility box, and click.
- Back on the main page, click Content from the navigation pane on the left and hover the mouse over the thumbnail of the video you uploaded, and click the Details icon that appears on the right.
- Click Editor from the Your video pane on the left and click GET STARTED from the right window and click BLUR PARTS OF YOUR VIDEO from the lower area of the Video editor window on the right.
- Click Custom blur from the list that appears and position and scale the selection box in the preview window to cover the object that needs to be blurred and drag the Blur slider in the Timeline to specify the duration of the effect.
- Optionally click BLUR from the upper-left area of the Video editor window to add another instance of the blur effect to blur another segment of the clip and click SAVE from the upper-right side.
- Click SAVE again on the Save changes confirmation box to save the changes
- Wait while Google reviews the modifications, and the video is made available for viewing
- Once this is done, get back to the Content section as explained earlier
- Hover mouse over the thumbnail, and click the Options icon from the right this time
- Click Download from the list to download the video with the blur effect to your PC

You can check more details of blurring videos with YouTube Studio .
Limitations
- Your YouTube account must be verified before you can publish long videos. Account verification is free.
- No copyright content is allowed to be published on YouTube
- No pornography or unethical content is allowed to be posted on YouTube
Bonus: How to Blur Video with Wondershare Filmora
Download Mac Version ](https://tools.techidaily.com/wondershare/filmora/download/ )
Wondershare Filmora is a versatile post-production application with a built-in video editing tools and effects to edit videos with ease. The tool is usually considered a good competitor of Adobe Premiere Pro, Final Cut Pro X, etc.
Like any other similar program, even Filmora allows you to blur both landscape and portrait videos. The processes of getting these tasks done are given below:
1. Blur a Part of Video (Landscape Video)
Step 1: Import and Add the Source Video to Timeline
Launch Wondershare Filmora on your Windows or Mac computer (MacBook Pro M1 is used here), make sure that the 16:9 (Widescreen) layout preset is selected under the Select Project Aspect Ratio section on the flash screen, and click New Project.

Next, click to select My Media from the menu bar if not already selected, and from the navigation pane on the left, select Project Media.

Then, click Import from the Media box, select and import the source video to the program, drag the clip from the Media box to the Timeline at the bottom, and when the confirmation box appears, choose the option either under the Keep Project Settings or Match to Media sections to add the video to the Timeline.

Step 2: Add Blur Effect
Go to Effects from the menu bar, select Default from the top of the navigation pane on the left, and select Utility from the available list. From the right box, drag the Mosaic effect, and place it on a separate layer above the video track in the Timeline.

Step 3: Customize the Effect to Blur a Part of Video
Double-click the Blur effect in the Timeline, use the scaling handles in the preview window to scale and position the effect to cover your preferred part of the video and place it at your desired location respectively, choose a Mosaic style from the Type list present in the left box, and use the Intensity and Opacity sliders to customize further the appearance of effect as needed. Optionally, you can drag the side handles of the effect in the Timeline to adjust the duration of its visibility, and click OK from the bottom-right area of the upper-left box to save the changes.

2. Blur a Vertical Video
Download Mac Version ](https://tools.techidaily.com/wondershare/filmora/download/ )
Step 1: Import a Vertical Video and Add It to the Timeline
Use the above method to import the source vertical video to Filmora X and add it to the Timeline. However, it is important to choose the button under the Keep Project Settings label when the confirmation box appears, so you get some real estate because of the landscape mode to add the blur effect.
Step 2: Add Background Blur
Go to Effects and choose Default from the left pane, as explained earlier. Next, expand the Filters tree if not already expanded, click to select Background Blur from the list, from the box on the right, choose and drag your preferred blur effect, and place it on a separate layer in the Timeline above the video track.

Step 3: Customize the Blur Effect
Double-click the Blur effect in the Timeline, and use the available sliders to customize the effect that best fits your needs.

You can find more details about how to blur the background in the portrait video with Filmora .
Conclusion
If you want to have full control over the post-production process, having an efficient desktop program like Wondershare Filmora X would be something you might be looking for. On the other hand, if you are not a professional editor or are not much into editing and prefer playing around with the tools for personal use, going for a decent web portal to blur video online is your best bet.
Liza Brown
Liza Brown is a writer and a lover of all things video.
Follow @Liza Brown
Liza Brown
Mar 27, 2024• Proven solutions
Sometimes it becomes important to blur the entire video or a particular part or section of it to draw the viewers’ attention or hide some sensitive or objectionable details from them respectively. Even though you can download and use any efficient app to get the job done, why take the pain when you can blur video online, and that too for free? Right?
With that said, in the following sections, you will learn about some portals available on the Internet that let you blur video background online. In addition, the options present in some of these web apps can also be exploited to blur part of video online free.
Best Online Tools to Blur Videos
A list of some of the best websites and their essential details are given below:
1. PickFrom
Visit: https://pickfrom.net/blur-video
PickFrom is a one-stop shop for almost all types of post-production tasks. For instance, you can blur a video or part of it, convert video to audio, add filters to the clips, and much more.
You Must Know About PickFrom Blur Tool
- No registration is required
- The free version adds a watermark while exporting
- Offers three pricing plans, namely Starter, Premium, and Enterprise
To blur video online with PickFrom:
- Go to the official website using your favorite Internet browser, and then click the Click to add files button
- Locate and upload the source video from your PC, and check the Blur part of the video box from the right pane
- Drag the selection box over the subject that you don’t want to get blurred, and resize the selection box as needed
- Turn off the Blur inside switch from the right pane, and choose a format from the Save As menu present at the bottom-left corner.
- Click Start, and then click Download or Copy the link to download the modified video to your PC or share it online, respectively.
Limitations
- Maximum acceptable video size is up to 2GB and 5GB for Starter and Premium subscriptions respectively.
- Enables you to blur either the full video or a part of it
- At the time of this writing, the ‘Blur video background’ feature isn’t smart enough to differentiate between the background and the main subject (humans)
2. WoFox
Visit: https://www.wofox.com/video-editing-tools/blur-an-object-in-video
WoFox is another website that offers almost every important tool for designing, post-production, and audio and video treatments. For example, you can create animation designs, GIF templates, infographic images, etc., with the web app.
You Must Know About Using WoFox to Blur Video
- No registration or credit card details are required
- Even the free access doesn’t add any watermark to the exported videos
- Offers three types of subscription plans, namely Free, Business Plan, Team Plan, and Virtual Assistant Plan
To blur part of video online free with WoFox:
- Launch your favorite web browser, and use the link given above to visit the portal;
- Click Upload and upload the source video, and then position and scale the selection box to cover the portion of the video that needs to be blurred.
- Optionally click the + button from the navigation pane on the left to add more selection boxes to cover multiple video portions. Click Download from the top-right corner of the page to download the modified clip.
Limitations of using Wo Fox to Blur Video Online
- In this writing, WoFox cannot differentiate between the normal background and humans.
- The free version can create videos only of up to 30 seconds
- The free version can export videos only in 360p resolution
3. Flixier
Visit: https://flixier.com/tools/blur-or-pixelate-video
This online portal offers many tools to make your source videos look more engaging and professional. With Flixier, you can create innovative adverts, slideshows, intros/outros, lyric videos, and even birthday clips. As for the social media part, you can create videos for YouTube, Twitch, Instagram, and Facebook.
Things You Must Know About Flixier
- Registration is required before you can start using Flixier
- The free access adds a watermark to the exported videos
- Offers three subscription plans, namely Creator, Business, and Enterprise
To blur video online with Flixier:
- Use your web browser to visit the URL given above, and then click Get Started;
- Sign up for a new account, or if you already have one, click login from the upper-right corner of the left section of the page;
- Right-click anywhere inside the Personal Library pane on the left, and then click Import;
- Choose your preferred method, and upload the source video to Flixier, and then click Import all when done;
- Close the Pick a layout box and drag the video from the Personal Library pane to the Timeline at the bottom;
- Position the Skimmer (Playhead) on the frame you want to start blurring the video from, and then click to select Shapes from the toolbox on the left;
- Click the Expand arrow next to the Square shape in the Shapes pane, and then click Square mask from the menu;
- Position and scale the square mask in the preview window, and then choose your preferred effect from the available options under the Masks section in the right pane;
- Drag the sides of the mask layer in the Timeline to specify for how long the mask should be applied in the video;
- Click Export from the top-right corner, and customize the output settings, and if need be, choose the target platform(s);
- Click Export Video from the lower area of the right pane, and wait while the video is rendered before you can start downloading it.
Limitations of using Flixier
- The free account can have only up to 2GB of storage
- It supports only 10 minutes of videos per month to be exported with a free account
- The maximum resolution for the videos exported with a free account is 720p
4. Kapwing
Visit: https://www.kapwing.com/studio
Kapwing is a trusted portal known to almost everyone who prefers online resources over PC applications. The website allows you to edit the videos, create memes for social media platforms, add audio and subtitles to the clips, resize them, etc.
Things You Must Know About Kapwing
- Registration is not necessary to blur video background online with Kapwing
- The free version does not add a watermark to the videos while exporting.
- Offers three subscription plans, namely Free, Pro, and For Teams
To blur video background online with Kapwing:
- Launch a web browser and visit the link given above
- Click Upload File, and upload the source video (or paste its URL if the clip is published online)
- Click Duplicate from the LAYER section of the right pane, and click to select the duplicate layer
- Click Crop from the top of the right pane, and crop the portion of the video that needs to be blurred
- Click Done Cropping, and then click Adjust from the top of the right pane
- Use the Blur slider to adjust the intensity of the blur effect
- Click Done Adjustingand use the Forward, Front, Backward, or Back buttons under the LAYER section to make the duplicate layer visible.
- Click Export Video from the top-right corner of the page, and wait while the modified video is rendered.
- Click the Download or Copy link to save the video to your PC or share it online, respectively.
Limitations
- You must register and sign in to a free account before exporting the videos to get rid of the watermark.
- Files of only up to 250MB can be uploaded while using a free account
- Videos of only up to 7 minutes each can be exported with a free account, while the total duration of the videos that can be exported is up to 3 hours.
5. Hippo Video
Visit: https://www.hippovideo.io/users/sign%5Fin
In addition to having various tools to edit the clips, including blur video online, Hippo Video can also record your PC screen and audio and even capture webcam footage. Creating engaging slideshows from the uploaded images is yet another feature that the web app offers.
You Must Know
- Registration is mandatory before you can start using Hippo Video
- The free/trial version doesn’t add a watermark to the exported videos
- Offers four subscription plans, namely Free, Personal, Classroom, and School
To blur video background online for free with Hippo Video:
- Use your favorite web browser to visit the URL given above
- Click Sign Up from the lower area of the Sign In to your account box (or sign in if you already have a Hippo Video account)
- Choose your preferred method to create an account, and then sign in
- Click Get Started and then populate the fields on the next couple of pages with the correct information on the next page.
- After completing the account creation process, click Import Video on the page that appears.
- On the Import Video box, choose your preferred method to locate and upload the source video, i.e., from your local computer or G-Drive.
- Click PROCEED from the bottom-right corner, and on the next page, add the necessary details related to the video (optional)
- Click IMPORT from the bottom-right corner to import the video and click EDIT VIDEO from the upper-right area of the preview window on the next page.
- Click Quick Edit from the list that appears, and then click the Blur tool from the bottom of the preview window.
- Click Add New Blur and position and scale the selection box in the preview window to cover the area that needs to be blurred.
- Drag the Blur marker in the progress bar to define the effect duration, and use the Strength slider to manage the intensity of the blur effect, and then click SAVE
- Back on the previous page, click EXPORT from the lower area of the preview window.
- Choose your preferred platform to export and publish the modified video to
Limitations
- The video resolution remains 480p while using a free account
- With the free version, you only get 1GB of bandwidth per month
6. YouTube Studio
Visit: https://studio.youtube.com/
Being one of the most viewed streaming media portals that offer free uploads and even lets you monetize your creations, YouTube has a separate section called YouTube Studio, where you can edit clips before publishing.
You Must Know
- A Gmail account is required to use YouTube Studio.
- All the videos can be uploaded without a watermark for free without any expiration date
- No subscription plans are enforced
To blur video online with YouTube Studio:
- Visit the URL given above using your favorite web browser (Google Chrome is recommended)
- If not already signed in, do so with your Gmail account when prompted for
- Click UPLOAD VIDEOS from the Channel dashboard section and on the Upload videos box, click SELECT FILES, and select and upload the source video from your PC
- While the video uploads, specify other publishing preferences using the options present on the box that appears
- Click NEXT from the bottom-right corner when done.
- On the Video elements box, add your preferred elements, click NEXT, review the details on the Checks box, click NEXT, choose your visibility preferences on the Visibility box, and click.
- Back on the main page, click Content from the navigation pane on the left and hover the mouse over the thumbnail of the video you uploaded, and click the Details icon that appears on the right.
- Click Editor from the Your video pane on the left and click GET STARTED from the right window and click BLUR PARTS OF YOUR VIDEO from the lower area of the Video editor window on the right.
- Click Custom blur from the list that appears and position and scale the selection box in the preview window to cover the object that needs to be blurred and drag the Blur slider in the Timeline to specify the duration of the effect.
- Optionally click BLUR from the upper-left area of the Video editor window to add another instance of the blur effect to blur another segment of the clip and click SAVE from the upper-right side.
- Click SAVE again on the Save changes confirmation box to save the changes
- Wait while Google reviews the modifications, and the video is made available for viewing
- Once this is done, get back to the Content section as explained earlier
- Hover mouse over the thumbnail, and click the Options icon from the right this time
- Click Download from the list to download the video with the blur effect to your PC
You can check more details of blurring videos with YouTube Studio .
Limitations
- Your YouTube account must be verified before you can publish long videos. Account verification is free.
- No copyright content is allowed to be published on YouTube
- No pornography or unethical content is allowed to be posted on YouTube
Bonus: How to Blur Video with Wondershare Filmora
Download Mac Version ](https://tools.techidaily.com/wondershare/filmora/download/ )
Wondershare Filmora is a versatile post-production application with a built-in video editing tools and effects to edit videos with ease. The tool is usually considered a good competitor of Adobe Premiere Pro, Final Cut Pro X, etc.
Like any other similar program, even Filmora allows you to blur both landscape and portrait videos. The processes of getting these tasks done are given below:
1. Blur a Part of Video (Landscape Video)
Step 1: Import and Add the Source Video to Timeline
Launch Wondershare Filmora on your Windows or Mac computer (MacBook Pro M1 is used here), make sure that the 16:9 (Widescreen) layout preset is selected under the Select Project Aspect Ratio section on the flash screen, and click New Project.
Next, click to select My Media from the menu bar if not already selected, and from the navigation pane on the left, select Project Media.
Then, click Import from the Media box, select and import the source video to the program, drag the clip from the Media box to the Timeline at the bottom, and when the confirmation box appears, choose the option either under the Keep Project Settings or Match to Media sections to add the video to the Timeline.
Step 2: Add Blur Effect
Go to Effects from the menu bar, select Default from the top of the navigation pane on the left, and select Utility from the available list. From the right box, drag the Mosaic effect, and place it on a separate layer above the video track in the Timeline.
Step 3: Customize the Effect to Blur a Part of Video
Double-click the Blur effect in the Timeline, use the scaling handles in the preview window to scale and position the effect to cover your preferred part of the video and place it at your desired location respectively, choose a Mosaic style from the Type list present in the left box, and use the Intensity and Opacity sliders to customize further the appearance of effect as needed. Optionally, you can drag the side handles of the effect in the Timeline to adjust the duration of its visibility, and click OK from the bottom-right area of the upper-left box to save the changes.
2. Blur a Vertical Video
Download Mac Version ](https://tools.techidaily.com/wondershare/filmora/download/ )
Step 1: Import a Vertical Video and Add It to the Timeline
Use the above method to import the source vertical video to Filmora X and add it to the Timeline. However, it is important to choose the button under the Keep Project Settings label when the confirmation box appears, so you get some real estate because of the landscape mode to add the blur effect.
Step 2: Add Background Blur
Go to Effects and choose Default from the left pane, as explained earlier. Next, expand the Filters tree if not already expanded, click to select Background Blur from the list, from the box on the right, choose and drag your preferred blur effect, and place it on a separate layer in the Timeline above the video track.
Step 3: Customize the Blur Effect
Double-click the Blur effect in the Timeline, and use the available sliders to customize the effect that best fits your needs.
You can find more details about how to blur the background in the portrait video with Filmora .
Conclusion
If you want to have full control over the post-production process, having an efficient desktop program like Wondershare Filmora X would be something you might be looking for. On the other hand, if you are not a professional editor or are not much into editing and prefer playing around with the tools for personal use, going for a decent web portal to blur video online is your best bet.
Liza Brown
Liza Brown is a writer and a lover of all things video.
Follow @Liza Brown
How to Change Shape of a Video?
How to Change Shape of a Video?
Liza Brown
Mar 27, 2024• Proven solutions
While most videos nowadays are rectangular, and are recorded in either landscape or portrait orientation, there are some social media platforms that require the clips to be square shaped. If you want to upload your footages on such websites, it is essential to learn how to change video shape.
Another benefit of changing the shape of the recorded films is that they can be adjusted in limited amount of space, especially if they are to be posted on a website. Furthermore, some fancy designs such as star-shaped or circle-shaped videos attract more attention when used in digital marketing campaigns.
With that said, here you will learn how to change the shape of a video using one of the most advanced and versatile post-production tools, Wondershare Filmora.
Want to learn more about aspect ratio of your video? Click here!
Or, you just want to transfer your video into vertical.
Part 1: How to Change Video Shape from Rectangle to Square
Depending on the recording device and the target audiences a video is intended to be distributed to, the aspect ratio of the produced footage could be 16:9, 4:3, or 21:9 that makes the film rectangular-shaped. Given that, the aspect ratio can be modified to change the film shape from rectangle to square.
The instructions given below explain how to change video shape from rectangle to square in Wondershare Filmora:
Step 1: Import Video to Timeline
Launch Wondershare Filmora on your PC (a Windows 10 computer is used here), click the Add Files icon from the center of the Media window present at the upper-left section, and use the Open box that appears to select and import the source video to Filmora. Next, drag the video from the Media window to the Timeline, and select your preferred option when/if the Project Setting confirmation box appears.
Step 2: Change Aspect Ratio
Select the video in the Timeline, and click the Crop and Zoom icon from the upper-left area of the Timeline itself. On the Crop and Zoom window that opens next, select 1:1 from the Ratio drop-down list, and click OK to save the new setting.
Step 3: Export the Video
Click EXPORT from the top-center area of the interface, go to the Local tab on the Export box, select your preferred format from the Format list in the left pane, optionally click SETTINGS from the right window to make other adjustments if necessary, and click EXPORT from the bottom-right corner of the box.
For more details, please refer to this article: How to Resize a Video to Right Aspect Ratio and Size.
Part 2: Change Video Shape by Cropping
If your preferred aspect ratio isn’t available in the ‘Ratio’ drop-down list of the ‘Crop and Zoom’ window, Wondershare Filmora allows you to manually change the video to a custom shape.

You can learn how to change the shape of a video to an unlisted aspect ratio by following the instructions given below:
Step 1: Import the Video and Get to the Crop and Zoom Window
Follow the method explained in Step 1 of Part 1 to import a video to Wondershare Filmora, and then add it to the Timeline.
Step 2: Select Custom Ratio
Select the video in the Timeline, and click the Crop and Zoom icon as explained earlier to open its window. Next, select Custom from the Ratio drop-down list to be able to crop the videos unproportionally.
Step 3: Crop the Video Manually
Drag the cropping handles from any one edge of the video. Repeat this process for all the four sides to select the area of interest. Click OK to save the changes.
Step 4: Export the Video
Follow the process explained in Step 3 of Part 1 to export the modified video.
Part 3: Change Video Shape to Circle or Other Shapes in Filmora
Another, rather better way of changing videos to custom shapes is with the help of image or shape masking.
In Filmora you can apply image masks either from the existing presets, i.e. circle, star, diamond, etc., or you can add custom photos if need be. Professionals generally use custom pictures to create fancy logos and titles.
On the other hand, shape masking allows you to mask a background video with a foreground footage in a custom shape.
Although the basic concept of both types of masking is same, the options available under each can be used to produce effective outputs.
That said, following are the instructions to apply both types of masking to your videos:
Image Masking
The steps given below explain how to change video shape with image masking in Filmora:
Step 1: Add Clip to Timeline
Use the method explained in the previous sections to import a clip and add it to the Timeline.
Step 2: Add Image Mask
Click Effects from the standard toolbar at the top, select Utility from the left pane, drag Image Mask from the Utility window, and drop it on top of the video itself in the Timeline. Notice how the fx icon appears on the video layer showing that the effect has been successfully added.
Step 3: Customize Image Mask
On the Timeline, double-click the video layer you applied Image Mask to, and notice all the available shapes available under the Preset Mask section on the Video Effects > Image Mask window that appears at the upper-left area. You can double-click any of the available shape presets to apply it to the video layer. In addition, drag the X and Y, and Width, Height, and Feather sliders to adjust the mask’s position, size, and edge smoothness respectively. You can also check the Invert Mask box to reverse the masking effect on the video. Finally, click OK to save the changes, and follow the method explained in earlier parts to export the video.
Shape Masking
The following steps explain how to change the shape of a video with shape masks in Filmora:
Step 1: Get to the Utility Window
Add at two footages on their individual layers in the Timeline (make sure to place the second layer above the first one), and follow the method explained above to get to the Effects > Utility window.
Step 2: Add Shape Mask
Drag Shape Mask from the Utility window, and drop it on top of the video itself in the Timeline. Confirm that the fx icon appears on the video layer to ensure that the effect has been applied.
Step 3: Customize Shape Mask
Double-click the video layer in the Timeline you applied shape mask to. On the Video Effects > Shape Mask window, use the X and Y, and Width, Height, and Feather sliders to adjust the mask’s position, size and edge smoothness respectively. Optionally check the Invert Mask box to reverse the masking effect, and click OK to save the settings. Next, follow the method explained earlier to export the video.
FAQs
1. What’s the difference between Image Mask and Shape Mask in Filmora?
A) In Filmora, Image Mask allows you to use an image (or any available preset) for masking so that the background footage is cropped to the shape of the picture. This is generally used to create logos and dynamic titles for movies or documentaries. On the other hand, Shape Mask enables you to mask the background clip with the foreground footage in the form of a shape that could be positioned and customized using the available sliders.
2. How many image masks are available in Filmora?
A) At the time of this writing, Wondershare Filmora has around 40 image mask presets. In addition, it also allows you to add custom images from your PC for more dynamic approach.
Liza Brown
Liza Brown is a writer and a lover of all things video.
Follow @Liza Brown
Liza Brown
Mar 27, 2024• Proven solutions
While most videos nowadays are rectangular, and are recorded in either landscape or portrait orientation, there are some social media platforms that require the clips to be square shaped. If you want to upload your footages on such websites, it is essential to learn how to change video shape.
Another benefit of changing the shape of the recorded films is that they can be adjusted in limited amount of space, especially if they are to be posted on a website. Furthermore, some fancy designs such as star-shaped or circle-shaped videos attract more attention when used in digital marketing campaigns.
With that said, here you will learn how to change the shape of a video using one of the most advanced and versatile post-production tools, Wondershare Filmora.
Want to learn more about aspect ratio of your video? Click here!
Or, you just want to transfer your video into vertical.
Part 1: How to Change Video Shape from Rectangle to Square
Depending on the recording device and the target audiences a video is intended to be distributed to, the aspect ratio of the produced footage could be 16:9, 4:3, or 21:9 that makes the film rectangular-shaped. Given that, the aspect ratio can be modified to change the film shape from rectangle to square.
The instructions given below explain how to change video shape from rectangle to square in Wondershare Filmora:
Step 1: Import Video to Timeline
Launch Wondershare Filmora on your PC (a Windows 10 computer is used here), click the Add Files icon from the center of the Media window present at the upper-left section, and use the Open box that appears to select and import the source video to Filmora. Next, drag the video from the Media window to the Timeline, and select your preferred option when/if the Project Setting confirmation box appears.
Step 2: Change Aspect Ratio
Select the video in the Timeline, and click the Crop and Zoom icon from the upper-left area of the Timeline itself. On the Crop and Zoom window that opens next, select 1:1 from the Ratio drop-down list, and click OK to save the new setting.
Step 3: Export the Video
Click EXPORT from the top-center area of the interface, go to the Local tab on the Export box, select your preferred format from the Format list in the left pane, optionally click SETTINGS from the right window to make other adjustments if necessary, and click EXPORT from the bottom-right corner of the box.
For more details, please refer to this article: How to Resize a Video to Right Aspect Ratio and Size.
Part 2: Change Video Shape by Cropping
If your preferred aspect ratio isn’t available in the ‘Ratio’ drop-down list of the ‘Crop and Zoom’ window, Wondershare Filmora allows you to manually change the video to a custom shape.
You can learn how to change the shape of a video to an unlisted aspect ratio by following the instructions given below:
Step 1: Import the Video and Get to the Crop and Zoom Window
Follow the method explained in Step 1 of Part 1 to import a video to Wondershare Filmora, and then add it to the Timeline.
Step 2: Select Custom Ratio
Select the video in the Timeline, and click the Crop and Zoom icon as explained earlier to open its window. Next, select Custom from the Ratio drop-down list to be able to crop the videos unproportionally.
Step 3: Crop the Video Manually
Drag the cropping handles from any one edge of the video. Repeat this process for all the four sides to select the area of interest. Click OK to save the changes.
Step 4: Export the Video
Follow the process explained in Step 3 of Part 1 to export the modified video.
Part 3: Change Video Shape to Circle or Other Shapes in Filmora
Another, rather better way of changing videos to custom shapes is with the help of image or shape masking.
In Filmora you can apply image masks either from the existing presets, i.e. circle, star, diamond, etc., or you can add custom photos if need be. Professionals generally use custom pictures to create fancy logos and titles.
On the other hand, shape masking allows you to mask a background video with a foreground footage in a custom shape.
Although the basic concept of both types of masking is same, the options available under each can be used to produce effective outputs.
That said, following are the instructions to apply both types of masking to your videos:
Image Masking
The steps given below explain how to change video shape with image masking in Filmora:
Step 1: Add Clip to Timeline
Use the method explained in the previous sections to import a clip and add it to the Timeline.
Step 2: Add Image Mask
Click Effects from the standard toolbar at the top, select Utility from the left pane, drag Image Mask from the Utility window, and drop it on top of the video itself in the Timeline. Notice how the fx icon appears on the video layer showing that the effect has been successfully added.
Step 3: Customize Image Mask
On the Timeline, double-click the video layer you applied Image Mask to, and notice all the available shapes available under the Preset Mask section on the Video Effects > Image Mask window that appears at the upper-left area. You can double-click any of the available shape presets to apply it to the video layer. In addition, drag the X and Y, and Width, Height, and Feather sliders to adjust the mask’s position, size, and edge smoothness respectively. You can also check the Invert Mask box to reverse the masking effect on the video. Finally, click OK to save the changes, and follow the method explained in earlier parts to export the video.
Shape Masking
The following steps explain how to change the shape of a video with shape masks in Filmora:
Step 1: Get to the Utility Window
Add at two footages on their individual layers in the Timeline (make sure to place the second layer above the first one), and follow the method explained above to get to the Effects > Utility window.
Step 2: Add Shape Mask
Drag Shape Mask from the Utility window, and drop it on top of the video itself in the Timeline. Confirm that the fx icon appears on the video layer to ensure that the effect has been applied.
Step 3: Customize Shape Mask
Double-click the video layer in the Timeline you applied shape mask to. On the Video Effects > Shape Mask window, use the X and Y, and Width, Height, and Feather sliders to adjust the mask’s position, size and edge smoothness respectively. Optionally check the Invert Mask box to reverse the masking effect, and click OK to save the settings. Next, follow the method explained earlier to export the video.
FAQs
1. What’s the difference between Image Mask and Shape Mask in Filmora?
A) In Filmora, Image Mask allows you to use an image (or any available preset) for masking so that the background footage is cropped to the shape of the picture. This is generally used to create logos and dynamic titles for movies or documentaries. On the other hand, Shape Mask enables you to mask the background clip with the foreground footage in the form of a shape that could be positioned and customized using the available sliders.
2. How many image masks are available in Filmora?
A) At the time of this writing, Wondershare Filmora has around 40 image mask presets. In addition, it also allows you to add custom images from your PC for more dynamic approach.
Liza Brown
Liza Brown is a writer and a lover of all things video.
Follow @Liza Brown
Also read:
- New In 2024, S Top-Rated Video Editing Software for Music and Video Production
- New In 2024, Ditch Subtitle Edit Explore These Exceptional Mac Subtitle Editors
- New In 2024, Image Ratio Mastery Learn to Calculate, Find, and Adjust Like a Pro
- New In 2024, Filmora 13 Download Free Unleash Your Creativity
- New Unbiased AVS Video Editor Review Is It the Right Choice for You?
- Updated From LOL to OMG The Best Meme Generator Apps for Mobile for 2024
- New Best Video Editing Programs for GoPro Users Looking Beyond Studio for 2024
- New In 2024, Best Online Video Trailer Makers
- Trim and Edit MP4 Videos with These Free Tools (2023 Review) for 2024
- New In 2024, Boost Your Visibility LinkedIn Video Size and Aspect Ratio Tips
- New In 2024, Mac Video Creator Effortless Video Production for Beginners and Pros
- The Ultimate Guide to Android Video Editing Top 10 Free and Paid Apps for 2024
- New In 2024, The Ultimate Guide to Converting MP4 to MP3 Best Converters
- Updated In 2024, MP3 to MP4 Conversion Things You Need to Know
- New The Power of Pro How Final Cut Pro Surpasses Final Cut Express for 2024
- New In 2024, Steady Shots Best Apps for Video Stabilization
- New In 2024, Unlock FCPs Full Potential Top 5 Editing Secrets Revealed
- New In 2024, Best Cartoon Animation Software for Android and iOS
- 2024 Approved Mastering FCP 5 Essential Editing Techniques to Elevate Your Videos
- Measuring Up How to Calculate Pixel Dimensions Accurately for 2024
- New Add a Sense of Urgency 3 Quick Steps to Create a Countdown in FCPX for 2024
- New In 2024, From Download to Edit Installing Videoleap on Your MacBook
- Updated 2024 Approved Windows Movie Maker Download Instructions For PC and Laptop Users
- New In 2024, Bring Your Memories to Life How to Create Engaging Home DVDs
- Updated 2024 Approved The Best Free and Paid Online Vertical Video Editors
- New 2024 Approved Transform Your Videos Best Mobile Editing Apps for iPhone and Android
- Updated In 2024, S Leading Video Editing Tools with Built-In Music Libraries
- Updated 2024 Approved Final Cut Pro X Productivity Hacks Top 40 Keyboard Shortcuts
- Updated 2024 Approved Split Your Screen for Free Top Online and Offline Video Editors
- Updated 2024 Approved Unleash Your Creativity Top 40 Keyboard Shortcuts for Final Cut Pro X Users
- Updated VHS Revival on Mobile Top Apps for iPhone and Android Users
- New FCPX Jump Cut Mastery Elevate Your Video Editing Skills for 2024
- Updated In 2024, The Ultimate List of Music Video Makers for Unforgettable Videos
- Updated In 2024, Video Editing Software Like VirtualDub Top Alternatives
- In 2024, Make a Lasting Impression 6 Best Movie Intro Creation Tools
- In 2024, Mac Subtitle Editor Showdown Top Alternatives to Subtitle Edit
- What is Fake GPS Location Pro and Is It Good On Samsung Galaxy F14 5G? | Dr.fone
- How to Unlock Samsung Galaxy A54 5G Phone without Google Account?
- In 2024, Sim Unlock Oppo A2 Phones without Code 2 Ways to Remove Android Sim Lock
- All You Need To Know About Mega Greninja For Honor Magic 6 | Dr.fone
- Updated Animate in the Cloud Stop Motion Software Features, Guidelines, and Alternatives Compared
- How PGSharp Save You from Ban While Spoofing Pokemon Go On Oppo F25 Pro 5G? | Dr.fone
- How to Change GPS Location on Oppo Reno 11F 5G Easily & Safely | Dr.fone
- Full Tutorial to Bypass Your Xiaomi Redmi A2 Face Lock?
- In 2024, Top 7 Skype Hacker to Hack Any Skype Account On your OnePlus Nord N30 SE | Dr.fone
- iPhone Transfer Transfer Contact from Apple iPhone 13 Pro Max to iPhone without iCloud | Dr.fone
- Apply These Techniques to Improve How to Detect Fake GPS Location On Apple iPhone 13 | Dr.fone
- In 2024, Fake the Location to Get Around the MLB Blackouts on Apple iPhone 13 Pro Max | Dr.fone
- In 2024, Bypass iCloud Activation Lock with IMEI Code On Apple iPhone XR
- 5 Hassle-Free Solutions to Fake Location on Find My Friends Of Samsung Galaxy S23 | Dr.fone
- 2024 Approved Discover the Secret to Affordable Final Cut Pro Education Bundle Revealed
- How to Transfer Data After Switching From OnePlus Nord CE 3 Lite 5G to Latest Samsung | Dr.fone
- How To Transfer Data From Apple iPhone SE To Other iPhone 13 devices? | Dr.fone
- How to Unlock iPhone X without Passcode or Face ID
- In 2024, How to Fix Apple iPhone 13 Passcode not Working? | Dr.fone
- In 2024, Hacks to do pokemon go trainer battles For Poco C51 | Dr.fone
- In 2024, How to Unlock a Network Locked Samsung Galaxy S23 Ultra Phone?
- 4 Solutions to Fix Unfortunately Your App Has Stopped Error on Xiaomi Redmi Note 12 Pro 4G | Dr.fone
- Reset iTunes Backup Password Of Apple iPhone 13 Pro Prevention & Solution | Dr.fone
- In 2024, Unlock Your Disabled iPhone 8 Plus Without iTunes in 5 Ways
- 2024 Approved Mavericks Movie Maker How to Create Stunning Videos
- 10 Amazing Whiteboard Animation Video Examples You Need to Bookmark for 2024
- Why are your photos lost from iPhone 15 Pro? | Stellar
- Quickly Remove Google FRP Lock on Xiaomi
- In 2024, A Quick Guide to Tecno Pova 5 Pro FRP Bypass Instantly
- In 2024, How to Unlock Xiaomi 14 Ultra Phone without PIN
- In 2024, 8 Best Apps for Screen Mirroring Realme Narzo 60x 5G PC | Dr.fone
- Remove the lock of Lava Blaze 2 Pro
- Hacks to do pokemon go trainer battles For Vivo Y78+ | Dr.fone
- Forgot Your Apple ID Password and Email From iPhone 14 Plus? Heres the Best Fixes
- In 2024, Here are Some of the Best Pokemon Discord Servers to Join On Xiaomi Redmi A2 | Dr.fone
- In 2024, Top 4 Ways to Trace Nokia C300 Location | Dr.fone
- Title: Updated In 2024, Free Gaming Paradise Top 10 Download Sites for PC and Android
- Author: Ava
- Created at : 2024-04-29 13:14:15
- Updated at : 2024-04-30 13:14:15
- Link: https://video-content-creator.techidaily.com/updated-in-2024-free-gaming-paradise-top-10-download-sites-for-pc-and-android/
- License: This work is licensed under CC BY-NC-SA 4.0.
