

Trim and Share Best Free Online and Offline Video Trimmers for Windows 10 for 2024
Trim and Share: Best Free Online and Offline Video Trimmers for Windows 10
If you enjoy recording and editing videos, you may have some hefty video files to trim. Do you wish to split the long videos into shorter ones? Do you want to remove the black part that appears at the start and conclusion of your videos? Typically, a video trimmer is required.
However, finding an excellent video trimmer for Windows 10 is a difficult job. But don’t worry, a few excellent video trimmers are reviewed in this article, all of which are simple to use and have useful features. Let’s get started!
In this article
01 Best Free Video Trimmer for Windows 10
02 Best Free Online Video Trimmer for Windows 10
03 How to Trim Multiple Parts from One Video Faster?
Part 1: Best Free Video Trimmer for Windows 10
Time is important, and some people cannot afford to waste it. Or maybe they want to cut a specific part of the video on their PC. For both of these tasks, they need a video trimmer. Following are the best video trimmers for Windows 10:
1. Windows 10 Video Editor
Windows 10 features an excellent video editor , offering a full collection of video creation and editing features that use music, graphics, animation, and 3D effects to convey your narrative. Video Editor is Windows 10’s replacement for Movie Maker, emphasizing simple creative tools that allow you to convey your narrative.
Features:
- It supports all of the windows 10 input and output formats
- Lets you add texts and animations to the videos
- You can split the videos using this tool
- It leaves no watermark on the video
Follow the steps below to trim the videos using Windows 10 Photo video editor :
Step 1: Open the Photos app and click on Video Editor to proceed.
Step 2: Now, click on New Video Project to import the video you wish to trim.
Step 3: Drag the video to the editing toolbar and click on Trim.
Step 4: Now adjust the sliders accordingly to trim your video and click on Done to save the trimmed video.

2. Windows 10 - Movies & TV
You will be surprised to learn that there might be another built-in video trimmer for Windows 10 - Movies & TV - that works effectively to edit films with no effort. It is another built-in tool with an easy-to-use interface. It supports multiple formats, such as mp4, asf, m4v, mov, etc.
Features:
- It supports all the input and output formats of windows 10
- You can trim the videos while watching it
- Offers several editing features to edit the video
Follow the steps below to trim the videos using Movies & TV:
Step 1: Open the video you wish to trim with Movies & TV on your PC.
Step 2: Click the Edit button in the bottom right corner and then choose the Trim tool from the menu that appears.
Step 3: After loading the movie, move it over the timeline in the playback windows to finish the cutting procedure and save it on Windows 10.

3. Filmora Instant Cutter Tool
The Instant Cutter tool in Wondershare Filmora video editor lets you input huge video clips in formats and rapidly reduce or combine them without re-encoding. This is a very valuable tool when working with high-resolution movies. It supports MP4/MOV and MTS/M2TS video files.
For Win 7 or later (64-bit)
For macOS 10.12 or later
Features:
- It maintains the quality of the video
- It supports 4K UHD video formats
- It allows you to merge the videos
- You can trim massive files with ease
Follow the steps below to trim the videos using this video editor:
Step 1: Launch Filmora, select Import, and then Import with Instant Cutter Tool.
Step 2: Click Open File under the Trim tab to select a video from your computer.
Step 3: Drag the editing sliders on their timeline to decide which parts of the clip to preserve.
Step 4: To preview the segment, choose it in the left side window and hit the Play option.
Step 5: After you’ve finished previewing the video, click Export to save it.

4. FilmForth
FilmForth is an effective and straightforward free video editor , media encoder, and slideshows video creator for Windows 10. It is a free movie director and slideshow creator for Windows. FilmForth, as a free film editor, can export any output format to share it with social media platforms, like YouTube, Facebook, Instagram, and Twitch.
Features:
- It is a completely free editing tool
- It can export the video to social media
- It allows you to create slideshows
- You can also create videos with this tool
Follow the steps below to trim the videos using this video editor:
Step 1: Open FilmForth and select New Project to add the video to be edited.
Step 2: Now, drag the video to the timeline.
Step 3: Select Edit, then Trim from the popup menu.
Step 4: Now, adjust the sliders as needed to trim your movie.
Step 5: Simply click the red Save Video button in the editor’s bottom right corner.

5. VSDC Free video editor
VSDC Video Editor is a free video trimmer that converts one clip type to another. It helps you create various shaped masks for obscuring, blurring, or emphasizing specific aspects in your movie. It supports all major formats, including mkv, mp4, mov, and wav.
Features:
- It allows you to apply visual and audio effects to your videos.
- It has several blending options and Instagram-style filters.
- It can upload videos straight to YouTube.
- It enables you to construct your multimedia file library.
Follow the steps below to trim the videos using this video editor:
Step 1: Open VSDC Free Video Editor on your PC and import the video you wish to trim.
Step 2: Select Cutting and splitting in the object properties or the object menu**.**
Step 3: Mark the region to be removed and then click the Cut region button.
Step 4: Then, in the bottom right corner, click the Apply changes option to save your changes.

Part 2: Best Free Online Video Trimmer for Windows 10
Trimming the unnecessary parts of the video is the need of the hour. However, some people don’t prefer downloading a tool for it. So, the following online video trimmers for windows 10 can assist them in their job:
2. Online Video Cutter

Online Video Cutter allows you to trim easily, crop, and twist videos, as well as modify the playing speed. It functions in any browser — tested it in Safari on the Mac, which isn’t frequently recognized by online tools, and it worked flawlessly – and the only restriction is that your file size cannot exceed 500MB.
You may export in MP4, MKV, or MOV format. It does not require any sign up from the user to trim the video and nor does it leave any watermark on the video after editing.
Features:
- Supports every kind of browser
- It does not leave any watermark
- Offers a quick no-encode alternative
3. Kapwing

Kapwing is a straightforward online video editor. It displays a preview of your video on the left side of the screen, and users can use the scales or timeouts to choose the start and finish times of their cut.
Kapwing is a premium service, which means free users can only upload files up to 250MB in size, and exports may only be 7 minutes long. There’s no need to register yourself for editing the videos through Kapwing, but it does leave a watermark.
Features:
- Allows you to preview the video
- It is quite simple to use for editing
- It does not require any sign up before trimming
4. Adobe Creative Cloud Express
Adobe Creative Cloud Express is the best free online video trimmer windows 10 available for making simple modifications to videos. It enables the creation, editing, and sharing of new projects from any device. It recognizes original edit spots automatically and works with all AVI, MXF, and other file formats. Furthermore, the curve is managed automatically by this online video trimmer.
However, it needs registration to edit the video, and the free version leaves a watermark.
Features:
- It reformats the video automatically.
- It enables the editing platform to be expanded.
- It integrates with other apps and services without a hitch.

5. Clipchamp

Clipchamp is a freemium service, which means it has a free tier, but the finest features are only available to paying users. Your video output is restricted to general standards at 480p quality.
Since Safari does not support Clipchamp, you must use the Chrome or Edge browser on a Mac. Users need to register themselves for editing the videos through Clipchamp. The free version also leaves a watermark on the video.
Features:
- Helps the user to add audio and video
- Lets you export the video to social media platforms
- Offers multiple editing features for the video
6. Clideo
Clideo provides several online tools for looping, flipping, reversing, and filtering video clips, adding subtitles, resizing clips, and creating memes. Each tool is a standalone application running in your internet browser.
There are file size restrictions while using the free version, i.e., 500MB or fewer files, as with other online services. A Pro subscription, which costs $9 per month, allows you access to the full version. Clideo does not need registration, but the free version leaves a watermark.
Features:
- Excellent editing features in the free version
- Helps you add subtitles to the video
- Allows you to compress/resize the video

Part 3: How to Trim Multiple Parts from One Video Faster?
Trimming usually entails eliminating a piece of the beginning or conclusion of the clip. In various methods, Filmora’s sophisticated video trimmer speeds up the process of removing undesirable bits of a film. Follow the instruction below to trim multiple parts from the video faster using the Mark In and Out approach:
Step 1: Double-click on the media files in the Media library to preview it in the Preview window.
Step 2: Choose one of the markers shown below the video preview. Highlight the in and out marks by tapping on the video and dragging the cursor to the beginning and finish positions.

Step 3: Move the video from the media files to the timeline, and it will be cut according to your specifications. You may now repeat the technique to extract additional sections of the clip.

For Win 7 or later (64-bit)
For macOS 10.12 or later
Note: You can also move them to the timeline to combine the clips.
FAQs
Does Windows Have a Video Trimmer?
Windows do include a video editor that lets you trim the videos as per choice. You may trim films by adjusting the start and stop locations in the Video Editor accessed through the Photos app on Windows 10.
Conclusion
As said above, trimming the unnecessary parts of the video is the need of the hour. To ease the procedure of finding the best video trimmer windows 10, some excellent video trimmers are reviewed in this article. Simply select one that appeals to you and begin video editing for a quality video result.
02 Best Free Online Video Trimmer for Windows 10
03 How to Trim Multiple Parts from One Video Faster?
Part 1: Best Free Video Trimmer for Windows 10
Time is important, and some people cannot afford to waste it. Or maybe they want to cut a specific part of the video on their PC. For both of these tasks, they need a video trimmer. Following are the best video trimmers for Windows 10:
1. Windows 10 Video Editor
Windows 10 features an excellent video editor , offering a full collection of video creation and editing features that use music, graphics, animation, and 3D effects to convey your narrative. Video Editor is Windows 10’s replacement for Movie Maker, emphasizing simple creative tools that allow you to convey your narrative.
Features:
- It supports all of the windows 10 input and output formats
- Lets you add texts and animations to the videos
- You can split the videos using this tool
- It leaves no watermark on the video
Follow the steps below to trim the videos using Windows 10 Photo video editor :
Step 1: Open the Photos app and click on Video Editor to proceed.
Step 2: Now, click on New Video Project to import the video you wish to trim.
Step 3: Drag the video to the editing toolbar and click on Trim.
Step 4: Now adjust the sliders accordingly to trim your video and click on Done to save the trimmed video.
2. Windows 10 - Movies & TV
You will be surprised to learn that there might be another built-in video trimmer for Windows 10 - Movies & TV - that works effectively to edit films with no effort. It is another built-in tool with an easy-to-use interface. It supports multiple formats, such as mp4, asf, m4v, mov, etc.
Features:
- It supports all the input and output formats of windows 10
- You can trim the videos while watching it
- Offers several editing features to edit the video
Follow the steps below to trim the videos using Movies & TV:
Step 1: Open the video you wish to trim with Movies & TV on your PC.
Step 2: Click the Edit button in the bottom right corner and then choose the Trim tool from the menu that appears.
Step 3: After loading the movie, move it over the timeline in the playback windows to finish the cutting procedure and save it on Windows 10.
3. Filmora Instant Cutter Tool
The Instant Cutter tool in Wondershare Filmora video editor lets you input huge video clips in formats and rapidly reduce or combine them without re-encoding. This is a very valuable tool when working with high-resolution movies. It supports MP4/MOV and MTS/M2TS video files.
For Win 7 or later (64-bit)
For macOS 10.12 or later
Features:
- It maintains the quality of the video
- It supports 4K UHD video formats
- It allows you to merge the videos
- You can trim massive files with ease
Follow the steps below to trim the videos using this video editor:
Step 1: Launch Filmora, select Import, and then Import with Instant Cutter Tool.
Step 2: Click Open File under the Trim tab to select a video from your computer.
Step 3: Drag the editing sliders on their timeline to decide which parts of the clip to preserve.
Step 4: To preview the segment, choose it in the left side window and hit the Play option.
Step 5: After you’ve finished previewing the video, click Export to save it.
4. FilmForth
FilmForth is an effective and straightforward free video editor , media encoder, and slideshows video creator for Windows 10. It is a free movie director and slideshow creator for Windows. FilmForth, as a free film editor, can export any output format to share it with social media platforms, like YouTube, Facebook, Instagram, and Twitch.
Features:
- It is a completely free editing tool
- It can export the video to social media
- It allows you to create slideshows
- You can also create videos with this tool
Follow the steps below to trim the videos using this video editor:
Step 1: Open FilmForth and select New Project to add the video to be edited.
Step 2: Now, drag the video to the timeline.
Step 3: Select Edit, then Trim from the popup menu.
Step 4: Now, adjust the sliders as needed to trim your movie.
Step 5: Simply click the red Save Video button in the editor’s bottom right corner.
5. VSDC Free video editor
VSDC Video Editor is a free video trimmer that converts one clip type to another. It helps you create various shaped masks for obscuring, blurring, or emphasizing specific aspects in your movie. It supports all major formats, including mkv, mp4, mov, and wav.
Features:
- It allows you to apply visual and audio effects to your videos.
- It has several blending options and Instagram-style filters.
- It can upload videos straight to YouTube.
- It enables you to construct your multimedia file library.
Follow the steps below to trim the videos using this video editor:
Step 1: Open VSDC Free Video Editor on your PC and import the video you wish to trim.
Step 2: Select Cutting and splitting in the object properties or the object menu**.**
Step 3: Mark the region to be removed and then click the Cut region button.
Step 4: Then, in the bottom right corner, click the Apply changes option to save your changes.
Part 2: Best Free Online Video Trimmer for Windows 10
Trimming the unnecessary parts of the video is the need of the hour. However, some people don’t prefer downloading a tool for it. So, the following online video trimmers for windows 10 can assist them in their job:
2. Online Video Cutter
Online Video Cutter allows you to trim easily, crop, and twist videos, as well as modify the playing speed. It functions in any browser — tested it in Safari on the Mac, which isn’t frequently recognized by online tools, and it worked flawlessly – and the only restriction is that your file size cannot exceed 500MB.
You may export in MP4, MKV, or MOV format. It does not require any sign up from the user to trim the video and nor does it leave any watermark on the video after editing.
Features:
- Supports every kind of browser
- It does not leave any watermark
- Offers a quick no-encode alternative
3. Kapwing
Kapwing is a straightforward online video editor. It displays a preview of your video on the left side of the screen, and users can use the scales or timeouts to choose the start and finish times of their cut.
Kapwing is a premium service, which means free users can only upload files up to 250MB in size, and exports may only be 7 minutes long. There’s no need to register yourself for editing the videos through Kapwing, but it does leave a watermark.
Features:
- Allows you to preview the video
- It is quite simple to use for editing
- It does not require any sign up before trimming
4. Adobe Creative Cloud Express
Adobe Creative Cloud Express is the best free online video trimmer windows 10 available for making simple modifications to videos. It enables the creation, editing, and sharing of new projects from any device. It recognizes original edit spots automatically and works with all AVI, MXF, and other file formats. Furthermore, the curve is managed automatically by this online video trimmer.
However, it needs registration to edit the video, and the free version leaves a watermark.
Features:
- It reformats the video automatically.
- It enables the editing platform to be expanded.
- It integrates with other apps and services without a hitch.
5. Clipchamp
Clipchamp is a freemium service, which means it has a free tier, but the finest features are only available to paying users. Your video output is restricted to general standards at 480p quality.
Since Safari does not support Clipchamp, you must use the Chrome or Edge browser on a Mac. Users need to register themselves for editing the videos through Clipchamp. The free version also leaves a watermark on the video.
Features:
- Helps the user to add audio and video
- Lets you export the video to social media platforms
- Offers multiple editing features for the video
6. Clideo
Clideo provides several online tools for looping, flipping, reversing, and filtering video clips, adding subtitles, resizing clips, and creating memes. Each tool is a standalone application running in your internet browser.
There are file size restrictions while using the free version, i.e., 500MB or fewer files, as with other online services. A Pro subscription, which costs $9 per month, allows you access to the full version. Clideo does not need registration, but the free version leaves a watermark.
Features:
- Excellent editing features in the free version
- Helps you add subtitles to the video
- Allows you to compress/resize the video
Part 3: How to Trim Multiple Parts from One Video Faster?
Trimming usually entails eliminating a piece of the beginning or conclusion of the clip. In various methods, Filmora’s sophisticated video trimmer speeds up the process of removing undesirable bits of a film. Follow the instruction below to trim multiple parts from the video faster using the Mark In and Out approach:
Step 1: Double-click on the media files in the Media library to preview it in the Preview window.
Step 2: Choose one of the markers shown below the video preview. Highlight the in and out marks by tapping on the video and dragging the cursor to the beginning and finish positions.
Step 3: Move the video from the media files to the timeline, and it will be cut according to your specifications. You may now repeat the technique to extract additional sections of the clip.
For Win 7 or later (64-bit)
For macOS 10.12 or later
Note: You can also move them to the timeline to combine the clips.
FAQs
Does Windows Have a Video Trimmer?
Windows do include a video editor that lets you trim the videos as per choice. You may trim films by adjusting the start and stop locations in the Video Editor accessed through the Photos app on Windows 10.
Conclusion
As said above, trimming the unnecessary parts of the video is the need of the hour. To ease the procedure of finding the best video trimmer windows 10, some excellent video trimmers are reviewed in this article. Simply select one that appeals to you and begin video editing for a quality video result.
Elevate Your Videos: Mastering Lower Thirds in FCPX
What Makes the Best Lower Thirds in Final Cut Pro X?

Liza Brown
Oct 26, 2023• Proven solutions
The videos drop facts to audiences and educate the viewers. The video makers strive to offer a complete overview of the topic within a short duration. Graphics, elements, modules occupy the screen and excites the viewers. The advent of video editing innovations shifted the perspectives.
Here comes an enlightening discussion about the lower third modules in your videos. The tips and tricks associated with the making of this lower third element are available in the below content. Surf them carefully and learn the fabulous lower third templates to customize your videos to the next level.

Part1: What is the lower third?
Are you aware of lower third elements? If you are a newbie video designer, then this article ignites you with reliable facts about it. The lower third module is a graphical element that takes the lower position of a video.
It carries texts to educate the viewers related to the discussed topic in the video. It adds information to the existing content playing in the background. On a clear note, had you observed the news boards displayed at the bottom of the news channel? Yes, of course, most of you must be aware of this element flashing the current news.
You can also observe this lower third module during an interview session on your television. It displays the name of the interviewer and extra data about the session.
On a short note, you can define the lower third module as a piece of a graphical element that hangs at the bottom of the screen displaying related data in pace with the existing video content. You can create the lower third module using an incredible tool for your videos in no time. Identify the factors to work on to refine the lower third module appearance and performances.

Part2: What factors contribute to a good lower third?
While designing the lower third element for your video, you must keep an eye on few factors. Work on the below attributes to build a good lower third element. Always remember to keep it simple to obtain the desired outcomes.
- The harmony of hues
The color combinations of your lower third element play a vital factor. Choose the right mix of shades to attract the viewers. Based on the background, use a complementary color to fill your lower third module for a persuasive display. Ensure the combination of hues must not distract the viewers at any cost.
Try different color schemes with Green, Magenta, Orange, and Blue to create a mesmerizing display of the lower third element. You can also use a color picker tool to choose the right combination of colors that match perfectly with the background and typography.

- Motion effect
Thrill your audience by inserting movements with the lower third elements. When you add some motion effect to this module, it adds flavors to your video. Work on this feature in-depth and observe whether the lower third’s motion effect excites the audience. Customize the animation time, style, and the way it flashes on the screen.
Make the movements simple and do not add too many moves which distract the viewers. Decide how long the animation should play and align the texts and other related elements according to obtain a perfect look. With the perfect text movements, you can draw the attention of the viewers in no time.
- Fonts
The next crucial factor associated with the lower third element is fonts. Font size, the style creates an impact on the overall design of a lower third module.
If you concentrate on this attribute, you will surely end up with a professional design. Choose the font style and sine according to the background content. Do not overshadow the lower third element with the playing content, instead try to add value to it.
- Right timing of showing up
Now, you must sense the time for the module to turn up on the video. The timing factor contributes a lot to the perfect display of the lower third element.
Set the right time for the element to enter the screen. Decide the enter and exit timing attribute for this element to reach the audience in a better way.
- Logos and positions
Position the element at the perfect place on the screen to ensure its visibility. You can also insert your logos along with the texts to enhance your brand.
Proper alignment and the best coordinates on the screen make the lower third module shine better in your video. Proper placement of this element decides the impact on it.
![]()
Part3: How to make a lower third quickly in final cut pro X?
The Final Cut Pro X is a fabulous program to edit your videos professionally. Insert the desired elements and customize them quickly. To work on this platform, you do not require any special skills.
Click, drag, and drop appropriately to include the right elements at the perfect positions on the video. There is ample personalization options built-in with the Final Cut Pro X. It is high time to discover them for optimal utilization.
Features of Final Cut Pro X to design lower third module element
- It has a built-in title element to add the desired texts in the video
- Quick customization option to type in the relevant message on the screen.
- This app consist of a user-friendly interface and the controls are explicit for easy reach.
- Personalize the lower third element further using the ‘Generator’ option
- You can include animations for the lower third module to persuade the viewers.

In this section, you will learn to make a lower third element using a Final Cut Pro X tool. It is high to check out the steps in detail.
1Step 1: Download the tool
You can download the app and install them in your system. Launch the tool by double-tapping the tool icon.

2Step 2: Add the Title
In the home screen, import the video that requires the edits and then tap the ‘Titles’ tab at the left top of the screen. Click the ‘Build-in/Build-out’ option to custom the Title element. According to your needs, you can repeat it to insert the desired titles on the video screen.

3Step 3: Customize the Title
Now, you can edit the texts in the inserted titles and add animation to the element using the attributes under the ‘Generator’ tab. Modify the title’s textures, background, and positions using the relevant options displayed. Choose accordingly to personalize the title element based on your requirement.

Use the above instructions, insert the lower third element in your video effortlessly. Simple click and drag actions are sufficient to carry out the desired effects on the element.
For those who still need more guides about making lower thirds, this Filmora tutorial may help a lot.


Part 4: Where to find great lower thirds templates for final cut pro X?
You can find the best collections of lower third templates in the online space. Evanto Elements offers an incredible design structure for the lower third module to add value to your videos. They are unique and jaw-dropping. You can opt for this template, instead of creating from the scratch.
According to your needs, you can select the template, customize it, and insert them on your videos flawlessly. Evanto offers the lower third templates based on the video content. It has organized the templates based on the end-use. Check out few suggestions on the built-in templates for the lower third.
YouTube Lower Thirds
If you have a YouTube channel, then make use of this collection to add a lower third module for your video. Increase the followers by adding the perfect texts at the right time on the screen. Easy to use design and displays attractive appearances.
Pop Lower Thirds template
Colorful and yet attractive design from the Evanto elements. This design has a fresh and creative structure to convince the viewer’s needs. It has a high-end resolution with a duration control option.
Minimalistic collection
In this template group, you can find the design seems to be simple and minimal. It offers a lighter touch to your videos. The text overlays do not distract the viewers. Everything looks the same but still, you can feel the difference in it when you customize it according to your needs.
Conclusion
Thus, this article had given you enlightening discussion about the lower third elements. Insert this module optimally in your videos and obtain the desired outcomes. Enhance the design of the lower third element using the Final Cut Pro X app and feel the difference in your video.
Display the texts promptly to enlighten the audience. Connect the texts to the target audience without distracting them. Work on this challenging element using a professional app like the Final Cut Pro X program. Stay tuned with this article to discover the new horizons of video editing.
Liza Brown
Liza Brown is a writer and a lover of all things video.
Follow @Liza Brown
Liza Brown
Oct 26, 2023• Proven solutions
The videos drop facts to audiences and educate the viewers. The video makers strive to offer a complete overview of the topic within a short duration. Graphics, elements, modules occupy the screen and excites the viewers. The advent of video editing innovations shifted the perspectives.
Here comes an enlightening discussion about the lower third modules in your videos. The tips and tricks associated with the making of this lower third element are available in the below content. Surf them carefully and learn the fabulous lower third templates to customize your videos to the next level.
Part1: What is the lower third?
Are you aware of lower third elements? If you are a newbie video designer, then this article ignites you with reliable facts about it. The lower third module is a graphical element that takes the lower position of a video.
It carries texts to educate the viewers related to the discussed topic in the video. It adds information to the existing content playing in the background. On a clear note, had you observed the news boards displayed at the bottom of the news channel? Yes, of course, most of you must be aware of this element flashing the current news.
You can also observe this lower third module during an interview session on your television. It displays the name of the interviewer and extra data about the session.
On a short note, you can define the lower third module as a piece of a graphical element that hangs at the bottom of the screen displaying related data in pace with the existing video content. You can create the lower third module using an incredible tool for your videos in no time. Identify the factors to work on to refine the lower third module appearance and performances.
Part2: What factors contribute to a good lower third?
While designing the lower third element for your video, you must keep an eye on few factors. Work on the below attributes to build a good lower third element. Always remember to keep it simple to obtain the desired outcomes.
- The harmony of hues
The color combinations of your lower third element play a vital factor. Choose the right mix of shades to attract the viewers. Based on the background, use a complementary color to fill your lower third module for a persuasive display. Ensure the combination of hues must not distract the viewers at any cost.
Try different color schemes with Green, Magenta, Orange, and Blue to create a mesmerizing display of the lower third element. You can also use a color picker tool to choose the right combination of colors that match perfectly with the background and typography.
- Motion effect
Thrill your audience by inserting movements with the lower third elements. When you add some motion effect to this module, it adds flavors to your video. Work on this feature in-depth and observe whether the lower third’s motion effect excites the audience. Customize the animation time, style, and the way it flashes on the screen.
Make the movements simple and do not add too many moves which distract the viewers. Decide how long the animation should play and align the texts and other related elements according to obtain a perfect look. With the perfect text movements, you can draw the attention of the viewers in no time.
- Fonts
The next crucial factor associated with the lower third element is fonts. Font size, the style creates an impact on the overall design of a lower third module.
If you concentrate on this attribute, you will surely end up with a professional design. Choose the font style and sine according to the background content. Do not overshadow the lower third element with the playing content, instead try to add value to it.
- Right timing of showing up
Now, you must sense the time for the module to turn up on the video. The timing factor contributes a lot to the perfect display of the lower third element.
Set the right time for the element to enter the screen. Decide the enter and exit timing attribute for this element to reach the audience in a better way.
- Logos and positions
Position the element at the perfect place on the screen to ensure its visibility. You can also insert your logos along with the texts to enhance your brand.
Proper alignment and the best coordinates on the screen make the lower third module shine better in your video. Proper placement of this element decides the impact on it.
![]()
Part3: How to make a lower third quickly in final cut pro X?
The Final Cut Pro X is a fabulous program to edit your videos professionally. Insert the desired elements and customize them quickly. To work on this platform, you do not require any special skills.
Click, drag, and drop appropriately to include the right elements at the perfect positions on the video. There is ample personalization options built-in with the Final Cut Pro X. It is high time to discover them for optimal utilization.
Features of Final Cut Pro X to design lower third module element
- It has a built-in title element to add the desired texts in the video
- Quick customization option to type in the relevant message on the screen.
- This app consist of a user-friendly interface and the controls are explicit for easy reach.
- Personalize the lower third element further using the ‘Generator’ option
- You can include animations for the lower third module to persuade the viewers.
In this section, you will learn to make a lower third element using a Final Cut Pro X tool. It is high to check out the steps in detail.
1Step 1: Download the tool
You can download the app and install them in your system. Launch the tool by double-tapping the tool icon.
2Step 2: Add the Title
In the home screen, import the video that requires the edits and then tap the ‘Titles’ tab at the left top of the screen. Click the ‘Build-in/Build-out’ option to custom the Title element. According to your needs, you can repeat it to insert the desired titles on the video screen.
3Step 3: Customize the Title
Now, you can edit the texts in the inserted titles and add animation to the element using the attributes under the ‘Generator’ tab. Modify the title’s textures, background, and positions using the relevant options displayed. Choose accordingly to personalize the title element based on your requirement.
Use the above instructions, insert the lower third element in your video effortlessly. Simple click and drag actions are sufficient to carry out the desired effects on the element.
For those who still need more guides about making lower thirds, this Filmora tutorial may help a lot.
Part 4: Where to find great lower thirds templates for final cut pro X?
You can find the best collections of lower third templates in the online space. Evanto Elements offers an incredible design structure for the lower third module to add value to your videos. They are unique and jaw-dropping. You can opt for this template, instead of creating from the scratch.
According to your needs, you can select the template, customize it, and insert them on your videos flawlessly. Evanto offers the lower third templates based on the video content. It has organized the templates based on the end-use. Check out few suggestions on the built-in templates for the lower third.
YouTube Lower Thirds
If you have a YouTube channel, then make use of this collection to add a lower third module for your video. Increase the followers by adding the perfect texts at the right time on the screen. Easy to use design and displays attractive appearances.
Pop Lower Thirds template
Colorful and yet attractive design from the Evanto elements. This design has a fresh and creative structure to convince the viewer’s needs. It has a high-end resolution with a duration control option.
Minimalistic collection
In this template group, you can find the design seems to be simple and minimal. It offers a lighter touch to your videos. The text overlays do not distract the viewers. Everything looks the same but still, you can feel the difference in it when you customize it according to your needs.
Conclusion
Thus, this article had given you enlightening discussion about the lower third elements. Insert this module optimally in your videos and obtain the desired outcomes. Enhance the design of the lower third element using the Final Cut Pro X app and feel the difference in your video.
Display the texts promptly to enlighten the audience. Connect the texts to the target audience without distracting them. Work on this challenging element using a professional app like the Final Cut Pro X program. Stay tuned with this article to discover the new horizons of video editing.
Liza Brown
Liza Brown is a writer and a lover of all things video.
Follow @Liza Brown
Want to Edit Video with Sony Vegas on Mac? But It only Available on Windows Platform, Below Are the Best Alternatives to Sony Vegas Pro Mac
For creating high-grade dynamic videos, simply shooting or recording a clip is not enough. Finding the best Sony Ve gas alternatives for Mac is essential since the software mainly targets Windows users.
Thanks to developers, there are many free and paid options to start your video editing journey on a Mac. Let’s first have a look at alternative software you could consider.
- Lightworks
- Wondershare Filmora
- Adobe Premiere Pro
- HitFilm Express
- Kdenlive
- OpenShot
- Blender
- Jahshaka
- Final Cut Pro
- Cyberlink PowerDirector 365
- What are the limitations when using Sony Vegas (Vegas Pro) on Mac?
- Hot FAQs about Vegas Pro Alternatives
Part 1: Sony Vegas Pro Alternatives & Competitors Overview
Here is a list of the top 10 tools we found after research. For an easier understanding, the following are the essential points of difference between alternative video editing software types for Sony Vegas Pro in a tabular form.
| Software | Supported OS | Price | Editor’s Verdict |
|---|---|---|---|
| Lightworks | Windows, Mac, Linux | Create-$9.99/month, Pro-$23.99/month | Medium-Difficult |
| Wondershare Filmora | Windows, Mac | Annual-$49.99, Perpetual-$79.99 | Easy |
| Adobe Premiere Pro | Windows, Mac | $20.99/month | Easy-Medium |
| HitFilm Express | Windows, Mac | Free | Easy |
| Kdenlive | Windows, Mac, Linux | Free | Medium-Difficult |
| OpenShot | Windows, Mac, Linux, OsX | Free | Medium-Difficult |
| Blender | Windows, Mac, Linux | Free | Easy |
| Jahshaka | Windows, Linux, OsX | Free | Easy-Medium |
| Final Cut Pro | Mac | Lifetime-$299.99 | Easy-Medium |
| Cyberlink PowerDirector 365 | Windows, Mac | Lifetime-$52.50 | Easy-Medium |
Part 2: Top 10 Sony Vegas (Vegas Pro) Alternatives & Competitors
Now that you know the primary differences between the Sony Vegas Pro alternatives. Are you find anything you like? Let’s move on to more details for your further consideration.
1. Lightworks
With Lightworks, using the independent timeline codec, format, and resolution alteration in videos is extremely simple. In addition, you can use the multi-cam editing feature for real-time, high-quality editing work. Moreover, drag and drop elements into videos for optimized video editing work, including pre-existing Storyboard points.
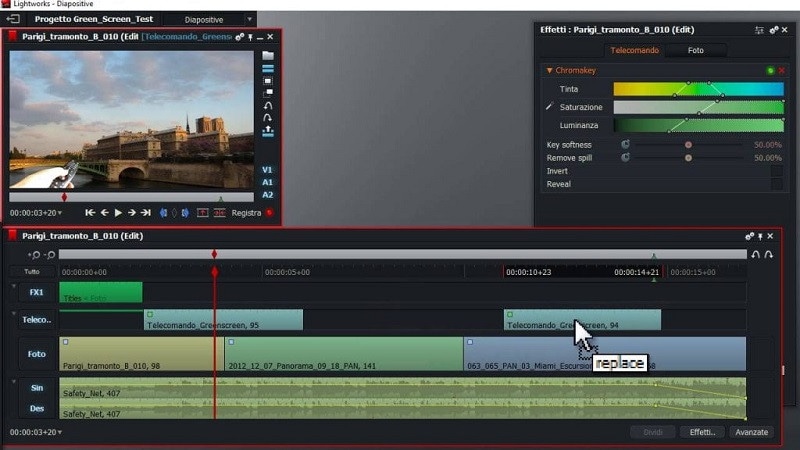
Main Features:
- Industry-grade features like QC, transcoding, and automated transfer are available.
- Edit files at different FPS limits and use three-point editing for recording/source files.
- Insert files and overwrite on a new project, replace, backfill, and fit to fill your video clips.
- Attach Storyboard tiles and match-frame clips/sub-clips easily.
Pros
- Flexible functionality and speedy transfers
- Edit files with professional movie-like quality
- Auto Sync feature for automatic timeline re-syncing is available
Cons
- Direct X is only available on the Windows version
- TotalFX plugin is not available for free- you have to upgrade to use them
OS Compatibility: Windows , Mac , Linux
Best For: Editing experts creating visually animated and professional-looking short videos can work with Lightworks.
What users say:
For professional-level video editing work, Lightworks brings a lot of resources and elements to users. According to reviews , people who have tried it have experienced better video editing functionality with these resources.
2. Wondershare Filmora
The top Vegas Pro alternative that both Windows and Mac users can opt for is Filmora. The software has advanced AI-incorporated editing functions for automated editing work, including preset effects from FX plugins. Besides that, you can easily add pre-set transitions, audio clips, text, images, and more.
Beginners find it simple to navigate through its interface and can opt for the Instant Mode function for automatic video edits .
Free Download For Win 7 or later(64-bit)
Free Download For macOS 10.14 or later

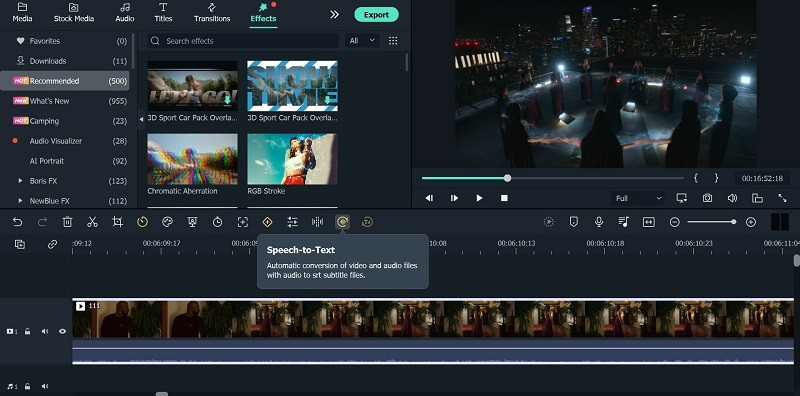
For a better idea of how this works, you should check out this tutorial video: https://filmora.wondershare.com/get-creative/make-a-video-quickly.html
Main Features:
- Instant Mode is available for automatic video/audio project editing out of 6 shorter clips.
- Support Advanced editing tools like Chroma Key and AI Portrait.
- Record voiceover, apply speech-to-text/text-to-speech functions, and more audio editing features.
- OpenFX plugins like BorisFX and NewBlue FX for a better list of pre-set effects.
Pros
- Simple to use and navigate on the editor timeline, especially with drag-and-drop support
- Output your editing files in different video/audio formats
- Quickly share the file on Vimeo or YouTube, besides downloading it on the local hard drive
Cons
- Free trial users cannot bring their Instant Mode-created videos into the editor timeline
- 4K support only with selected MKV, MOV, M4V (for Mac), and MP4 codecs
OS Compatibility: Windows , Mac
G2 Rating: 4.4 out of 5
Best For: All types of users like educators, students, homeowners, businesses, and video editors for comprehensive video editing tools and uses.
What users say:
Filmora is extremely simple to use, with advanced features available for top-level video editing work. Users mention in reviews how they have benefitted from the simple functionality and dynamic AI-based features available here for video editing.
3. Adobe Premiere Pro
If you are looking for high-quality programs like Sony Vegas, Adobe Premiere Pro is a reliable choice. This editing software allows you to easily create, delete, and move big video projects. Moreover, you can work on multiple files simultaneously and use shortcuts for faster editing work.
Preset filters and editing features are also available here, especially if they choose the Adobe Creative Cloud option.
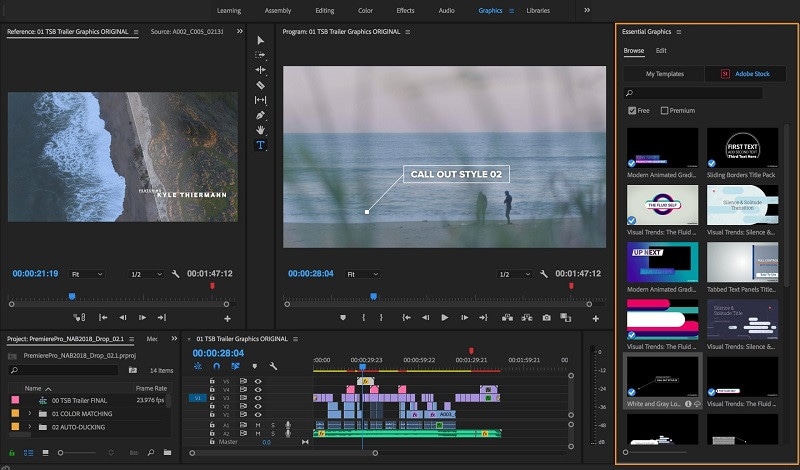
Main Features:
- Multiple pre-set transitions and effects are available for quick thematic changes.
- Add graphics, titles, and captions.
- Color grading and correction tools are available.
- It is possible to add keyframing and animation elements.
Pros
- Opting for group plans for video editing practice and learning using Adobe Premiere Pro is possible
- Aligns audio with videos instantly during editing
- Utilize Quick Export functionality for video files in some taps
Cons
- Windows High Contrast Mode is supported but to a limited extent, like with menus and title bars
- HDR workflows can only be handled on the Windows version with DisplayHDR 400 support
OS Compatibility: Windows , Mac
G2 Rating: 4.5 out of 5
Best For: Professional editors and trainers can use the various plans under Adobe Premiere Pro for video/audio editing.
What users say:
Advertisers and videographers enjoy high-grade video editing features and like the simple effects and interface quality. The motion graphics support in Adobe Premiere Pro is high-grade as well.
4. HitFilm Express
A capable Sony Vegas free alternative that you should check out is HitFilm Express. With this, you can expect many prepared designs for quick video edits. Additionally, you can manually customize the video files you are working on with high-grade personalization features available in the timeline.

Main Features:
- Pre-set customizable designs are available.
- Built-in sound effects and soundtracks are usable for free.
- Cache renders in timelines are optimized.
- The New Grade Clips feature allows users to apply varying effects to many video clips.
Pros
- Stable process of switching between timelines with an active orbit tool
- Easy to switch between 2D/3D timelines while using the text tool
- Simple to use for an unlimited period
Cons
- Does not work on older versions than Windows 10 and macOS 10.14
- Users cannot integrate this with Vegas Pro like before
OS Compatibility: Windows , Mac
TechRadar Rating: 4.5 out of 5
Best For: This software is a high-quality video editor for custom video editing work, fit for beginners and professionals alike.
What users say:
HitFilm Express is easy to use and efficient in the market for professional-level editing. The tutorial is available here for quick learning about the steps, and expandable features are well-admired by users.
5. Kdenlive
A high-quality Sony Vegas open-source variety that you should seriously consider is Kdenlive. The video editor comes with MLT framework support and holds many tools for optimizing video editing.
To simplify, you can arrange and adjust various video/audio tracks and mute or lock specific ones as needed. Add everything from filters, texts, and transitions using this editor for high-grade video projects.
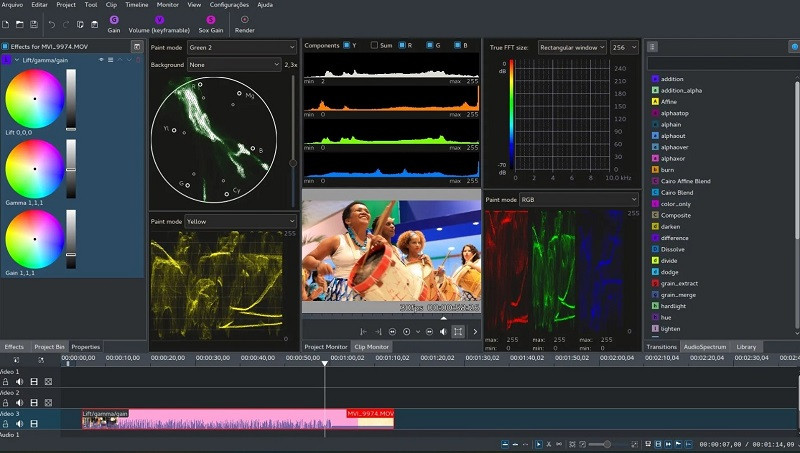
Main Features:
- Get an automatic backup of your video project while you are editing it.
- Use proxy editing to create low-resolution source clip copies and render them later on computers.
- Multiple video/audio scopes are available for monitoring projects like vectorscope, waveform, and RDB Parade.
- Many transition and effect choices to use.
Pros
- Flexibility with themes to add with multiple options
- Pre-render specific timeline parts for preview
- Effects are simple to use with keyframing quality
Cons
- Complex for completely non-technical users to adapt to
- Only supports 64-bit versions in regards to Windows-based compatibility
Trustpilot Rating: 3.7 out of 5
Best For: High-level editing experts who need strong video editing and monitoring features in an open-source platform.
What users say:
Kdenlive, as an open-source video editing software, assures quick and straightforward usability with projects. Per reviews , users like the ability to make simple video edits without bugs in this editor and quickly export finished projects.
6. OpenShot
OpenShot is a high-quality cross-platform video editor that you can use on different devices for quick but dynamic video project edits. Use keyframing ability here to adjust the animated elements you add to the file.
Moreover, cut the videos with simple steps and add many audio tracks/background videos/watermarks in layers. Also, get several video effects to optimize the video look easily.
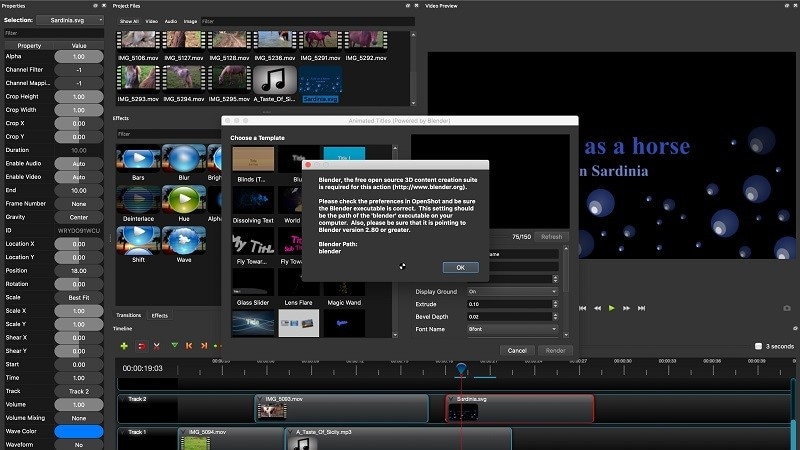
Main Features:
- Adjust video speed in reverse motion, fast forward, and slow motion.
- Render effects and 3D animated elements into the video project.
- Get title templates and edit them as needed.
- Visualize the background audio beats with waveform support.
Pros
- Very user-friendly interface with a simple navigation guarantee
- Supports more than 70 languages that you can translate as well using LaunchPad
- Drag-and-drop functionality is supported for adding images, audio, and videos into the OpenShot editor timeline
Cons
- Some bug issues can occur
- Slightly complex learning curve
OS Compatibility: Windows , Linux , OsX
G2 Rating: 4.4 out of 5
Best For: Professional-level video editing experts can opt for this cross-platform free software for high-quality video creations.
What users say:
The OpenShot software is suitable for high-quality video editing across different devices and operating systems. Users like the lack of automated watermarks on all videos, its simple dashboard, and its multi-track editing ability, all available for free.
7. Blender
Blender is free video editing software like Sony Vegas that users can use for video editing, but it is also effective for game development with animations. Indeed, you can create and render dynamic-looking scenes with features like Cycles.
Furthermore, the software has a rich modelling toolset with solutions like curves and sculpting tools.

Main Features:
- Completely customization-friendly UI, shortcuts, and window layout here.
- Customization and scripting are possible to do with this software due to the Python API support.
- Supports access and integration of many pipeline tools for projects.
- Comes with advanced simulation-based features available in MantaFlow and Bullet libraries.
Pros
- Basic and advanced tools for quick video edits
- Strong composition and masking ability with object-based motion tracking benefits
- Easily create short animations with Blender
Cons
- Data under the standalone games created here fall under GPL conditions
- Strict licensing rules are applicable here
OS Compatibility: Windows , Mac , Linux
G2 Rating: 4.5 out of 5
Best For: Game developers and videographers for companies can use this open-source platform for creation and editing.
What users say:
Blender is a capable software for animation-based editing, with high-quality game-based features and interactive elements that make editing simple. As per reviews , users like the simple animation-based tools and fast rendering it offers.
8. Jahshaka
Users of Jahshaka can experience an inclusive, collaborative environment for metaverse-level editing work. This free editing software, like Sony Vegas, focuses mainly on VR-based editing functions and comes with powerful tools for project management and content creation.
Take the help of other team members to collaborate on dynamic virtual world building, editing, and publishing.
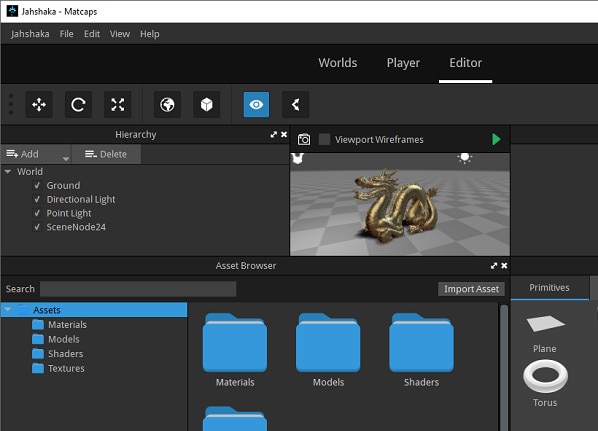
Main Features:
- Compatible player for different desktop and mobile devices.
- Create diversified worlds and scenes with one comprehensive platform.
- Immersive software 3D video development.
- Access to pre-built content and libraries of scenes and assets
Pros
- Easily share and distribute your virtual projects
- Deliver final projects offline and online
- An interactive multi-user engine is available
Cons
- Usable for a niche audience and does not include standard video editing tools
- Jahshaka V2 legacy support is no longer active
OS Compatibility: Windows , Linux , OsX
SourceForge Rating: 4.4 out of 5
Best For: Professional video editors who want a collaborative experience in VR-based development and publishing.
What users say:
Jahshaka is a suitable program for optimized VR-based editing with many preset features and themes to choose from. Most users enjoy the new features and worlds and can work with them efficiently.
9. Final Cut Pro
One of the top Sony Vegas alternatives Mac users can safely turn to is Final Cut Pro, which has powerful modern video editing features. With this software, you will access Cinematic Mode, which you can use to create stylish and thematic video scenes.
Similarly, the Object Tracker features utilize ML technology to automatically detect objects and faces in moving videos. It can align effects and titles accurately with the graphical elements in videos.

Main Features:
- Object Tracker feature for using color correction and adding texts into moving videos.
- Accelerated functional for motion tracking with Apple Neural Engine.
- Add high-quality effects and titles into videos with Cinematic Mode support.
- Preset audio tracks and royalty-free sound effects are available for editing.
Pros
- Handle color grading for optimized scene quality
- Adjust the field depth and focus depth in clips
- Share projects across iOS and macOS platforms
Cons
- Not valid for Windows users
- Relatively high cost to avail the paid version with all advanced features
OS Compatibility: Mac
TrustRadius Rating: 4.8 out of 5
Best For: Professional video editors, students, and filmmakers who want to create cinematic-quality video projects.
What users say:
Final Cut Pro is an efficient Mac-based video editing tool with easy sharing and editing capabilities, rich effects/transitions options, and fast rendering ability. Customers enjoy the intuitive non-linear editor, easy accessibility to social media platforms for file exporting, and live scrubbing, as noted in one review .
10. Cyberlink PowerDirector 365
Another Sony Vegas mac alternative for Windows you should give a try is PowerDirector 365 from Cyberlink. This software removes or compiles video clips and uses masking features like image/custom masks.
Preset special effects, blending modes, and sound effects are available here for quick editing. Additionally, the AI-powered Motion Tracking traces objects in clips and adds graphics, animations, and text quickly in line with it.

Main Features:
- You can create and remove videos with masking features.
- Drag and drop the pre-set effects and texts into videos.
- Adjust video clips with tools for border, gradation, and shadowing.
- Multiple animations, callouts, graphics, and stickers to add to videos.
Pros
- Use green screen functionality for quick background removal or editing
- Automatic audio mastering and mixing functionality are available
- Keyframing benefits for customized animations like scaling and positioning
Cons
- Dolby Digital-centric audio codec is not available for users
- Users can try features like Room Echo Removal and NVIDIA A/V Denoise only on Windows 11
OS Compatibility: Windows
TechRadar Rating: 4.5 out of 5
Best For: Professional videographers and regular users who want a Windows-based video editing software for standard video clip editing.
What users say:
Cyberlink PowerDirector is a powerful video editor with standard editing functions many users have tried and benefited from. According to customers , the program has high-quality video and audio editing benefits for presentations, with additional effects/splitting/cropping features.
Part 3: What are the limitations when using Sony Vegas (Vegas Pro) on Mac?
Yes, with the given Sony Vegas alternatives, Mac and Windows users can benefit heavily. But why is it important to try for a replacement when Sony Vegas Pro is relatively efficient software?
To know the answer, you should take the time to understand its limitations, which do exist.
It only works for Windows users
The Sony Vegas Pro software is not available for Mac or other operating systems besides Windows. In addition, it’ll be really complex and time-consuming, even if you opt for virtual machine software or handle dual booting techniques to configure the software on your Mac or Linux.
You need to invest in other hardware
Sony Vegas Pro does do not work within one comprehensive platform like other capable video editing software types, like Wondershare Filmora . You have to acquire a powerful PC and tools to operate it separately. The software works very slowly on older devices.
Not incredibly unique
The functions of Sony Vegas Pro match somewhat with other options in the market. So, users would not expect much value in purchasing this software’s plans that they want to upgrade from their previous system, but on the other hand, the available features are mostly standard-level in functionality as well.
Hot FAQs about Vegas Pro Alternatives
After knowing these details, many users still have specific common queries about opting for a Sony Vegas Pro alternatively. So these are some common FAQs about this- answered.
1. Can Sony Vegas be used on a Mac?
No, it is impossible to directly use Sony Vegas on macOS devices since it does not support it. Instead, you have to separately use a dual boot strategy or virtual machine software to activate the video editor on Mac devices, but the process for that is complex.
2. Is Wondershare Filmora or Vegas Pro better?
Wondershare Filmora and Vegas Pro are top-level options in video and audio editing projects with professional-level editing accuracy. However, Filmora has a cohesive ecosystem with rich AI and standard functions and comes with Mac/Windows support. So, in that sense, Filmora is comparatively a better choice.
Final Words
In place of Sony Vegas Pro, any of these options would also give you a great user experience. Out of them, Filmora is one that we will recommend due to its multi-faceted benefits and features for Mac and Windows users. Ultimately, make your decision based on your particular needs.
Free Download For Win 7 or later(64-bit)
Free Download For macOS 10.14 or later
Part 1: Sony Vegas Pro Alternatives & Competitors Overview
Here is a list of the top 10 tools we found after research. For an easier understanding, the following are the essential points of difference between alternative video editing software types for Sony Vegas Pro in a tabular form.
| Software | Supported OS | Price | Editor’s Verdict |
|---|---|---|---|
| Lightworks | Windows, Mac, Linux | Create-$9.99/month, Pro-$23.99/month | Medium-Difficult |
| Wondershare Filmora | Windows, Mac | Annual-$49.99, Perpetual-$79.99 | Easy |
| Adobe Premiere Pro | Windows, Mac | $20.99/month | Easy-Medium |
| HitFilm Express | Windows, Mac | Free | Easy |
| Kdenlive | Windows, Mac, Linux | Free | Medium-Difficult |
| OpenShot | Windows, Mac, Linux, OsX | Free | Medium-Difficult |
| Blender | Windows, Mac, Linux | Free | Easy |
| Jahshaka | Windows, Linux, OsX | Free | Easy-Medium |
| Final Cut Pro | Mac | Lifetime-$299.99 | Easy-Medium |
| Cyberlink PowerDirector 365 | Windows, Mac | Lifetime-$52.50 | Easy-Medium |
Part 2: Top 10 Sony Vegas (Vegas Pro) Alternatives & Competitors
Now that you know the primary differences between the Sony Vegas Pro alternatives. Are you find anything you like? Let’s move on to more details for your further consideration.
1. Lightworks
With Lightworks, using the independent timeline codec, format, and resolution alteration in videos is extremely simple. In addition, you can use the multi-cam editing feature for real-time, high-quality editing work. Moreover, drag and drop elements into videos for optimized video editing work, including pre-existing Storyboard points.
Main Features:
- Industry-grade features like QC, transcoding, and automated transfer are available.
- Edit files at different FPS limits and use three-point editing for recording/source files.
- Insert files and overwrite on a new project, replace, backfill, and fit to fill your video clips.
- Attach Storyboard tiles and match-frame clips/sub-clips easily.
Pros
- Flexible functionality and speedy transfers
- Edit files with professional movie-like quality
- Auto Sync feature for automatic timeline re-syncing is available
Cons
- Direct X is only available on the Windows version
- TotalFX plugin is not available for free- you have to upgrade to use them
OS Compatibility: Windows , Mac , Linux
Best For: Editing experts creating visually animated and professional-looking short videos can work with Lightworks.
What users say:
For professional-level video editing work, Lightworks brings a lot of resources and elements to users. According to reviews , people who have tried it have experienced better video editing functionality with these resources.
2. Wondershare Filmora
The top Vegas Pro alternative that both Windows and Mac users can opt for is Filmora. The software has advanced AI-incorporated editing functions for automated editing work, including preset effects from FX plugins. Besides that, you can easily add pre-set transitions, audio clips, text, images, and more.
Beginners find it simple to navigate through its interface and can opt for the Instant Mode function for automatic video edits .
Free Download For Win 7 or later(64-bit)
Free Download For macOS 10.14 or later
For a better idea of how this works, you should check out this tutorial video: https://filmora.wondershare.com/get-creative/make-a-video-quickly.html
Main Features:
- Instant Mode is available for automatic video/audio project editing out of 6 shorter clips.
- Support Advanced editing tools like Chroma Key and AI Portrait.
- Record voiceover, apply speech-to-text/text-to-speech functions, and more audio editing features.
- OpenFX plugins like BorisFX and NewBlue FX for a better list of pre-set effects.
Pros
- Simple to use and navigate on the editor timeline, especially with drag-and-drop support
- Output your editing files in different video/audio formats
- Quickly share the file on Vimeo or YouTube, besides downloading it on the local hard drive
Cons
- Free trial users cannot bring their Instant Mode-created videos into the editor timeline
- 4K support only with selected MKV, MOV, M4V (for Mac), and MP4 codecs
OS Compatibility: Windows , Mac
G2 Rating: 4.4 out of 5
Best For: All types of users like educators, students, homeowners, businesses, and video editors for comprehensive video editing tools and uses.
What users say:
Filmora is extremely simple to use, with advanced features available for top-level video editing work. Users mention in reviews how they have benefitted from the simple functionality and dynamic AI-based features available here for video editing.
3. Adobe Premiere Pro
If you are looking for high-quality programs like Sony Vegas, Adobe Premiere Pro is a reliable choice. This editing software allows you to easily create, delete, and move big video projects. Moreover, you can work on multiple files simultaneously and use shortcuts for faster editing work.
Preset filters and editing features are also available here, especially if they choose the Adobe Creative Cloud option.
Main Features:
- Multiple pre-set transitions and effects are available for quick thematic changes.
- Add graphics, titles, and captions.
- Color grading and correction tools are available.
- It is possible to add keyframing and animation elements.
Pros
- Opting for group plans for video editing practice and learning using Adobe Premiere Pro is possible
- Aligns audio with videos instantly during editing
- Utilize Quick Export functionality for video files in some taps
Cons
- Windows High Contrast Mode is supported but to a limited extent, like with menus and title bars
- HDR workflows can only be handled on the Windows version with DisplayHDR 400 support
OS Compatibility: Windows , Mac
G2 Rating: 4.5 out of 5
Best For: Professional editors and trainers can use the various plans under Adobe Premiere Pro for video/audio editing.
What users say:
Advertisers and videographers enjoy high-grade video editing features and like the simple effects and interface quality. The motion graphics support in Adobe Premiere Pro is high-grade as well.
4. HitFilm Express
A capable Sony Vegas free alternative that you should check out is HitFilm Express. With this, you can expect many prepared designs for quick video edits. Additionally, you can manually customize the video files you are working on with high-grade personalization features available in the timeline.
Main Features:
- Pre-set customizable designs are available.
- Built-in sound effects and soundtracks are usable for free.
- Cache renders in timelines are optimized.
- The New Grade Clips feature allows users to apply varying effects to many video clips.
Pros
- Stable process of switching between timelines with an active orbit tool
- Easy to switch between 2D/3D timelines while using the text tool
- Simple to use for an unlimited period
Cons
- Does not work on older versions than Windows 10 and macOS 10.14
- Users cannot integrate this with Vegas Pro like before
OS Compatibility: Windows , Mac
TechRadar Rating: 4.5 out of 5
Best For: This software is a high-quality video editor for custom video editing work, fit for beginners and professionals alike.
What users say:
HitFilm Express is easy to use and efficient in the market for professional-level editing. The tutorial is available here for quick learning about the steps, and expandable features are well-admired by users.
5. Kdenlive
A high-quality Sony Vegas open-source variety that you should seriously consider is Kdenlive. The video editor comes with MLT framework support and holds many tools for optimizing video editing.
To simplify, you can arrange and adjust various video/audio tracks and mute or lock specific ones as needed. Add everything from filters, texts, and transitions using this editor for high-grade video projects.
Main Features:
- Get an automatic backup of your video project while you are editing it.
- Use proxy editing to create low-resolution source clip copies and render them later on computers.
- Multiple video/audio scopes are available for monitoring projects like vectorscope, waveform, and RDB Parade.
- Many transition and effect choices to use.
Pros
- Flexibility with themes to add with multiple options
- Pre-render specific timeline parts for preview
- Effects are simple to use with keyframing quality
Cons
- Complex for completely non-technical users to adapt to
- Only supports 64-bit versions in regards to Windows-based compatibility
Trustpilot Rating: 3.7 out of 5
Best For: High-level editing experts who need strong video editing and monitoring features in an open-source platform.
What users say:
Kdenlive, as an open-source video editing software, assures quick and straightforward usability with projects. Per reviews , users like the ability to make simple video edits without bugs in this editor and quickly export finished projects.
6. OpenShot
OpenShot is a high-quality cross-platform video editor that you can use on different devices for quick but dynamic video project edits. Use keyframing ability here to adjust the animated elements you add to the file.
Moreover, cut the videos with simple steps and add many audio tracks/background videos/watermarks in layers. Also, get several video effects to optimize the video look easily.
Main Features:
- Adjust video speed in reverse motion, fast forward, and slow motion.
- Render effects and 3D animated elements into the video project.
- Get title templates and edit them as needed.
- Visualize the background audio beats with waveform support.
Pros
- Very user-friendly interface with a simple navigation guarantee
- Supports more than 70 languages that you can translate as well using LaunchPad
- Drag-and-drop functionality is supported for adding images, audio, and videos into the OpenShot editor timeline
Cons
- Some bug issues can occur
- Slightly complex learning curve
OS Compatibility: Windows , Linux , OsX
G2 Rating: 4.4 out of 5
Best For: Professional-level video editing experts can opt for this cross-platform free software for high-quality video creations.
What users say:
The OpenShot software is suitable for high-quality video editing across different devices and operating systems. Users like the lack of automated watermarks on all videos, its simple dashboard, and its multi-track editing ability, all available for free.
7. Blender
Blender is free video editing software like Sony Vegas that users can use for video editing, but it is also effective for game development with animations. Indeed, you can create and render dynamic-looking scenes with features like Cycles.
Furthermore, the software has a rich modelling toolset with solutions like curves and sculpting tools.
Main Features:
- Completely customization-friendly UI, shortcuts, and window layout here.
- Customization and scripting are possible to do with this software due to the Python API support.
- Supports access and integration of many pipeline tools for projects.
- Comes with advanced simulation-based features available in MantaFlow and Bullet libraries.
Pros
- Basic and advanced tools for quick video edits
- Strong composition and masking ability with object-based motion tracking benefits
- Easily create short animations with Blender
Cons
- Data under the standalone games created here fall under GPL conditions
- Strict licensing rules are applicable here
OS Compatibility: Windows , Mac , Linux
G2 Rating: 4.5 out of 5
Best For: Game developers and videographers for companies can use this open-source platform for creation and editing.
What users say:
Blender is a capable software for animation-based editing, with high-quality game-based features and interactive elements that make editing simple. As per reviews , users like the simple animation-based tools and fast rendering it offers.
8. Jahshaka
Users of Jahshaka can experience an inclusive, collaborative environment for metaverse-level editing work. This free editing software, like Sony Vegas, focuses mainly on VR-based editing functions and comes with powerful tools for project management and content creation.
Take the help of other team members to collaborate on dynamic virtual world building, editing, and publishing.
Main Features:
- Compatible player for different desktop and mobile devices.
- Create diversified worlds and scenes with one comprehensive platform.
- Immersive software 3D video development.
- Access to pre-built content and libraries of scenes and assets
Pros
- Easily share and distribute your virtual projects
- Deliver final projects offline and online
- An interactive multi-user engine is available
Cons
- Usable for a niche audience and does not include standard video editing tools
- Jahshaka V2 legacy support is no longer active
OS Compatibility: Windows , Linux , OsX
SourceForge Rating: 4.4 out of 5
Best For: Professional video editors who want a collaborative experience in VR-based development and publishing.
What users say:
Jahshaka is a suitable program for optimized VR-based editing with many preset features and themes to choose from. Most users enjoy the new features and worlds and can work with them efficiently.
9. Final Cut Pro
One of the top Sony Vegas alternatives Mac users can safely turn to is Final Cut Pro, which has powerful modern video editing features. With this software, you will access Cinematic Mode, which you can use to create stylish and thematic video scenes.
Similarly, the Object Tracker features utilize ML technology to automatically detect objects and faces in moving videos. It can align effects and titles accurately with the graphical elements in videos.
Main Features:
- Object Tracker feature for using color correction and adding texts into moving videos.
- Accelerated functional for motion tracking with Apple Neural Engine.
- Add high-quality effects and titles into videos with Cinematic Mode support.
- Preset audio tracks and royalty-free sound effects are available for editing.
Pros
- Handle color grading for optimized scene quality
- Adjust the field depth and focus depth in clips
- Share projects across iOS and macOS platforms
Cons
- Not valid for Windows users
- Relatively high cost to avail the paid version with all advanced features
OS Compatibility: Mac
TrustRadius Rating: 4.8 out of 5
Best For: Professional video editors, students, and filmmakers who want to create cinematic-quality video projects.
What users say:
Final Cut Pro is an efficient Mac-based video editing tool with easy sharing and editing capabilities, rich effects/transitions options, and fast rendering ability. Customers enjoy the intuitive non-linear editor, easy accessibility to social media platforms for file exporting, and live scrubbing, as noted in one review .
10. Cyberlink PowerDirector 365
Another Sony Vegas mac alternative for Windows you should give a try is PowerDirector 365 from Cyberlink. This software removes or compiles video clips and uses masking features like image/custom masks.
Preset special effects, blending modes, and sound effects are available here for quick editing. Additionally, the AI-powered Motion Tracking traces objects in clips and adds graphics, animations, and text quickly in line with it.
Main Features:
- You can create and remove videos with masking features.
- Drag and drop the pre-set effects and texts into videos.
- Adjust video clips with tools for border, gradation, and shadowing.
- Multiple animations, callouts, graphics, and stickers to add to videos.
Pros
- Use green screen functionality for quick background removal or editing
- Automatic audio mastering and mixing functionality are available
- Keyframing benefits for customized animations like scaling and positioning
Cons
- Dolby Digital-centric audio codec is not available for users
- Users can try features like Room Echo Removal and NVIDIA A/V Denoise only on Windows 11
OS Compatibility: Windows
TechRadar Rating: 4.5 out of 5
Best For: Professional videographers and regular users who want a Windows-based video editing software for standard video clip editing.
What users say:
Cyberlink PowerDirector is a powerful video editor with standard editing functions many users have tried and benefited from. According to customers , the program has high-quality video and audio editing benefits for presentations, with additional effects/splitting/cropping features.
Part 3: What are the limitations when using Sony Vegas (Vegas Pro) on Mac?
Yes, with the given Sony Vegas alternatives, Mac and Windows users can benefit heavily. But why is it important to try for a replacement when Sony Vegas Pro is relatively efficient software?
To know the answer, you should take the time to understand its limitations, which do exist.
It only works for Windows users
The Sony Vegas Pro software is not available for Mac or other operating systems besides Windows. In addition, it’ll be really complex and time-consuming, even if you opt for virtual machine software or handle dual booting techniques to configure the software on your Mac or Linux.
You need to invest in other hardware
Sony Vegas Pro does do not work within one comprehensive platform like other capable video editing software types, like Wondershare Filmora . You have to acquire a powerful PC and tools to operate it separately. The software works very slowly on older devices.
Not incredibly unique
The functions of Sony Vegas Pro match somewhat with other options in the market. So, users would not expect much value in purchasing this software’s plans that they want to upgrade from their previous system, but on the other hand, the available features are mostly standard-level in functionality as well.
Hot FAQs about Vegas Pro Alternatives
After knowing these details, many users still have specific common queries about opting for a Sony Vegas Pro alternatively. So these are some common FAQs about this- answered.
1. Can Sony Vegas be used on a Mac?
No, it is impossible to directly use Sony Vegas on macOS devices since it does not support it. Instead, you have to separately use a dual boot strategy or virtual machine software to activate the video editor on Mac devices, but the process for that is complex.
2. Is Wondershare Filmora or Vegas Pro better?
Wondershare Filmora and Vegas Pro are top-level options in video and audio editing projects with professional-level editing accuracy. However, Filmora has a cohesive ecosystem with rich AI and standard functions and comes with Mac/Windows support. So, in that sense, Filmora is comparatively a better choice.
Final Words
In place of Sony Vegas Pro, any of these options would also give you a great user experience. Out of them, Filmora is one that we will recommend due to its multi-faceted benefits and features for Mac and Windows users. Ultimately, make your decision based on your particular needs.
Free Download For Win 7 or later(64-bit)
Free Download For macOS 10.14 or later
Your Number 1 Tip to Resize Social Media Vertical Video Ratio
Your Number 1 Tip to Resize social media Vertical Video Ratio
An easy yet powerful editor
Numerous effects to choose from
Detailed tutorials provided by the official channel
With more and more content being designed for phones, vertical videos are widely used now.

If you too have recorded videos for posting on your social media sites, resize them in vertical video ratio and to get the right size, take help of a video ratio calculator.
In this article
01 [Benefits of Square and Vertical Videos](#Part 1)
02 [How Vertical Videos Are Displayed](#Part 2)
03 [What’s the Best Tip to Resize Social Media Vertical Video Ratio?](#Part 3)
Part 1 Benefits of Square and Vertical Videos
● What is Square Video & Vertical Video?
A Square Video is the one that has the same width and height while a vertical video is taller than it is wide. A vertical video or a square video is presented in the form of a landscape. A square video has an aspect ratio of 1:1 while a vertical video has an aspect ratio of 9:16.So, in a vertical video, the horizontal video size is less than its vertical size.
● Why Vertical Video is Dominating
It would not be wrong to say that the world has taken a mobile route and with this, the dominance of vertical videos can be seen. As per the studies it has been found that around 75% of the video playback across the globe are from mobile phones and around 94% of the time, the phones are held vertically. These figures completely state the need for the hour-vertical videos.
With users holding their mobile phones vertically the majority of the time, the dominance of the vertical videos is no surprise.
● Benefits of Square and Vertical Videos
There are several benefits of having square and vertical videos. These videos are specifically
designed for mobile phones and thus they can be easily posted on multiple social media sites without any need for change or editing. Other benefits of using vertical videos are their ease of recording through a mobile phone. Vertical videos are beneficial even for the advertisers and promoters as they help them reach more audiences and prospective customers through social media sites and other sites.
Part 2 How Vertical Videos Are Displayed
Vertical videos are majorly displayed on mobile devices as smartphones are used vertically most of the time. The width of these videos is less as compared to their height and this makes them appear fit on the smartphone’s screen. Moreover, using the screen aspect ratio calculator, you can further decide upon the aspect ratio depending on the size of the device screen on which video has to be played.
Part 3 What’s the Best Tip to Resize social media Vertical Video Ratio?
Listed below are the tips for resizing the social media vertical video ratio.
● Learn about the Aspect Ratios
A vertical video is taller than it is wide. Thus, any video that is taller than the 1:1 aspect ratio will be termed a vertical video. The commonly used aspect ratio is 9:16 that uses the complete vertical screen. So, to capture a vertical video, use the camera in portrait mode or edit it as per the vertical aspect ratio. There are also TV aspect ratio calculator tools that can be used for the task.

● Screen splitting
Multiple clips that are horizontal can be placed at the top of each other for a vertical frame as it is tall. The stacking can be done for the related clips or to make them appear as one. Place the clips creatively using patterns or lines.

● Filling the vertical space
If needed, you can creatively fill the vertical space when the shot is not a close one. One of the ideas is by raising the camera of your phone high and then moving it down that will give a deep frame. You can also fill up the vertical space below.

● Side-to-side fast movements must be avoided
Since the width area in the vertical videos is less, it is also better to avoid the fast side-to-side movement as it will create a shaky and blurry effect.

● Make use of text and graphics
To complement videos, using text and graphics is a good option. Use the vertical space smartly and include text, stickers, graphics, and other content for enhancing the video and its meaning.

● Grab attention
It is important for the videos on the social media sites to instantly catch the attention of the viewers, else they will move on to the next one. So, ensure that your vertical videos are eye-catchy and interesting with bright colors, looping animations, GIFs, and other content that is likely to hook up the viewers.

● Rule of Thirds
As per the photography rule of thirds, the main subject is not to be placed at the center and instead it the entire frame is divided into thirds using imaginary horizontal and vertical lines. The subject should be placed on these lines or where the lines meet. Use the guide grid on your phone’s camera to use this rule.

● Using a professional video editing software
If you have a video that is already recorded, you can enhance its looks and appearance using good video editing software and one such recommended tool is Wondershare Filmora Video Editor . The software is compatible with Windows and Mac and allows you to create stunning videos in just a few clicks that can be posted on several social media sites.

Wondershare Filmora - Best Video Editor for Mac/Windows
5,481,435 people have downloaded it.
Build unique custom animations without breaking a sweat.
Focus on creating epic stories and leave the details to Filmora’s auto features.
Start a creative adventure with drag & drop effects and endless possibilities.
Filmora simplifies advanced features to save you time and effort.
Filmora cuts out repetition so you can move on to your next creative breakthrough.
Using this versatile software you can add animations, motion tracking, zooming function, masking, text, and titles. Features like auto-correction, control settings, color wheels, noise reduction, audio sync, audio compression, and others are also supported.

Key Takeaways from This Episode
● With the majority of the video content being viewed on mobile phones, vertical videos have dominated the market.
● Vertical videos can be easily posted on several social media sites and other platforms without any tweaking from your phone.
● Several tips will help you to create a good vertical video for social media and using professional software like Wondershare Filmora is one of them.
With more and more content being designed for phones, vertical videos are widely used now.
If you too have recorded videos for posting on your social media sites, resize them in vertical video ratio and to get the right size, take help of a video ratio calculator.
In this article
01 [Benefits of Square and Vertical Videos](#Part 1)
02 [How Vertical Videos Are Displayed](#Part 2)
03 [What’s the Best Tip to Resize Social Media Vertical Video Ratio?](#Part 3)
Part 1 Benefits of Square and Vertical Videos
● What is Square Video & Vertical Video?
A Square Video is the one that has the same width and height while a vertical video is taller than it is wide. A vertical video or a square video is presented in the form of a landscape. A square video has an aspect ratio of 1:1 while a vertical video has an aspect ratio of 9:16.So, in a vertical video, the horizontal video size is less than its vertical size.
● Why Vertical Video is Dominating
It would not be wrong to say that the world has taken a mobile route and with this, the dominance of vertical videos can be seen. As per the studies it has been found that around 75% of the video playback across the globe are from mobile phones and around 94% of the time, the phones are held vertically. These figures completely state the need for the hour-vertical videos.
With users holding their mobile phones vertically the majority of the time, the dominance of the vertical videos is no surprise.
● Benefits of Square and Vertical Videos
There are several benefits of having square and vertical videos. These videos are specifically
designed for mobile phones and thus they can be easily posted on multiple social media sites without any need for change or editing. Other benefits of using vertical videos are their ease of recording through a mobile phone. Vertical videos are beneficial even for the advertisers and promoters as they help them reach more audiences and prospective customers through social media sites and other sites.
Part 2 How Vertical Videos Are Displayed
Vertical videos are majorly displayed on mobile devices as smartphones are used vertically most of the time. The width of these videos is less as compared to their height and this makes them appear fit on the smartphone’s screen. Moreover, using the screen aspect ratio calculator, you can further decide upon the aspect ratio depending on the size of the device screen on which video has to be played.
Part 3 What’s the Best Tip to Resize social media Vertical Video Ratio?
Listed below are the tips for resizing the social media vertical video ratio.
● Learn about the Aspect Ratios
A vertical video is taller than it is wide. Thus, any video that is taller than the 1:1 aspect ratio will be termed a vertical video. The commonly used aspect ratio is 9:16 that uses the complete vertical screen. So, to capture a vertical video, use the camera in portrait mode or edit it as per the vertical aspect ratio. There are also TV aspect ratio calculator tools that can be used for the task.
● Screen splitting
Multiple clips that are horizontal can be placed at the top of each other for a vertical frame as it is tall. The stacking can be done for the related clips or to make them appear as one. Place the clips creatively using patterns or lines.
● Filling the vertical space
If needed, you can creatively fill the vertical space when the shot is not a close one. One of the ideas is by raising the camera of your phone high and then moving it down that will give a deep frame. You can also fill up the vertical space below.
● Side-to-side fast movements must be avoided
Since the width area in the vertical videos is less, it is also better to avoid the fast side-to-side movement as it will create a shaky and blurry effect.
● Make use of text and graphics
To complement videos, using text and graphics is a good option. Use the vertical space smartly and include text, stickers, graphics, and other content for enhancing the video and its meaning.
● Grab attention
It is important for the videos on the social media sites to instantly catch the attention of the viewers, else they will move on to the next one. So, ensure that your vertical videos are eye-catchy and interesting with bright colors, looping animations, GIFs, and other content that is likely to hook up the viewers.
● Rule of Thirds
As per the photography rule of thirds, the main subject is not to be placed at the center and instead it the entire frame is divided into thirds using imaginary horizontal and vertical lines. The subject should be placed on these lines or where the lines meet. Use the guide grid on your phone’s camera to use this rule.
● Using a professional video editing software
If you have a video that is already recorded, you can enhance its looks and appearance using good video editing software and one such recommended tool is Wondershare Filmora Video Editor . The software is compatible with Windows and Mac and allows you to create stunning videos in just a few clicks that can be posted on several social media sites.
Wondershare Filmora - Best Video Editor for Mac/Windows
5,481,435 people have downloaded it.
Build unique custom animations without breaking a sweat.
Focus on creating epic stories and leave the details to Filmora’s auto features.
Start a creative adventure with drag & drop effects and endless possibilities.
Filmora simplifies advanced features to save you time and effort.
Filmora cuts out repetition so you can move on to your next creative breakthrough.
Using this versatile software you can add animations, motion tracking, zooming function, masking, text, and titles. Features like auto-correction, control settings, color wheels, noise reduction, audio sync, audio compression, and others are also supported.
Key Takeaways from This Episode
● With the majority of the video content being viewed on mobile phones, vertical videos have dominated the market.
● Vertical videos can be easily posted on several social media sites and other platforms without any tweaking from your phone.
● Several tips will help you to create a good vertical video for social media and using professional software like Wondershare Filmora is one of them.
Also read:
- In 2024, Unleash Your Creativity Best Free and Open-Source Video Editors
- Updated The Best Free WebM Video Editors You Need to Try
- Updated 2024 Approved Discover the Best Free Video Editing Apps for Chromebooks
- New Revolutionize Your Animation Workflow 7 Must-Try Drawing Software for 2024
- Updated In 2024, Make a Heartfelt Video Montage with Pictures and Songs
- No-Cost Video Editing Top Online Solutions Ranked for 2024
- New The Best Virtualdub Alternatives for Windows, Mac, and Linux
- Updated In 2024, Whats the Best Aspect Ratio for Twitter Videos?
- New The Ultimate List 10 Free Video Editors for MP4 Videos
- New In 2024, Free Video Invitation Templates and Makers Events
- Updated Video Editing on Mac How to Install Lumafusion and Its Best Alternatives for 2024
- 2024 Approved Simple yet Powerful Video Editors for Learners
- Updated Windows Movie Maker Download and Setup A Complete Walkthrough
- New In 2024, Avidemux Sound Not Working? Try These Solutions
- Updated The Ultimate Guide to Free Video Cutting and Joining Software for 2024
- New 2024 Approved Facebook Video Cover Dimensions Tips for a Flawless Fit
- New Visual Magic How to Create Stunning Video Effects From Scratch
- In 2024, S Leading Lego Animation Artists
- New Top 16 Best Free Easy Movie Makers
- New Optimize Your Rig Premiere Pro System Requirements and Setup Guide
- Updated The Art of Slow Motion A Beginners Guide to Kapwing
- New In 2024, Assess and Align Image Ratio Accuracy
- Updated Best Voice Generators & Changers with The Most Anime Voices Supported
- New How to Use Blender Green Screen
- Thinking About Changing Your Netflix Region Without a VPN On Vivo X Flip? | Dr.fone
- New In 2024, Tips for Perfecting Your Talking Face Content A Complete Guide
- In 2024, Top 7 Skype Hacker to Hack Any Skype Account On your Realme 12 Pro 5G | Dr.fone
- How to Exit Android Factory Mode On HTC U23? | Dr.fone
- How To Bypass FRP on Razr 40
- Apply These Techniques to Improve How to Detect Fake GPS Location On Samsung Galaxy S24 Ultra | Dr.fone
- How To Restore Missing Contacts Files from Oppo A38.
- In 2024, How To Use Allshare Cast To Turn On Screen Mirroring On Samsung Galaxy F54 5G | Dr.fone
- In 2024, Best Ways on How to Unlock/Bypass/Swipe/Remove Nubia Z50 Ultra Fingerprint Lock
- Fix Honor X9a Android System Webview Crash 2024 Issue | Dr.fone
- How do I play MKV movies on Samsung Galaxy A34 5G?
- In 2024, How to Change Your Oppo Reno 8T Location on life360 Without Anyone Knowing? | Dr.fone
- Repair broken or corrupt video files of Yuva 2 Pro
- In 2024, How Can I Use a Fake GPS Without Mock Location On Realme GT 3? | Dr.fone
- 3 Ways to Erase iPhone 15 When Its Locked Within Seconds
- Forgotten The Voicemail Password Of Realme Narzo N53? Try These Fixes
- 8 Quick Fixes Unfortunately, Snapchat has Stopped on Itel P40 | Dr.fone
- In 2024, Forgot Locked Apple iPhone 11 Pro Password? Learn the Best Methods To Unlock
- How to retrieve erased messages from C12
- Reset pattern lock Tutorial for Y100
- Title: Trim and Share Best Free Online and Offline Video Trimmers for Windows 10 for 2024
- Author: Ava
- Created at : 2024-06-24 10:57:28
- Updated at : 2024-06-25 10:57:28
- Link: https://video-content-creator.techidaily.com/trim-and-share-best-free-online-and-offline-video-trimmers-for-windows-10-for-2024/
- License: This work is licensed under CC BY-NC-SA 4.0.
