
:max_bytes(150000):strip_icc():format(webp)/twittermute-5bc42bbd46e0fb002679ac08.jpg)
New Revamp Your Footage Top Free Online Video Quality Improvement Tools for 2024
Revamp Your Footage: Top Free Online Video Quality Improvement Tools
Top 9 Best Online Video Quality Enhancer for FREE

Ollie Mattison
Apr 24, 2024• Proven solutions
In 2024, the average person will watch 17 hours of video content every week. Improving the quality of your videos can make your content more noticeable.
Fortunately, there are many excellent video quality enhancer tools to choose from. These tools can enhance both the visual and audio clarity of your content. Ultimately, this will enhance your professionalism and reputation as a trustworthy creator.
Are you wondering where to start when selecting an effective, user-friendly video enhancer? Here are some of our top recommendations to help you begin.
- Part 2: 5 Free AI Video Enhancers [Software Options]
- Part 3: Top 2 4K Video Enhancer Online Free Options
- Part 4: How to Choose the Best Video Enhancer
- In this article
Why Do You Need an AI Video Enhancer?
AI video enhancers utilize generative AI to remove noise, stabilize shaky videos, upscale, or enhance their overall appearance. These tools employ machine learning and neural network techniques to analyze videos and apply different effects for enhancement. Trained on extensive datasets, most AI video enhancers can understand video content like faces, scenes, and objects, automatically adjusting imperfections.
Using an AI video enhancer is an excellent way to boost video quality quickly. Unlike traditional methods, AI speeds up the enhancement process significantly. There are additional benefits, such as:
- **Enhanced Media Quality:**AI video enhancers enhance videos automatically with advanced algorithms, maintaining quality, clarity, and detail.
- Noise Reduction: Many AI video enhancer tools effectively reduce visual noise in videos, resulting in cleaner and clearer footage.
- **Reviving Old Clip:**AI video enhancers are adept at restoring old video footage to make it appear more vibrant.
5 Free AI Video Enhancers [Software Options]
Are blurry videos on your large screen getting on your nerves? Thanks to advancements in artificial intelligence (AI), you can now enhance your low-resolution videos for a crystal-clear viewing experience.
Whether you’re a video editor, content creator, or streamer, incorporating an AI video upscaler into your toolkit is a wise choice. Here are the top 5 picks for the best free AI video enhancer software to improve your video editing.
1.Wondershare Filmora - AI Video Enhancer

Pricing:Filmora offers a free trial without exporting.
Wondershare Filmora stands out in video editing by combining comprehensive editing features with AI-powered enhancement tools. With 4K editing, Filmora ensures videos are improved and future-proofed.
In addition to enhancement, Filmora offers over 300 unique transitions and effects catering to creative minds. Audio enthusiasts will enjoy advanced audio tools like audio ducking and equalizers.
Filmora’s standout feature is its motion tracking capability, enabling dynamic video compositions. While beginners may find the abundance of features overwhelming, regular updates and an active online community provide ample support.
Features
- Filmora’s advanced AI video-enhancing algorithms let you convert black-and-white footage to colored ones.
- It boosts frame rates up to 240 FPS using AI-enhanced frame interpolation technology and 4x super-resolution algorithms.
- Filmora enhances videos’ clarity and quality through audio ducking, equalizers, and more.
- This AI Video Enhancer tracks and attaches objects in videos.
- The tool preserves details and enhances quality in slow-motion scenes.
- Offers over 300 unique transitions and effects.
Pros
- Versatile editing and enhancement options.
- This AI video enhancer is designed to assist both beginners and professionals.
- It supports batch processing, enhancing 10+ videos simultaneously.
Cons
- The free version adds a watermark.
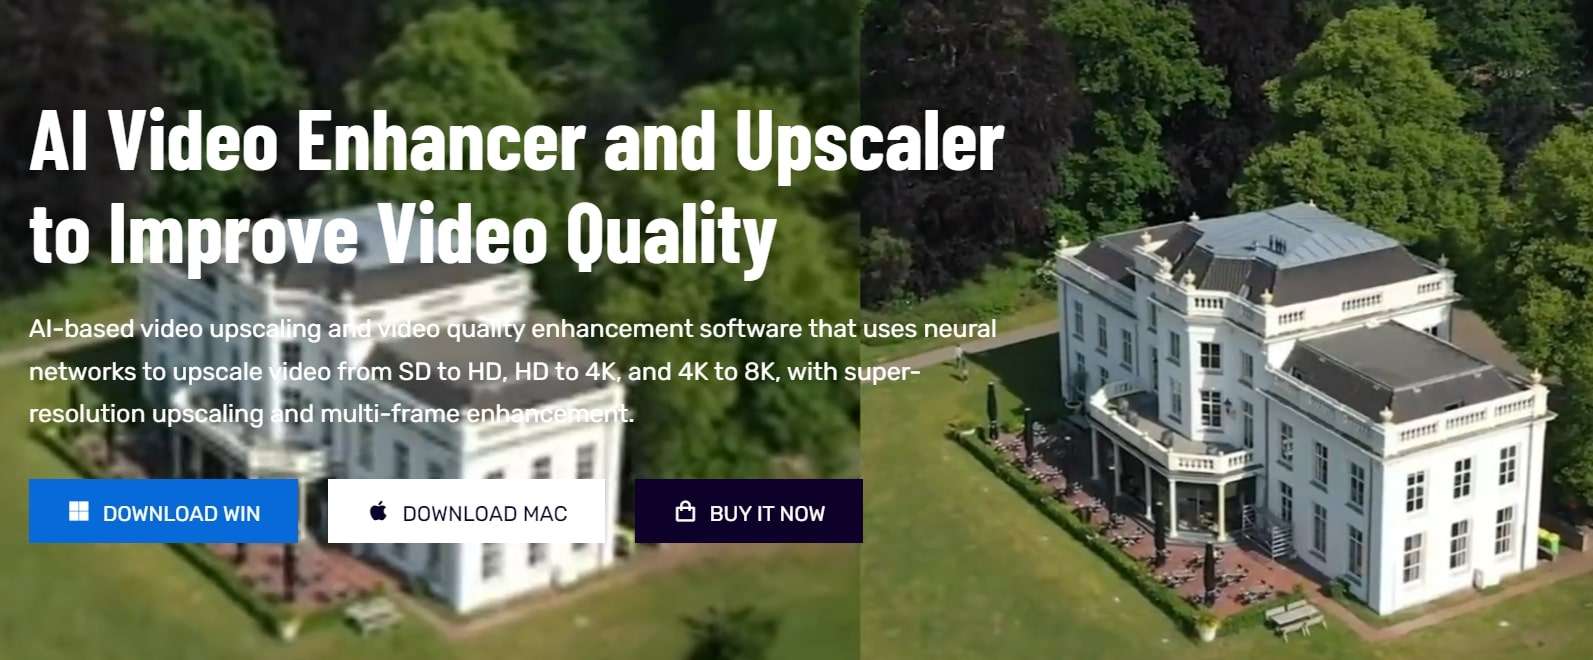
2.AVCLabs Video Enhancer AI
Pricing:AVCLabs offers new users a 7-day free trial.
AVCLabs Video Enhancer AI utilizes a neural network to improve video clip quality. With super-resolution AI video upscaling and multi-frame enhancement, it can easily upscale video from SD to HD (720p or 1080p) to 4K and up to 8K in just one click.
With support for various video and audio formats, users can work seamlessly without compatibility issues. A notable feature is its batch processing capability, enabling users to upscale and enhance multiple videos simultaneously, saving time. The real-time preview feature is invaluable for those who wish to see the software’s results before finalizing their project.
Features
- AVCLabs seamlessly enhances any video footage without quality loss. Whether single or multi-frame, you’ll experience smooth transitions and improved frames.
- With AVCLabs’ color correction feature, you can easily adjust each video frame’s brightness, saturation, and contrast. This tool employs AI video upscaling to create larger, more detailed images without sacrificing quality.
- This video enhancement tool offers automatic face refinement to enhance facial details, which is ideal for improving low-quality videos with excessive noise and blurriness.
- The Super Resolution feature recovers high-resolution videos from low-resolution materials by generating additional pixel data to fill gaps, resulting in enhanced output.
- AVCLabs Video Enhancer AI uses a multi-frame convolutional neural network to stabilize video shakes and remove motion artifacts, overlay noise, and grain, producing natural and enhanced results.
Pros
- AVCLabs features a color calibration algorithm that accurately portrays natural colors.
- It allows you to add color to old black-and-white videos.
- The video processing is fully automatic, requiring no manual fine-tuning.
Cons
- The app demands a significant amount of free space, up to 15 GB.
- It is only compatible with Windows and Mac operating systems.
- The free trial adds a watermark from AVC Labs to the videos.
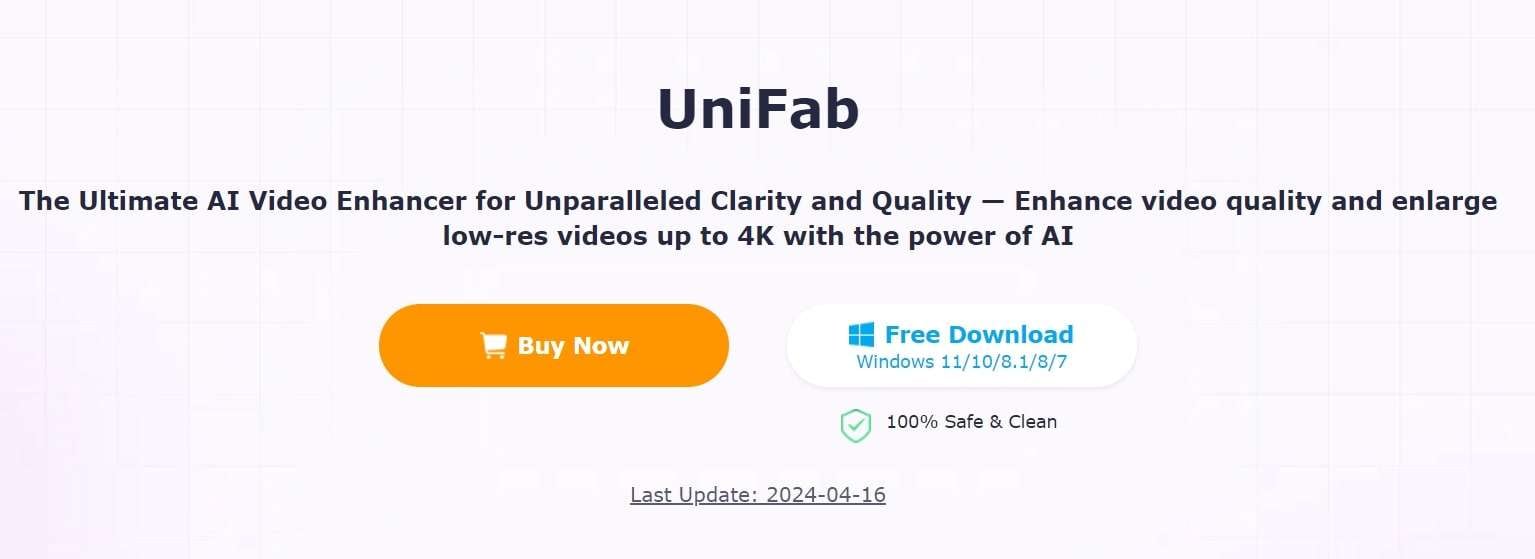
3.UniFab Video Enhancer
Pricing: UniFab provides a 30-day free trial for new AI users and a 30-day money-back guarantee for paid.
UniFab is a comprehensive AI-powered video enhancer to enhance video quality for all types of videos. Standout features like upscaling video to HDR10/Dolby Vision, denoising, and deinterlacing set this tool apart.
The models are regularly updated with the latest advancements in Deep Learning. Whether you’re a novice or an expert, UniFab offers both automatic and manual modes for video enhancement, making it easy to use without requiring complex settings.
Features
- Upgrade any video to 720p, 1080p, or even 4k resolution with remarkable clarity.
- Convert SDR videos to stunning HDR formats like HDR10+ and Dolby Vision. This feature revitalizes your videos, making them significantly more vibrant and immersive.
- Utilize AI technology to deinterlace your videos, ensuring smooth playback and a pristine viewing experience on modern displays.
- Specifically designed for videos captured in low-light conditions or with high ISO settings, this tool intuitively reduces grain and noise, restoring your footage’s true essence without sacrificing detail.
- Experience unprecedented fluidity as the software boosts your videos to an impressive 120FPS using AI. This transforms your content into a smooth motion stream, ideal for high-definition screens and attentive audiences.
Pros
- It allows audio up-mixing to EAC3 5.1/DTS 7.1 through AI.
- Utilizes GPU-accelerated technology.
- Supports video conversion, compression, and editing.
Cons
- The free trial is limited to 3 videos.
- Does not support Mac systems.
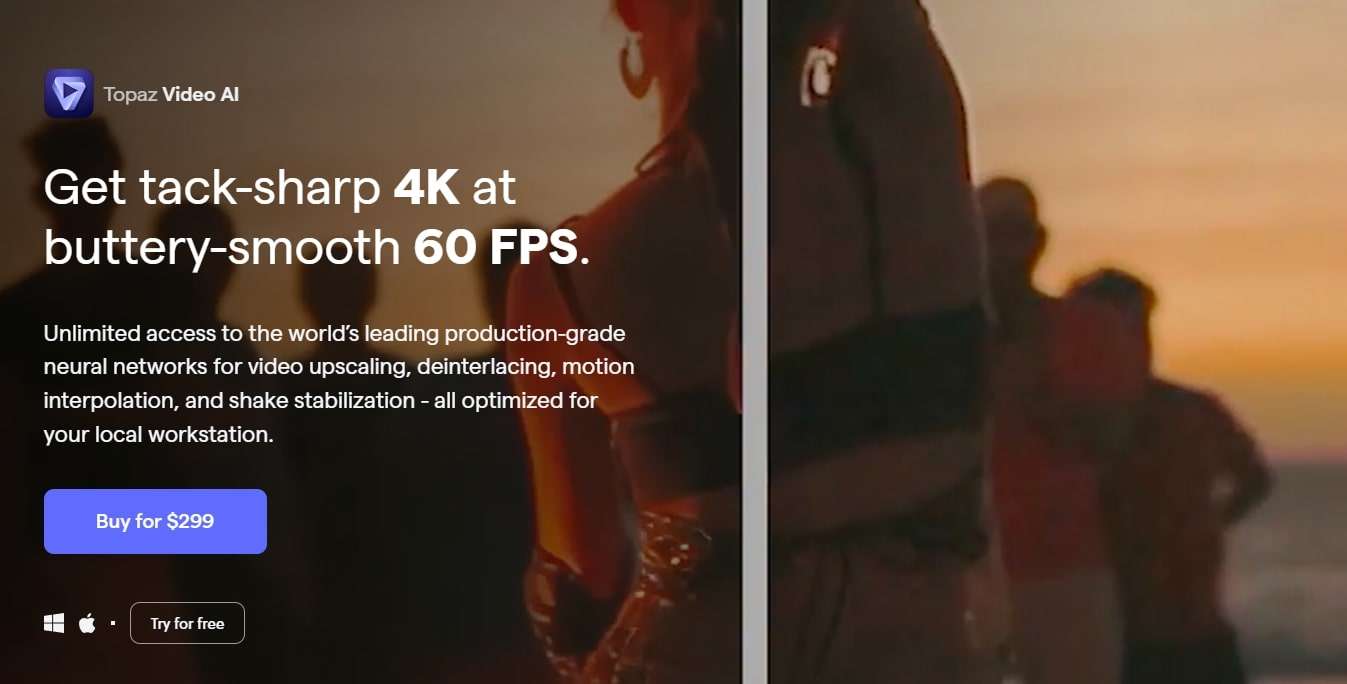
4.Topaz Video Enhance AI
Pricing:Topaz video enhancement tool offers a 30-day no-questions-asked refund policy.
Topaz Video Enhance AI enhances video quality by increasing its resolution. It supports batch upscaling of videos and is compatible with DVD, DSLR, Game, and HD stock footage.
Many notable film studios consider Topaz Video Enhance AI one of the best video editing software tools. It is suitable for various uses, such as commercials, movie content, and YouTube videos.
Features
- This free video upscaling software swiftly analyzes video footage quality using AI tools and recreates it into high-resolution videos.
- Topaz offers Gaia CGI and Theia for enhancing CG and animated videos, along with Proteus and Artemis for noise removal and sharpening.
- Easily recover details from any video footage by injecting original details using adjacent frames’ additional information. It detects and corrects visual artifacts formed during compression.
- Topaz provides an automatic mode for quick video quality enhancement and manual fine-tuning options using available controls.
- With this free video enhancer software, preserve video audio tracks and select from different conversion options for optimal output in the final project.
Pros
- Reduces motion artifacts.
- Adds extra frames for smooth, slow-motion videos.
- Enhances video quality up to 8K.
Cons
- AI processing can be time-consuming, sometimes taking hours.
- Requires a high-quality graphics card.
5.HitPaw Video Enhancer

Pricing:HitPaw AI video enhancer offers a 30-day refund guarantee on paid plans.
HitPaw is a user-friendly video enhancer suitable for both beginners and professionals. It features an easy-to-navigate interface, ensuring even those with minimal experience can improve their videos. Despite its simplicity, HitPaw offers robust enhancement tools, including color correction and stabilization. Its extensive support for various video formats eliminates compatibility concerns.
The software prioritizes efficient video enhancement without compromising quality or speed. Comprehensive tutorials help users explore different editing tasks and unlock their content’s full potential.
Features
- Utilize advanced AI algorithms to upscale low-resolution videos for a more appealing look. The AI feature optimizes content for sharper and more vibrant visuals.
- The HitPaw video quality enhancer app uses AI tools to improve detailing on human faces. Apply filters and adjust settings to enhance facial output in videos.
- The app includes a video stabilization feature that eliminates shaky camera movements, producing smoother and clearer videos with a professional touch.
- HitPaw offers an AI video repair option to restore damaged, corrupted, and old videos. It can also use deep learning AI to colorize black-and-white videos.
- Remove noise from videos with the General Denoise feature, making them look sharper, clearer, and newer.
Pros
- Supports various video formats.
- Has a user-friendly and intuitive interface.
- Can repair and enhance animation videos.
Cons
- The free plan has limited editing features.
Top 2 4K Video Enhancer Online Free Options
The AI-enhanced video tools mentioned above excel in their field. However, there are times when you might run out of storage or need a quick fix through your browser. So, here are some online AI tools that can enhance your videos. Unlike offline video enhancer AIs, online tools are easily accessible. While they may offer fewer features than desktop solutions, they are still useful for some editors.
1.Cutout.Pro
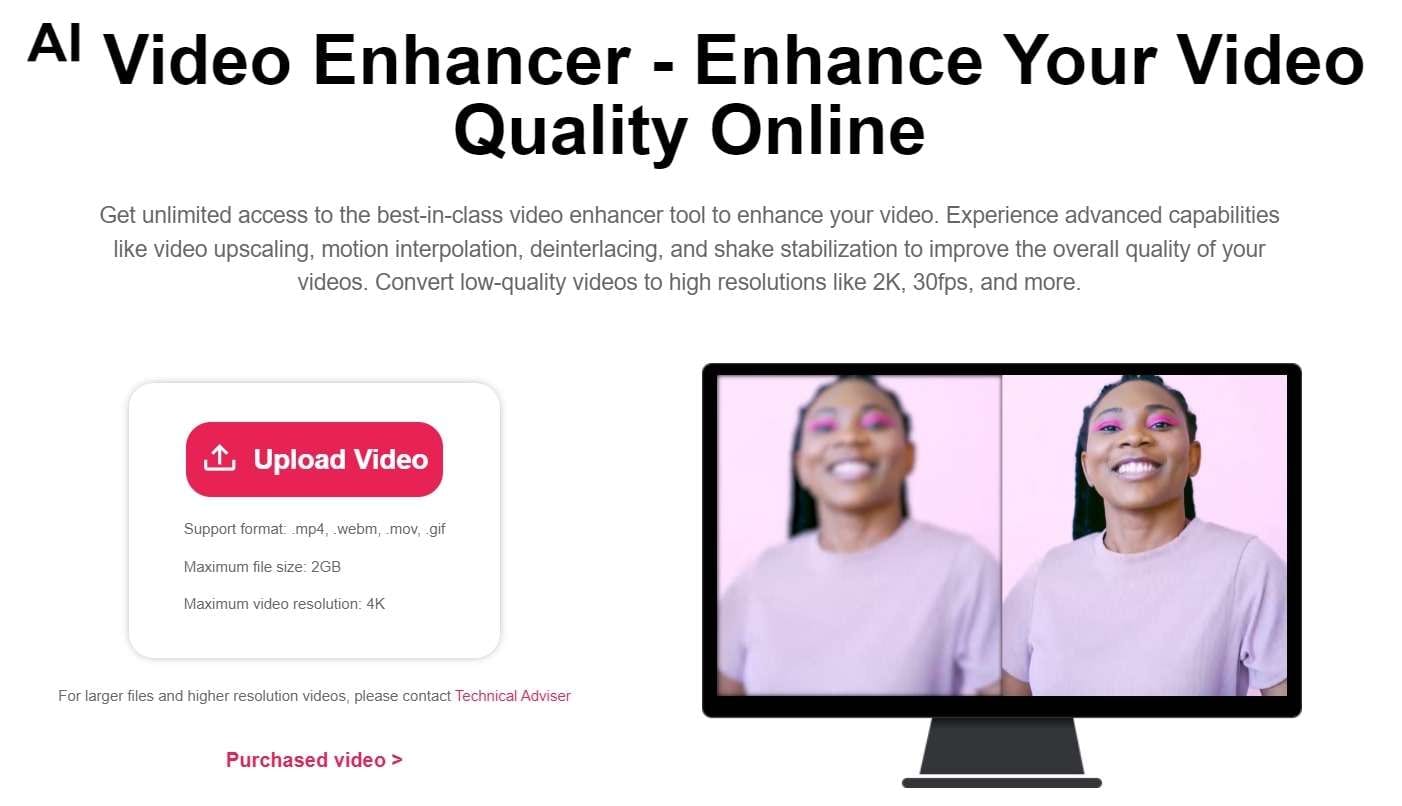
Many editing professionals rely on this free AI video enhancer for unlimited video improvements. Cutout.Pro utilizes advanced features such as video upscaling, motion interpolation, deinterlacing, and shake stabilization to enhance overall quality. This tool converts low-quality videos to higher resolutions like 2K, 30fps, and beyond. Moreover, this online tool swiftly reduces visual noise and other motion artifacts from clips using AI.
Features
- Reduce noise, motion artifacts, and improve video resolution significantly with this powerful online video quality enhancer and upscaler. Perfect for enhancing low-resolution videos like 240p, 360p, 480p, and more.
- Pro increases video frame rates without sacrificing quality. Smooth out shaky footage for better slow-motion effects.
- This tool enhances video resolution up to 2K at a maximum of 30fps effortlessly. It sharpens and defines your videos, bringing your story to life like a professional.
- This is perfect for filmmakers seeking to enhance footage quality and create professional-looking films. Improve video resolution and quality to unblur, upscale, and smooth videos for cinematic results.
- Enhance the quality of personal videos as this tool features shake stabilization for professional results.
- This video enhancer is ideal for professionals creating cinematic frames and restoring old footage. It’s also great for individuals looking to improve the quality of compressed videos downloaded from social media platforms like YouTube, Netflix, and TikTok.
Pros
- It boosts video frame rates and enables HD clip exports.
- Users can upload videos in MP4, MOV, WebM, and GIF formats for processing.
Cons
- It only offers a 5-second preview of the results after enhancement.
2.Clideo Video Enhancer
Clideo is an online video-enhancing tool that can completely transform any random video. It lets you add special AI effects and filters to adjust the video’s brightness, saturation, and contrast, making it stunning, vibrant, and attractive. You can enhance any video professionally for social media attention or business branding.
When it comes to video-enhancing tools, users seek maximum customization options. Clideo offers various features, functions, and facilities to transform average-looking videos into 4k video resolutions.
Features
- The interface is intuitive, so you don’t need any video editing experience to use it.
- You can enhance your video regardless of format because Clideo works with MP4, WMV, MOV, VOB, AVI, and other popular formats.
- You don’t need to download and install the video enhancer to your device. It’s not only faster but also more secure.
- Enhance multiple videos or images simultaneously.
- Add subtitles with customizable text fonts.
- Text Overlay feature with support for HD resolution.
- Access a media library with social sharing options.
Pros
- User-friendly tool is ideal for beginners.
- Supports multiple formats.
- As an online tool, it saves device storage space.
- Reasonable pricing.
- Provides uninterrupted video editing with customizable features.
Cons
- A premium subscription is required to remove watermarking.
- No offline app available; internet connection always necessary.
- No dedicated mobile app.
How to Choose the Best Video Enhancer
Consider the following to ensure you select the right video enhancer for your needs and creative vision.
1.Type of Content
Think about the type of content you’re working with. Are you creating short-form clips for social media or longer, more complex videos? Different enhancers may better suit different content types, so consider your file type and potential quality issues.
2.Consider The Features You Need
Consider the tools and features you need from your video quality enhancer software. Each system offers different capabilities, so planning can help you find the option that best fits your requirements.
3.Sharing Formats and Requirements
Determine the purpose of your video project and any specific sharing requirements. Understanding your goals will help you plan accordingly, whether for online sharing or commercial use.
4.Your Budget
Keep your budget in mind. Some enhancers offer free features, while others may require a purchase or subscription fee for full access. Budgeting effectively ensures you get the best value for your money while achieving great video results.
Conclusion
The video enhancement landscape has been transformed by artificial intelligence, providing numerous options to enhance your videos’ quality. Whether a professional filmmaker or a casual content creator, free AI video enhancers offer a chance to take your productions to the next level.
Each software has unique strengths, from Wondershare Filmora’s comprehensive editing features to AVCLabs’ neural network-powered upscaling and UniFab’s HDR conversion capabilities. User-friendly options like HitPaw cater to beginners while providing robust enhancement tools.
Moreover, for quick fixes or limited storage, online options like Cutout.Pro and Clideo offer accessible solutions with impressive results. With these advancements, achieving professional-quality videos is now achievable for everyone.
Ollie Mattison
Ollie Mattison is a writer and a lover of all things video.
Follow @Ollie Mattison
Ollie Mattison
Apr 24, 2024• Proven solutions
In 2024, the average person will watch 17 hours of video content every week. Improving the quality of your videos can make your content more noticeable.
Fortunately, there are many excellent video quality enhancer tools to choose from. These tools can enhance both the visual and audio clarity of your content. Ultimately, this will enhance your professionalism and reputation as a trustworthy creator.
Are you wondering where to start when selecting an effective, user-friendly video enhancer? Here are some of our top recommendations to help you begin.
- Part 2: 5 Free AI Video Enhancers [Software Options]
- Part 3: Top 2 4K Video Enhancer Online Free Options
- Part 4: How to Choose the Best Video Enhancer
- In this article
Why Do You Need an AI Video Enhancer?
AI video enhancers utilize generative AI to remove noise, stabilize shaky videos, upscale, or enhance their overall appearance. These tools employ machine learning and neural network techniques to analyze videos and apply different effects for enhancement. Trained on extensive datasets, most AI video enhancers can understand video content like faces, scenes, and objects, automatically adjusting imperfections.
Using an AI video enhancer is an excellent way to boost video quality quickly. Unlike traditional methods, AI speeds up the enhancement process significantly. There are additional benefits, such as:
- **Enhanced Media Quality:**AI video enhancers enhance videos automatically with advanced algorithms, maintaining quality, clarity, and detail.
- Noise Reduction: Many AI video enhancer tools effectively reduce visual noise in videos, resulting in cleaner and clearer footage.
- **Reviving Old Clip:**AI video enhancers are adept at restoring old video footage to make it appear more vibrant.
5 Free AI Video Enhancers [Software Options]
Are blurry videos on your large screen getting on your nerves? Thanks to advancements in artificial intelligence (AI), you can now enhance your low-resolution videos for a crystal-clear viewing experience.
Whether you’re a video editor, content creator, or streamer, incorporating an AI video upscaler into your toolkit is a wise choice. Here are the top 5 picks for the best free AI video enhancer software to improve your video editing.
1.Wondershare Filmora - AI Video Enhancer
Pricing:Filmora offers a free trial without exporting.
Wondershare Filmora stands out in video editing by combining comprehensive editing features with AI-powered enhancement tools. With 4K editing, Filmora ensures videos are improved and future-proofed.
In addition to enhancement, Filmora offers over 300 unique transitions and effects catering to creative minds. Audio enthusiasts will enjoy advanced audio tools like audio ducking and equalizers.
Filmora’s standout feature is its motion tracking capability, enabling dynamic video compositions. While beginners may find the abundance of features overwhelming, regular updates and an active online community provide ample support.
Features
- Filmora’s advanced AI video-enhancing algorithms let you convert black-and-white footage to colored ones.
- It boosts frame rates up to 240 FPS using AI-enhanced frame interpolation technology and 4x super-resolution algorithms.
- Filmora enhances videos’ clarity and quality through audio ducking, equalizers, and more.
- This AI Video Enhancer tracks and attaches objects in videos.
- The tool preserves details and enhances quality in slow-motion scenes.
- Offers over 300 unique transitions and effects.
Pros
- Versatile editing and enhancement options.
- This AI video enhancer is designed to assist both beginners and professionals.
- It supports batch processing, enhancing 10+ videos simultaneously.
Cons
- The free version adds a watermark.
2.AVCLabs Video Enhancer AI
Pricing:AVCLabs offers new users a 7-day free trial.
AVCLabs Video Enhancer AI utilizes a neural network to improve video clip quality. With super-resolution AI video upscaling and multi-frame enhancement, it can easily upscale video from SD to HD (720p or 1080p) to 4K and up to 8K in just one click.
With support for various video and audio formats, users can work seamlessly without compatibility issues. A notable feature is its batch processing capability, enabling users to upscale and enhance multiple videos simultaneously, saving time. The real-time preview feature is invaluable for those who wish to see the software’s results before finalizing their project.
Features
- AVCLabs seamlessly enhances any video footage without quality loss. Whether single or multi-frame, you’ll experience smooth transitions and improved frames.
- With AVCLabs’ color correction feature, you can easily adjust each video frame’s brightness, saturation, and contrast. This tool employs AI video upscaling to create larger, more detailed images without sacrificing quality.
- This video enhancement tool offers automatic face refinement to enhance facial details, which is ideal for improving low-quality videos with excessive noise and blurriness.
- The Super Resolution feature recovers high-resolution videos from low-resolution materials by generating additional pixel data to fill gaps, resulting in enhanced output.
- AVCLabs Video Enhancer AI uses a multi-frame convolutional neural network to stabilize video shakes and remove motion artifacts, overlay noise, and grain, producing natural and enhanced results.
Pros
- AVCLabs features a color calibration algorithm that accurately portrays natural colors.
- It allows you to add color to old black-and-white videos.
- The video processing is fully automatic, requiring no manual fine-tuning.
Cons
- The app demands a significant amount of free space, up to 15 GB.
- It is only compatible with Windows and Mac operating systems.
- The free trial adds a watermark from AVC Labs to the videos.
3.UniFab Video Enhancer
Pricing: UniFab provides a 30-day free trial for new AI users and a 30-day money-back guarantee for paid.
UniFab is a comprehensive AI-powered video enhancer to enhance video quality for all types of videos. Standout features like upscaling video to HDR10/Dolby Vision, denoising, and deinterlacing set this tool apart.
The models are regularly updated with the latest advancements in Deep Learning. Whether you’re a novice or an expert, UniFab offers both automatic and manual modes for video enhancement, making it easy to use without requiring complex settings.
Features
- Upgrade any video to 720p, 1080p, or even 4k resolution with remarkable clarity.
- Convert SDR videos to stunning HDR formats like HDR10+ and Dolby Vision. This feature revitalizes your videos, making them significantly more vibrant and immersive.
- Utilize AI technology to deinterlace your videos, ensuring smooth playback and a pristine viewing experience on modern displays.
- Specifically designed for videos captured in low-light conditions or with high ISO settings, this tool intuitively reduces grain and noise, restoring your footage’s true essence without sacrificing detail.
- Experience unprecedented fluidity as the software boosts your videos to an impressive 120FPS using AI. This transforms your content into a smooth motion stream, ideal for high-definition screens and attentive audiences.
Pros
- It allows audio up-mixing to EAC3 5.1/DTS 7.1 through AI.
- Utilizes GPU-accelerated technology.
- Supports video conversion, compression, and editing.
Cons
- The free trial is limited to 3 videos.
- Does not support Mac systems.
4.Topaz Video Enhance AI
Pricing:Topaz video enhancement tool offers a 30-day no-questions-asked refund policy.
Topaz Video Enhance AI enhances video quality by increasing its resolution. It supports batch upscaling of videos and is compatible with DVD, DSLR, Game, and HD stock footage.
Many notable film studios consider Topaz Video Enhance AI one of the best video editing software tools. It is suitable for various uses, such as commercials, movie content, and YouTube videos.
Features
- This free video upscaling software swiftly analyzes video footage quality using AI tools and recreates it into high-resolution videos.
- Topaz offers Gaia CGI and Theia for enhancing CG and animated videos, along with Proteus and Artemis for noise removal and sharpening.
- Easily recover details from any video footage by injecting original details using adjacent frames’ additional information. It detects and corrects visual artifacts formed during compression.
- Topaz provides an automatic mode for quick video quality enhancement and manual fine-tuning options using available controls.
- With this free video enhancer software, preserve video audio tracks and select from different conversion options for optimal output in the final project.
Pros
- Reduces motion artifacts.
- Adds extra frames for smooth, slow-motion videos.
- Enhances video quality up to 8K.
Cons
- AI processing can be time-consuming, sometimes taking hours.
- Requires a high-quality graphics card.
5.HitPaw Video Enhancer
Pricing:HitPaw AI video enhancer offers a 30-day refund guarantee on paid plans.
HitPaw is a user-friendly video enhancer suitable for both beginners and professionals. It features an easy-to-navigate interface, ensuring even those with minimal experience can improve their videos. Despite its simplicity, HitPaw offers robust enhancement tools, including color correction and stabilization. Its extensive support for various video formats eliminates compatibility concerns.
The software prioritizes efficient video enhancement without compromising quality or speed. Comprehensive tutorials help users explore different editing tasks and unlock their content’s full potential.
Features
- Utilize advanced AI algorithms to upscale low-resolution videos for a more appealing look. The AI feature optimizes content for sharper and more vibrant visuals.
- The HitPaw video quality enhancer app uses AI tools to improve detailing on human faces. Apply filters and adjust settings to enhance facial output in videos.
- The app includes a video stabilization feature that eliminates shaky camera movements, producing smoother and clearer videos with a professional touch.
- HitPaw offers an AI video repair option to restore damaged, corrupted, and old videos. It can also use deep learning AI to colorize black-and-white videos.
- Remove noise from videos with the General Denoise feature, making them look sharper, clearer, and newer.
Pros
- Supports various video formats.
- Has a user-friendly and intuitive interface.
- Can repair and enhance animation videos.
Cons
- The free plan has limited editing features.
Top 2 4K Video Enhancer Online Free Options
The AI-enhanced video tools mentioned above excel in their field. However, there are times when you might run out of storage or need a quick fix through your browser. So, here are some online AI tools that can enhance your videos. Unlike offline video enhancer AIs, online tools are easily accessible. While they may offer fewer features than desktop solutions, they are still useful for some editors.
1.Cutout.Pro
Many editing professionals rely on this free AI video enhancer for unlimited video improvements. Cutout.Pro utilizes advanced features such as video upscaling, motion interpolation, deinterlacing, and shake stabilization to enhance overall quality. This tool converts low-quality videos to higher resolutions like 2K, 30fps, and beyond. Moreover, this online tool swiftly reduces visual noise and other motion artifacts from clips using AI.
Features
- Reduce noise, motion artifacts, and improve video resolution significantly with this powerful online video quality enhancer and upscaler. Perfect for enhancing low-resolution videos like 240p, 360p, 480p, and more.
- Pro increases video frame rates without sacrificing quality. Smooth out shaky footage for better slow-motion effects.
- This tool enhances video resolution up to 2K at a maximum of 30fps effortlessly. It sharpens and defines your videos, bringing your story to life like a professional.
- This is perfect for filmmakers seeking to enhance footage quality and create professional-looking films. Improve video resolution and quality to unblur, upscale, and smooth videos for cinematic results.
- Enhance the quality of personal videos as this tool features shake stabilization for professional results.
- This video enhancer is ideal for professionals creating cinematic frames and restoring old footage. It’s also great for individuals looking to improve the quality of compressed videos downloaded from social media platforms like YouTube, Netflix, and TikTok.
Pros
- It boosts video frame rates and enables HD clip exports.
- Users can upload videos in MP4, MOV, WebM, and GIF formats for processing.
Cons
- It only offers a 5-second preview of the results after enhancement.
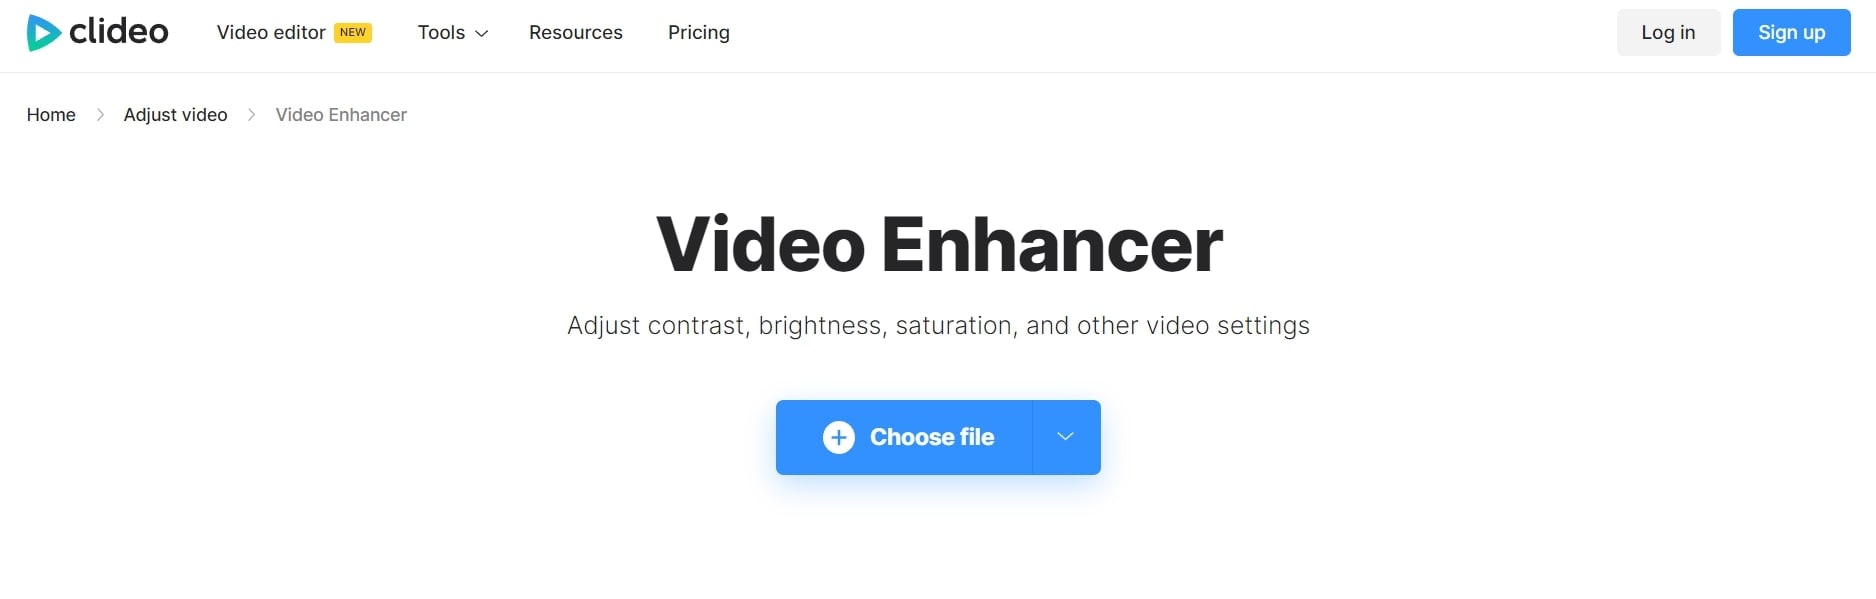
2.Clideo Video Enhancer
Clideo is an online video-enhancing tool that can completely transform any random video. It lets you add special AI effects and filters to adjust the video’s brightness, saturation, and contrast, making it stunning, vibrant, and attractive. You can enhance any video professionally for social media attention or business branding.
When it comes to video-enhancing tools, users seek maximum customization options. Clideo offers various features, functions, and facilities to transform average-looking videos into 4k video resolutions.
Features
- The interface is intuitive, so you don’t need any video editing experience to use it.
- You can enhance your video regardless of format because Clideo works with MP4, WMV, MOV, VOB, AVI, and other popular formats.
- You don’t need to download and install the video enhancer to your device. It’s not only faster but also more secure.
- Enhance multiple videos or images simultaneously.
- Add subtitles with customizable text fonts.
- Text Overlay feature with support for HD resolution.
- Access a media library with social sharing options.
Pros
- User-friendly tool is ideal for beginners.
- Supports multiple formats.
- As an online tool, it saves device storage space.
- Reasonable pricing.
- Provides uninterrupted video editing with customizable features.
Cons
- A premium subscription is required to remove watermarking.
- No offline app available; internet connection always necessary.
- No dedicated mobile app.
How to Choose the Best Video Enhancer
Consider the following to ensure you select the right video enhancer for your needs and creative vision.
1.Type of Content
Think about the type of content you’re working with. Are you creating short-form clips for social media or longer, more complex videos? Different enhancers may better suit different content types, so consider your file type and potential quality issues.
2.Consider The Features You Need
Consider the tools and features you need from your video quality enhancer software. Each system offers different capabilities, so planning can help you find the option that best fits your requirements.
3.Sharing Formats and Requirements
Determine the purpose of your video project and any specific sharing requirements. Understanding your goals will help you plan accordingly, whether for online sharing or commercial use.
4.Your Budget
Keep your budget in mind. Some enhancers offer free features, while others may require a purchase or subscription fee for full access. Budgeting effectively ensures you get the best value for your money while achieving great video results.
Conclusion
The video enhancement landscape has been transformed by artificial intelligence, providing numerous options to enhance your videos’ quality. Whether a professional filmmaker or a casual content creator, free AI video enhancers offer a chance to take your productions to the next level.
Each software has unique strengths, from Wondershare Filmora’s comprehensive editing features to AVCLabs’ neural network-powered upscaling and UniFab’s HDR conversion capabilities. User-friendly options like HitPaw cater to beginners while providing robust enhancement tools.
Moreover, for quick fixes or limited storage, online options like Cutout.Pro and Clideo offer accessible solutions with impressive results. With these advancements, achieving professional-quality videos is now achievable for everyone.
Ollie Mattison
Ollie Mattison is a writer and a lover of all things video.
Follow @Ollie Mattison
The Art of Bokeh: Top Mobile Apps for Creating Stunning Blur Effects
Best Bokeh Effects Apps in 2024

Liza Brown
Mar 27, 2024• Proven solutions
It’s no secret that DSLR cameras can help you achieve this blurred effect, but now there are dozens of apps that allow you to get the same outcome without spending hundreds on a new camera. This article will provide you with the 10 best Bokeh apps for iPhones and Androids, based on our own testing, so that you can start editing right away.
- Part 1: What is the Bokeh Effect?
- Part 2: Best Apps to Achieve the Bokeh Effect
- Part 3: What is the Bokeh Effect?
Part 1: What is the Bokeh Effect and Why Should I Be Using it?
The word “Bokeh”or “boke” refers to the Japanese concept of “blur.” It is, in its simplest form, a style of photography where one object is the primary focus, and everything else is strategically blurred.
Using the Bokeh effect is an excellent way to separate the focal point of your photo from non-focal points. It not only serves the purpose of highlighting the focus of the image, but can also help when you’re looking to get rid of an unpleasant or unwanted background. The blurred background is meant to keep your focal point at the absolute center of your audience’s attention.
Part 2: Top 10 Best Apps to Achieve the Bokeh Effect for iOS and Android
As mentioned, there are other ways to achieve the Bokeh effect without an expensive and often fidget DSLR camera. The following apps have been deemed the best based on a variety of characteristics which will be mentioned below.
1. Focos -iOS - FREE
The Focos app for iPhones is a free resource that uses computational photography and light-field camera settings to help you achieve the perfect blur. It offers users the option to apply the Bokeh effect to both the background and foreground of your image, with a variety of options for adjusting size and transparency.
To create the Bokeh effect in Focos:
- Download App via App Store and allow it access to your camera and camera roll;
- Import the image you wish you use, or take a photo using the app’s camera;
- Adjust your focal point and transparency of the blur using their sliding bar feature;

- To add more Bokeh effects, select the star Effect feature in the bottom right of the screen.

- Once you’re happy with the effect, this app allows you to save to your camera roll or share to other apps, including Instagram.
2. Photo Editor Pro - Android - FREE

Photo Editor Pro is a free application that allows users to achieve the Bokeh effect with 4 different camera modes. Users can also adjust the transparency of the bokeh effect chosen.
To create the Bokeh effect in Photo Editor Pro:
- Download the app and allow access to camera and camera roll;
- Select your desired image either via camera or camera roll;
- Choose between a variety of backgrounds and blending tools and adjust using the apps adjustable features, and download to camera roll or upload to a third-party app.
3. Auto Blur Background - Android - FREE

The Auto Blur Background app for iOS and Android is another free resource for creating an image with the Bokeh effect. The app allows users to select the size and desired amount of blur for your background, giving the user a lot of control over the outcome of their photo. It enables users to add overlays in addition to the bokeh effect to enhance the overall outcome.
To create the Bokeh effect in Auto Blur Background app:
- Import or take your photo on the Auto Blur Background application;
- Edit as desired using a variety of tools offered at the bottom of your screen, and add bokeh effect to the video;
- To export, select the Share icon in the bottom right hand corner;
- From this step you can either import directly to Instagram, or export to camera roll. If exported to camera roll, open Instagram app and add a new story, select photo from camera roll and hit add to story!
4. SnapSeed- iOS & Android - FREE
SnapSeed is one of the ultimate editing apps to help you achieve the Bokeh effect on iOS and Android devices. This app, owned by Google, provides an array of advanced editing tools to help improve your photography and editing capabilities.
To create the Bokeh effect in SnapSeed:
- Download the app in the app store and allow access to camera and camera roll;
- Import or take desired image and choose between a variety of filters;

- After selecting your filter, choose Tools and select the Lens Blur Option , and adjust your blur strength accordingly**;**

- Export and save to camera roll or upload to a third-party site.
5. AfterFocus -iOS & Android - $0.99
AfterFocus helps users achieve the Bokeh effect by letting you define the focal area and adjusting the blur of the surrounding regions.

To create the Bokeh effect in AfterFocus:
- Download the app and allow the app access to your camera and camera roll, and select the image given your options (camera, camera roll);
- Once you’ve selected your image, the app will prompt you to select whether you want to manually select the focus area or if you want their software to detect it for you;
- Several blurring tools will appear, use the focus selector tool to select the regions in which you’d like your image to be focused;
- Then use the background selector tool to select the background of your photo, and choose between lens, motion and zoom blur
6. Real Bokeh -iOS & Android - $2.99
Real Bokeh allows users on both the iPhone and Android to add Bokeh light features to their photos. It includes 36 Bokeh shapes, 33 light leak effects, 23 image filters and much more.

To create the Bokeh effect in Real Bokeh:
- Download the app and allow the app access to your camera and camera roll and select the image given your options (camera, camera roll);
- Choose between different filters, shapes and effects to add to your image;
- Adjust the transparency of your bokeh effect on the sliding bar provided by the app, and export to camera roll or to a third party site.
7. Bokeh Lens -iOS - $0.99
This app, designed for the iPhone, is a magnifying glass for photos, allowing users to create their own Bokeh effect without the use of a DSLR camera. The Bokeh level on this app is also customizable, making it great if you’re looking to get detailed.

To create the Bokeh effect in Bokeh Lens:
- Download the app and allow the app access to your camera and camera roll, and select the image given your options (camera, camera roll);
- Using the image below, follow the focus area tools, adjustable bokeh level and more to achieve your perfect photo, and then export to camera roll or third party app
8. Blur Photo - iOS & Android - FREE
Blur photo uses a one click method to achieve auto blurred backgrounds to help you achieve the Bokeh effect. It also allows you to manually adjust the settings to your own liking. Users can increase or decrease the blur effect, add filters to photos, and add emojis and text.

To create the Bokeh effect in Blur Photo:
- Download the app and allow the app access to your camera and camera roll, and select the image given your options (camera, camera roll);
- You are given a variety of image sizing options, once completed, select Blur, from here you are able to adjust the size and amount of blur and your image is blurred by using your finger to glide over desired areas;
- Upon completion, export and save to camera roll or third-party app.
9. PhotoDirector -iOS & Android - FREE
PhotoDirector is an app available on the iPhone and Android that offers extensive editing options, including the Bokeh effect. You can add animated overlays, animated decorations, sky placement, photo retouching, and much, much more.
To create the Bokeh effect in PhotoDirector:
- Download the app and allow the app access to your camera and camera roll and then select the image given your options (camera, camera roll) ;
- To find and utilize the Bokeh effect, click the Live button, from there, choose where you want the image to focus, which Bokeh effects you want and how animated you want them to be;
- Upon completion, export and save to camera roll or third-party app.
10. Tadaa SLR - iOS - $3.99
Although this app is the most expensive on the list, it also offers some of the best depth-of-field and bokeh effects. It is ultra-precise and easy to navigate.

To create the Bokeh effect in Tadaa SLR:
- Download the app and allow the app access to your camera and camera roll, and then select the image given your options (camera, camera roll);
- Once image is imported, select the Mask tool, which you can use to select the portion of the image you’d like to keep in focus;
- You may then adjust the aperture, range, gloss and highlights via the modification tools provided at the bottom of the screen.
- Adjust to your liking and export!
Part 3: Creating the Bokeh Effect Using the Portrait Mode Function on Your iPhone
If using a third-party app seems like too much effort, or you don’t find the app that achieves the exact blur to focus ratio you’re looking for, consider using the Portrait Mode feature available on newer iPhone models.
Portrait mode is a camera function that allows users to create the depth of field effect we know as Bokeh. When used, the focal image will be crisp and sharp, while the background will be blurred nicely so as to not cause a distraction to the focal point.
To achieve the Bokeh effect through Portrait Mode, you must:
- Open up your camera app and along the bottom of your screen find and select Portrait, and select from a variety of portrait mode options, including Natural light, studio light, contour light, stage light, stage light mono, high key light mono;

- Portrait mode will then allow you to choose your focal point, and do the rest of the work when it comes to blurring the background to create the Bokeh effect;
- The different modes offered will allow users to achieve different types of blur.
Note: If you want to add the bokeh effect to video on the desktop computer, you should try Wondershare Filmora , which provides tilt-shift circle and tilt-shift linear effects for creating the bokeh effect, as well as some bokeh effect overlay. For more details, you can check how to add bokeh effects to the video with Filmora.


Takeaway
Using the Bokeh effect can add a layer to your photography that takes it to the next level. While there are a variety of tools you can use to achieve this, I have covered the 10 best apps for iOS and Android users to accomplish Bokeh. And if third-party apps aren’t for you, don’t forget that iPhone user can also use Portrait Mode to achieve a great Bokeh outcome.
Liza Brown
Liza Brown is a writer and a lover of all things video.
Follow @Liza Brown
Liza Brown
Mar 27, 2024• Proven solutions
It’s no secret that DSLR cameras can help you achieve this blurred effect, but now there are dozens of apps that allow you to get the same outcome without spending hundreds on a new camera. This article will provide you with the 10 best Bokeh apps for iPhones and Androids, based on our own testing, so that you can start editing right away.
- Part 1: What is the Bokeh Effect?
- Part 2: Best Apps to Achieve the Bokeh Effect
- Part 3: What is the Bokeh Effect?
Part 1: What is the Bokeh Effect and Why Should I Be Using it?
The word “Bokeh”or “boke” refers to the Japanese concept of “blur.” It is, in its simplest form, a style of photography where one object is the primary focus, and everything else is strategically blurred.
Using the Bokeh effect is an excellent way to separate the focal point of your photo from non-focal points. It not only serves the purpose of highlighting the focus of the image, but can also help when you’re looking to get rid of an unpleasant or unwanted background. The blurred background is meant to keep your focal point at the absolute center of your audience’s attention.
Part 2: Top 10 Best Apps to Achieve the Bokeh Effect for iOS and Android
As mentioned, there are other ways to achieve the Bokeh effect without an expensive and often fidget DSLR camera. The following apps have been deemed the best based on a variety of characteristics which will be mentioned below.
1. Focos -iOS - FREE
The Focos app for iPhones is a free resource that uses computational photography and light-field camera settings to help you achieve the perfect blur. It offers users the option to apply the Bokeh effect to both the background and foreground of your image, with a variety of options for adjusting size and transparency.
To create the Bokeh effect in Focos:
- Download App via App Store and allow it access to your camera and camera roll;
- Import the image you wish you use, or take a photo using the app’s camera;
- Adjust your focal point and transparency of the blur using their sliding bar feature;
- To add more Bokeh effects, select the star Effect feature in the bottom right of the screen.
- Once you’re happy with the effect, this app allows you to save to your camera roll or share to other apps, including Instagram.
2. Photo Editor Pro - Android - FREE
Photo Editor Pro is a free application that allows users to achieve the Bokeh effect with 4 different camera modes. Users can also adjust the transparency of the bokeh effect chosen.
To create the Bokeh effect in Photo Editor Pro:
- Download the app and allow access to camera and camera roll;
- Select your desired image either via camera or camera roll;
- Choose between a variety of backgrounds and blending tools and adjust using the apps adjustable features, and download to camera roll or upload to a third-party app.
3. Auto Blur Background - Android - FREE
The Auto Blur Background app for iOS and Android is another free resource for creating an image with the Bokeh effect. The app allows users to select the size and desired amount of blur for your background, giving the user a lot of control over the outcome of their photo. It enables users to add overlays in addition to the bokeh effect to enhance the overall outcome.
To create the Bokeh effect in Auto Blur Background app:
- Import or take your photo on the Auto Blur Background application;
- Edit as desired using a variety of tools offered at the bottom of your screen, and add bokeh effect to the video;
- To export, select the Share icon in the bottom right hand corner;
- From this step you can either import directly to Instagram, or export to camera roll. If exported to camera roll, open Instagram app and add a new story, select photo from camera roll and hit add to story!
4. SnapSeed- iOS & Android - FREE
SnapSeed is one of the ultimate editing apps to help you achieve the Bokeh effect on iOS and Android devices. This app, owned by Google, provides an array of advanced editing tools to help improve your photography and editing capabilities.
To create the Bokeh effect in SnapSeed:
- Download the app in the app store and allow access to camera and camera roll;
- Import or take desired image and choose between a variety of filters;
- After selecting your filter, choose Tools and select the Lens Blur Option , and adjust your blur strength accordingly**;**
- Export and save to camera roll or upload to a third-party site.
5. AfterFocus -iOS & Android - $0.99
AfterFocus helps users achieve the Bokeh effect by letting you define the focal area and adjusting the blur of the surrounding regions.
To create the Bokeh effect in AfterFocus:
- Download the app and allow the app access to your camera and camera roll, and select the image given your options (camera, camera roll);
- Once you’ve selected your image, the app will prompt you to select whether you want to manually select the focus area or if you want their software to detect it for you;
- Several blurring tools will appear, use the focus selector tool to select the regions in which you’d like your image to be focused;
- Then use the background selector tool to select the background of your photo, and choose between lens, motion and zoom blur
6. Real Bokeh -iOS & Android - $2.99
Real Bokeh allows users on both the iPhone and Android to add Bokeh light features to their photos. It includes 36 Bokeh shapes, 33 light leak effects, 23 image filters and much more.
To create the Bokeh effect in Real Bokeh:
- Download the app and allow the app access to your camera and camera roll and select the image given your options (camera, camera roll);
- Choose between different filters, shapes and effects to add to your image;
- Adjust the transparency of your bokeh effect on the sliding bar provided by the app, and export to camera roll or to a third party site.
7. Bokeh Lens -iOS - $0.99
This app, designed for the iPhone, is a magnifying glass for photos, allowing users to create their own Bokeh effect without the use of a DSLR camera. The Bokeh level on this app is also customizable, making it great if you’re looking to get detailed.
To create the Bokeh effect in Bokeh Lens:
- Download the app and allow the app access to your camera and camera roll, and select the image given your options (camera, camera roll);
- Using the image below, follow the focus area tools, adjustable bokeh level and more to achieve your perfect photo, and then export to camera roll or third party app
8. Blur Photo - iOS & Android - FREE
Blur photo uses a one click method to achieve auto blurred backgrounds to help you achieve the Bokeh effect. It also allows you to manually adjust the settings to your own liking. Users can increase or decrease the blur effect, add filters to photos, and add emojis and text.
To create the Bokeh effect in Blur Photo:
- Download the app and allow the app access to your camera and camera roll, and select the image given your options (camera, camera roll);
- You are given a variety of image sizing options, once completed, select Blur, from here you are able to adjust the size and amount of blur and your image is blurred by using your finger to glide over desired areas;
- Upon completion, export and save to camera roll or third-party app.
9. PhotoDirector -iOS & Android - FREE
PhotoDirector is an app available on the iPhone and Android that offers extensive editing options, including the Bokeh effect. You can add animated overlays, animated decorations, sky placement, photo retouching, and much, much more.
To create the Bokeh effect in PhotoDirector:
- Download the app and allow the app access to your camera and camera roll and then select the image given your options (camera, camera roll) ;
- To find and utilize the Bokeh effect, click the Live button, from there, choose where you want the image to focus, which Bokeh effects you want and how animated you want them to be;
- Upon completion, export and save to camera roll or third-party app.
10. Tadaa SLR - iOS - $3.99
Although this app is the most expensive on the list, it also offers some of the best depth-of-field and bokeh effects. It is ultra-precise and easy to navigate.
To create the Bokeh effect in Tadaa SLR:
- Download the app and allow the app access to your camera and camera roll, and then select the image given your options (camera, camera roll);
- Once image is imported, select the Mask tool, which you can use to select the portion of the image you’d like to keep in focus;
- You may then adjust the aperture, range, gloss and highlights via the modification tools provided at the bottom of the screen.
- Adjust to your liking and export!
Part 3: Creating the Bokeh Effect Using the Portrait Mode Function on Your iPhone
If using a third-party app seems like too much effort, or you don’t find the app that achieves the exact blur to focus ratio you’re looking for, consider using the Portrait Mode feature available on newer iPhone models.
Portrait mode is a camera function that allows users to create the depth of field effect we know as Bokeh. When used, the focal image will be crisp and sharp, while the background will be blurred nicely so as to not cause a distraction to the focal point.
To achieve the Bokeh effect through Portrait Mode, you must:
- Open up your camera app and along the bottom of your screen find and select Portrait, and select from a variety of portrait mode options, including Natural light, studio light, contour light, stage light, stage light mono, high key light mono;
- Portrait mode will then allow you to choose your focal point, and do the rest of the work when it comes to blurring the background to create the Bokeh effect;
- The different modes offered will allow users to achieve different types of blur.
Note: If you want to add the bokeh effect to video on the desktop computer, you should try Wondershare Filmora , which provides tilt-shift circle and tilt-shift linear effects for creating the bokeh effect, as well as some bokeh effect overlay. For more details, you can check how to add bokeh effects to the video with Filmora.
Takeaway
Using the Bokeh effect can add a layer to your photography that takes it to the next level. While there are a variety of tools you can use to achieve this, I have covered the 10 best apps for iOS and Android users to accomplish Bokeh. And if third-party apps aren’t for you, don’t forget that iPhone user can also use Portrait Mode to achieve a great Bokeh outcome.
Liza Brown
Liza Brown is a writer and a lover of all things video.
Follow @Liza Brown
The Ultimate List: 10 Best Intro Maker Tools Online (Free & Paid)
Video intros are short video clips that are typically used for branding purposes. They appear at the beginning of a lengthy video. You may use these intro videos to market your brand. They will increase your professional appearance if they are appropriately produced and include all necessary facts about your real movie or product.
If you are a content creator, you should always take these things seriously and deliver them effectively. We recognize that producing intros is time-consuming and aggravating, but nothing is straightforward. In this post, we’ll help you find the best intro maker website by looking at some excellent options and discussing why you should check them out. Let’s get going!
In this article
01 Part 1: Top 10 Best Intro Maker Websites [Free and Paid]
02 Part 2: Tips for Making Better Intro Online
Part 1: Top 10 Best Intro Maker Websites [Free and Paid]
Intros are quite necessary, especially when you are a famous YouTuber, Social Media Influencer, or even promoting your business. People decide whether they want to see the video further or not by viewing the intro video. So, the intro should be eye-catching to gain the audience’s attention. Following are the few best intro maker website available in the market:
1. Canva
This is one of the best intro maker website free for Facebook, YouTube, Pinterest, videos, and other social media platforms. People have been utilizing this website for many years and are continuously impressed by its new features. It comes with thousands of templates for use as an intro, such as DIY Canva logo pack, Minima Blog and Social Pack, etc. Moreover, the free version of Canva leaves a watermark, but you can get rid of it by upgrading your package.
Features
- Includes a simple and intuitive user interface
- Millions of templates for users to use in different segments of the video
- Thousands of royalty-free filters and effects
- Allows you to record the videos for editing as well
2. MotionDen
MotionDen allows you to create unique animated intros by utilizing their library of ready-made expert templates, unquestionably their best suit. These are organized into logical categories, such as e-commerce or YouTube, to help you easily choose the ideal design for your specialty.
MotionDen does not require a credit card or a test period and allows you to produce up to five films utilizing their whole video template library. However, you will have to deal with the terrible watermark constantly. To eliminate it and broadcast HD quality films directly to YouTube, the most popular package costs $29 per month.
Features
- It Lets you create unique animated intros for your video
- A straightforward and unique interface is there to operate
- Allows you to create five videos without any credit card
- Helps you edit the intro template with text, color and apply filters
3. Placeit
Placeit is an intro creator powered by Envato, the world’s top digital asset store. Unsurprisingly, this implies their video intro builder delivers a powerful creative punch, with something like a library of over 20,000 classified templates for you to customize and a diverse selection of music tracks to accompany your movie.
Unfortunately, there is no free version of Placeit. It’s only $9 for each opening video. With an annual membership of $89.69, you may have complete access to every one of Placeit’s templates and limitless downloads.
Features
- Allows you to add logo, text, and color to your intros
- 20,000 categorized templates to increase the attractiveness
- Helps you add background music to your intros
- No download limit in the paid version of the software
4. Renderforest
Renderforest allows you to create high-quality intros in a matter of minutes. It offers a massive library of over 50,000 intro templates that you can customize and modify in minutes with scripts, logos, color schemes, and music. Renderforest offers a free intro creator bundle that allows you to generate an infinite number of 360p films up to three minutes long. They will, however, have a watermark and a restricted amount of music tracks to pick from. Paid memberships begin at $5.99 per month and are invoiced yearly.
Features
- 50,000 easily editable intro templates
- The free version allows you to create 360p videos
- Includes background music to add in your intro videos
- No need to install the software since it is completely web-based
5. Video Bolt
Video Bolt is a fantastic intro creator! Unlike the previous entries on this list, Video Bolt focuses solely on video-creating tools. When you subscribe to Video Bolt, you have exposure to all they have to provide, including great templates for intros, tales, product promotions, music pre-process, and more.
Video Bolt features a vast collection of high-quality intro templates. So, whatever your specialized emphasis is, there will undoubtedly be several templates that are a suitable fit. However, the free version does leave a watermark on your videos.
Features
- A vast collection of high-quality intro templates
- Contains background music to make your intro video sound excellent
- This tool is really fast as compared to others
- It features a variety of customization tools for intro videos
6. Panzoid
Panzoid is a tool for developing unique content and an online community. Don’t be misled by the grungy, limited interface; with a little work, you can create extremely customizable video intros with this online free intro maker website.
You have the option of starting your project from scratch or using one of the templates produced by the Panzoid community. Panzoid includes a free version with a watermark, but its subscription plans start at just $1.99 per month (billed yearly) for the Starter plan.
Features
- Intuitive and straightforward interface to operate
- Customizable template for better performance
- It features a simple and easy-to-do editing
7. InVideo
The first thing to mention about InVideo is that it is intended to function with the Chrome browser. As a result, if you’re using another browser, this may not perform as smoothly as you’d expect. InVideo is a fantastic tool for generating an intro video. It differs greatly from the majority of the other applications in this category, which have relatively limited customization choices.
The most interesting thing about InVideo is that you can begin with prepared templates and then apply your tweaks to make them distinctive and consistent with your brand. However, all the videos in the free version feature a watermark.
Features
- It features multiple high-quality editing options
- It comes with pre-made templates to use for intro
- You can customize your own template with this tool
8. OFFEO
OFFEO is a free intro creator for those who want to be designers. Its biggest selling point is the sheer amount – thousands of themes and graphical components you can utilize to make your entrance pop. All of their design pieces have a true aesthetic appeal to them, from dynamic drawings to high-quality stock pictures — everything you need to build a great beginning film.
OFFEO’s templates are conveniently organized into categories like intros, outros, and logos, as well as by industry.
Features
- Thousands of attractive themes for intro videos
- Includes dynamic drawings and high-quality stock pictures
- It is completely free for everyone to use
- Simple and intuitive interface for convenience
9. Visme
Visme is another intro maker website that easily creates high-quality and eye-catching content. Visme is created with a brand philosophy in mind. It allows you to save your brand’s or company’s color palettes, photographs, videos, and other materials.
Visme comes with many templates and access to a large library of stock photos, making it simple for non-designers to utilize the tool and get decent results. The free version of Visme allows you to create up to videos without a watermark.
Features
- Allows you to create three videos without a watermark with the free version
- A vast collection of themes and stock photos
- Simple and intuitive interface to operate
10. Videocreek
Videocreek is another wonderful service for creating free video intros for your YouTube and other social media platforms. It offers over 80 templates to choose from. You may use any of the themes provided, add your trademark or video, and create your video intro.
This platform is easy to use, and you can make high-definition intro movies at no extra charge. And since the website is free to operate, it leaves no watermark.
Features
- It leaves no watermark on the videos
- It offers over 80 templates to choose from
- It contains multiple themes to apply to videos

Part 2: Tips for Making Better Intro Online
After going through all the intro maker websites’ features above, you might have decided to create the intro of your videos to make them look more interesting. However, if you are still stuck with the decision, don’t worry because we will refer to the best intro maker website in this section.
We recommend using InVideo for creating your intro. Although it’s a paid tool, even the free version offers more than enough features to create eye-catching intro videos. The only concern should be the watermark that it leaves, but you can always remove it through a high-quality editor or buy the premium version to get rid of it.
Moreover, we also have some useful tips for you to create a better intro online:
- Pick music that will bring your intro videos to life
- Allow Your Brand’s Personality to excel in Your Intro Videos
- Consider your intro clips to be your social media business card
Conclusion
You can either invest a lot of time mastering high-quality professional technologies like Adobe After Effects, or you could pay big money to a freelancer to make your intro films.
However, if you’re searching for a less expensive solution but still concerned about the value of your intro, we’re confident you’ll be able to make your ideal intro using one of the aforementioned intro maker website.
02 Part 2: Tips for Making Better Intro Online
Part 1: Top 10 Best Intro Maker Websites [Free and Paid]
Intros are quite necessary, especially when you are a famous YouTuber, Social Media Influencer, or even promoting your business. People decide whether they want to see the video further or not by viewing the intro video. So, the intro should be eye-catching to gain the audience’s attention. Following are the few best intro maker website available in the market:
1. Canva
This is one of the best intro maker website free for Facebook, YouTube, Pinterest, videos, and other social media platforms. People have been utilizing this website for many years and are continuously impressed by its new features. It comes with thousands of templates for use as an intro, such as DIY Canva logo pack, Minima Blog and Social Pack, etc. Moreover, the free version of Canva leaves a watermark, but you can get rid of it by upgrading your package.
Features
- Includes a simple and intuitive user interface
- Millions of templates for users to use in different segments of the video
- Thousands of royalty-free filters and effects
- Allows you to record the videos for editing as well
2. MotionDen
MotionDen allows you to create unique animated intros by utilizing their library of ready-made expert templates, unquestionably their best suit. These are organized into logical categories, such as e-commerce or YouTube, to help you easily choose the ideal design for your specialty.
MotionDen does not require a credit card or a test period and allows you to produce up to five films utilizing their whole video template library. However, you will have to deal with the terrible watermark constantly. To eliminate it and broadcast HD quality films directly to YouTube, the most popular package costs $29 per month.
Features
- It Lets you create unique animated intros for your video
- A straightforward and unique interface is there to operate
- Allows you to create five videos without any credit card
- Helps you edit the intro template with text, color and apply filters
3. Placeit
Placeit is an intro creator powered by Envato, the world’s top digital asset store. Unsurprisingly, this implies their video intro builder delivers a powerful creative punch, with something like a library of over 20,000 classified templates for you to customize and a diverse selection of music tracks to accompany your movie.
Unfortunately, there is no free version of Placeit. It’s only $9 for each opening video. With an annual membership of $89.69, you may have complete access to every one of Placeit’s templates and limitless downloads.
Features
- Allows you to add logo, text, and color to your intros
- 20,000 categorized templates to increase the attractiveness
- Helps you add background music to your intros
- No download limit in the paid version of the software
4. Renderforest
Renderforest allows you to create high-quality intros in a matter of minutes. It offers a massive library of over 50,000 intro templates that you can customize and modify in minutes with scripts, logos, color schemes, and music. Renderforest offers a free intro creator bundle that allows you to generate an infinite number of 360p films up to three minutes long. They will, however, have a watermark and a restricted amount of music tracks to pick from. Paid memberships begin at $5.99 per month and are invoiced yearly.
Features
- 50,000 easily editable intro templates
- The free version allows you to create 360p videos
- Includes background music to add in your intro videos
- No need to install the software since it is completely web-based
5. Video Bolt
Video Bolt is a fantastic intro creator! Unlike the previous entries on this list, Video Bolt focuses solely on video-creating tools. When you subscribe to Video Bolt, you have exposure to all they have to provide, including great templates for intros, tales, product promotions, music pre-process, and more.
Video Bolt features a vast collection of high-quality intro templates. So, whatever your specialized emphasis is, there will undoubtedly be several templates that are a suitable fit. However, the free version does leave a watermark on your videos.
Features
- A vast collection of high-quality intro templates
- Contains background music to make your intro video sound excellent
- This tool is really fast as compared to others
- It features a variety of customization tools for intro videos
6. Panzoid
Panzoid is a tool for developing unique content and an online community. Don’t be misled by the grungy, limited interface; with a little work, you can create extremely customizable video intros with this online free intro maker website.
You have the option of starting your project from scratch or using one of the templates produced by the Panzoid community. Panzoid includes a free version with a watermark, but its subscription plans start at just $1.99 per month (billed yearly) for the Starter plan.
Features
- Intuitive and straightforward interface to operate
- Customizable template for better performance
- It features a simple and easy-to-do editing
7. InVideo
The first thing to mention about InVideo is that it is intended to function with the Chrome browser. As a result, if you’re using another browser, this may not perform as smoothly as you’d expect. InVideo is a fantastic tool for generating an intro video. It differs greatly from the majority of the other applications in this category, which have relatively limited customization choices.
The most interesting thing about InVideo is that you can begin with prepared templates and then apply your tweaks to make them distinctive and consistent with your brand. However, all the videos in the free version feature a watermark.
Features
- It features multiple high-quality editing options
- It comes with pre-made templates to use for intro
- You can customize your own template with this tool
8. OFFEO
OFFEO is a free intro creator for those who want to be designers. Its biggest selling point is the sheer amount – thousands of themes and graphical components you can utilize to make your entrance pop. All of their design pieces have a true aesthetic appeal to them, from dynamic drawings to high-quality stock pictures — everything you need to build a great beginning film.
OFFEO’s templates are conveniently organized into categories like intros, outros, and logos, as well as by industry.
Features
- Thousands of attractive themes for intro videos
- Includes dynamic drawings and high-quality stock pictures
- It is completely free for everyone to use
- Simple and intuitive interface for convenience
9. Visme
Visme is another intro maker website that easily creates high-quality and eye-catching content. Visme is created with a brand philosophy in mind. It allows you to save your brand’s or company’s color palettes, photographs, videos, and other materials.
Visme comes with many templates and access to a large library of stock photos, making it simple for non-designers to utilize the tool and get decent results. The free version of Visme allows you to create up to videos without a watermark.
Features
- Allows you to create three videos without a watermark with the free version
- A vast collection of themes and stock photos
- Simple and intuitive interface to operate
10. Videocreek
Videocreek is another wonderful service for creating free video intros for your YouTube and other social media platforms. It offers over 80 templates to choose from. You may use any of the themes provided, add your trademark or video, and create your video intro.
This platform is easy to use, and you can make high-definition intro movies at no extra charge. And since the website is free to operate, it leaves no watermark.
Features
- It leaves no watermark on the videos
- It offers over 80 templates to choose from
- It contains multiple themes to apply to videos
Part 2: Tips for Making Better Intro Online
After going through all the intro maker websites’ features above, you might have decided to create the intro of your videos to make them look more interesting. However, if you are still stuck with the decision, don’t worry because we will refer to the best intro maker website in this section.
We recommend using InVideo for creating your intro. Although it’s a paid tool, even the free version offers more than enough features to create eye-catching intro videos. The only concern should be the watermark that it leaves, but you can always remove it through a high-quality editor or buy the premium version to get rid of it.
Moreover, we also have some useful tips for you to create a better intro online:
- Pick music that will bring your intro videos to life
- Allow Your Brand’s Personality to excel in Your Intro Videos
- Consider your intro clips to be your social media business card
Conclusion
You can either invest a lot of time mastering high-quality professional technologies like Adobe After Effects, or you could pay big money to a freelancer to make your intro films.
However, if you’re searching for a less expensive solution but still concerned about the value of your intro, we’re confident you’ll be able to make your ideal intro using one of the aforementioned intro maker website.
Audio File Conversion Simplified: Top OGG Converter Takeaways
Takeaways from the Best OGG Converter
An easy yet powerful editor
Numerous effects to choose from
Detailed tutorials provided by the official channel
Sometimes, it is mandatory for you to convert the audio or video in order to get it. Well, right now majorly people convert the multimedia content to OGG. They look out for OGG Converter because of its diverse features and other options.
If you are unaware of it, stay tuned with us till the last. Here we are sharing all the relatable details that will help you to know for the same in detail that too easily. Let’s get started!
In this article
01 [What is OGG?](#Part 1)
02 [Eight Online and Free OGG to MP4 Converter](#Part 2)
Part 1 What is OGG?
01What Does OGG Means?
OGG is a file format that was developed by the Xiph Foundation, specifically for encoding audio and video file types. It is freely available and open-source. This format can be used by anyone with the right skills and knowledge. Additionally, file formats like this can contain not only the audio data but also video, text (like subtitles), and metadata related to the audio. It is a credit to the word ‘Jargon,’ which is slang for slang used on the computer game Netrek.
02Is OGG Better Than MP3?
OGG (or Open Source Graphics) is a popular audio file format. These are often preferred over MP3 as the files are easily readable and can have equal quality thru conversions. For better understanding, let’s have a look at other related details for both MP3 and OGG:-
● Both OGG & MP3 are compressed formats, but they have distinct differences. OGG files are smaller and less lossy, you will get higher quality with OGG files, and sometimes you can hear the difference even under close-to-same levels of compression.
● OGG is a file format that can only be developed by resource-rich companies. But it has huge benefits, such as being free, open, and owned by the public.
● OGG is an audio codec that uses a variable bit rate, which enables it to preserve bandwidth.
● MP3 is right up there with other formats when it comes to quality and size, but the OGG format compresses files into smaller sizes and maintains a better quality than the MP3 file.
● OGG files have a bit rate of several hundred Kbps, whereas MP3 format only reaches up to 320 Kbps. The difference, however, should not be too big of a concern.
03How to Play OGG Files?
When you are looking forward to playing the OGG files, it is important to convert them. Most devices available do not support the file format, due to which you cannot play them directly. Maybe the operating system at which you are using the device may support it but if it is not, look out for converter tools.
04Which Other Formats OGG Can Be Converted into and Why
Different formats are available in which you can convert OGG like MP4, WEBM and AVI and so on. The reason behind doing the conversion is that devices do not allow users to play the content directly due to the lack of features in them.
Part 2 Eight Online and Free OGG to MP4 Converter
01How to Convert Youtube to OGG
When you wish to convert Youtube to OGG, do understand that it is a complicated process. Without having any additional converter available, you cannot complete the task at all. Thus, always choose the OGG file converter to complete the process seamlessly.
After choosing the converter, you just need to paste the YouTube link in the same and the outcome will be right there presented to you.
02What Conversion Formats for Youtube Videos Are Available?
Majorly the formats that are available to you for YouTube videos are as follows: MP3 (audio), WEBM (Audio), M4A (Audio), FLAC (Audio), OPUS (Audio), WAV (Audio), OGG (Audio), MP4 (360p Video), MP4 (480p Video), MP4 (720p Video), MP4 (1080p Video), MP4 (1440p Video), WEBM (4K Video), WEBM (8K Video).
038 Online and Free OGG to MP4 Converter
Well, if you are getting confused about how OGG to MP4 gets converted, just utilise the best tools available around. Here we are sharing the top tool that you can consider.
❶ CloudConvert
Cloudconvert is a tool with a simple interface and allows users to convert OGG to MP4 easily. On the main page, you need to select the file and all other details, including resolution, aspect ratio, constant, quality and so on. Select all of them and be ready to get the video in the required format. The quality of the video will not get suppressed.

❷ Zamzar
Zamzar is an online tool available that will help you to do the conversion of the videos in just 3 steps. When you reach out to the main page, add file option is there. Click on it and select the format. It features various formats, and you can choose any of them as per your need. After it, hit on the convert now button and wait until the video with processed.

❸ AnyConv
AnyConv is the simplest tool available for you these days. The best part is it comes up when an innovative interface and lets you select the content easily. On the main page, select the content option that is available, and by clicking the same, select the video you wish to convert. It asks you to select some of the conditions, select all of them and wait until the final output is received to you.

❹ MiConv
Miconv comes up with an innovative yet simple-to-understand interface. When you wish to convert OGG to MP4, just visit the link and follow the on-screen instructions. On the homepage, there is an option available where you need to choose the format for conversion and upload the file after it. Within no time, there will be a file converted file available to you.

❺ Loader.To
Loader.to may appear to be a complex tool for some beginners, but in reality, it is not. At the very first, you just need to paste the URL of the video, and after that, you are all set to convert the same. There will be no restriction imposed, and quality will not be compromised at all.

❻ Onlineconvertfree.com
Onlineconvertfree.com is an online tool available that will help you to make the conversion just by a click. You may get interrupted by ads, but in reality the outcome will be worthy. Just to choose all drag and drop the file to convert the same. After it, select the format in which you wish to have it and wait until the outcome is available.

❼ Mconverter
Mconverter is a glitch-free tool available. As soon as you hit on the link, the direction appears where you can upload the file and select the format in which you wish to have it. It features video, audio, image options and all others you wish to convert.

❽ Freeconvert.com
Freeconvert.com also comes up with an innovative interface and helps you to convert the videos for free easily. The file and select the settings as per your need and hit on the convert button will stop the final output will be as same as you wanted.

Bonus: Choose Filmora to edit every bit of your video
Wondershare Filmora Video Editor is among the best tools available these days. It does not only come up with an innovative interface but helps you to edit the video without any limitation. Along with converting the video, if you wish to add on any special effect, the option is there in the same. You simply select the resolution and wait until the final outcome appears for you.

Wondershare Filmora - Best Video Editor for Mac/Windows
5,481,435 people have downloaded it.
Build unique custom animations without breaking a sweat.
Focus on creating epic stories and leave the details to Filmora’s auto features.
Start a creative adventure with drag & drop effects and endless possibilities.
Filmora simplifies advanced features to save you time and effort.
Filmora cuts out repetition so you can move on to your next creative breakthrough.
It can help you with so much of professional and interesting video editing options. You can get basic and advanced options that can help you to be a pro in editing.
Key Takeaways from This Episode
● OGG is among the best format to keep the multimedia content safe and with a small size.
● Filmora is the ultimate tool for converting OGG videos to MP4 or any other format.
● Online converting tools are available for making the conversion to OGG or vice-versa.
Sometimes, it is mandatory for you to convert the audio or video in order to get it. Well, right now majorly people convert the multimedia content to OGG. They look out for OGG Converter because of its diverse features and other options.
If you are unaware of it, stay tuned with us till the last. Here we are sharing all the relatable details that will help you to know for the same in detail that too easily. Let’s get started!
In this article
01 [What is OGG?](#Part 1)
02 [Eight Online and Free OGG to MP4 Converter](#Part 2)
Part 1 What is OGG?
01What Does OGG Means?
OGG is a file format that was developed by the Xiph Foundation, specifically for encoding audio and video file types. It is freely available and open-source. This format can be used by anyone with the right skills and knowledge. Additionally, file formats like this can contain not only the audio data but also video, text (like subtitles), and metadata related to the audio. It is a credit to the word ‘Jargon,’ which is slang for slang used on the computer game Netrek.
02Is OGG Better Than MP3?
OGG (or Open Source Graphics) is a popular audio file format. These are often preferred over MP3 as the files are easily readable and can have equal quality thru conversions. For better understanding, let’s have a look at other related details for both MP3 and OGG:-
● Both OGG & MP3 are compressed formats, but they have distinct differences. OGG files are smaller and less lossy, you will get higher quality with OGG files, and sometimes you can hear the difference even under close-to-same levels of compression.
● OGG is a file format that can only be developed by resource-rich companies. But it has huge benefits, such as being free, open, and owned by the public.
● OGG is an audio codec that uses a variable bit rate, which enables it to preserve bandwidth.
● MP3 is right up there with other formats when it comes to quality and size, but the OGG format compresses files into smaller sizes and maintains a better quality than the MP3 file.
● OGG files have a bit rate of several hundred Kbps, whereas MP3 format only reaches up to 320 Kbps. The difference, however, should not be too big of a concern.
03How to Play OGG Files?
When you are looking forward to playing the OGG files, it is important to convert them. Most devices available do not support the file format, due to which you cannot play them directly. Maybe the operating system at which you are using the device may support it but if it is not, look out for converter tools.
04Which Other Formats OGG Can Be Converted into and Why
Different formats are available in which you can convert OGG like MP4, WEBM and AVI and so on. The reason behind doing the conversion is that devices do not allow users to play the content directly due to the lack of features in them.
Part 2 Eight Online and Free OGG to MP4 Converter
01How to Convert Youtube to OGG
When you wish to convert Youtube to OGG, do understand that it is a complicated process. Without having any additional converter available, you cannot complete the task at all. Thus, always choose the OGG file converter to complete the process seamlessly.
After choosing the converter, you just need to paste the YouTube link in the same and the outcome will be right there presented to you.
02What Conversion Formats for Youtube Videos Are Available?
Majorly the formats that are available to you for YouTube videos are as follows: MP3 (audio), WEBM (Audio), M4A (Audio), FLAC (Audio), OPUS (Audio), WAV (Audio), OGG (Audio), MP4 (360p Video), MP4 (480p Video), MP4 (720p Video), MP4 (1080p Video), MP4 (1440p Video), WEBM (4K Video), WEBM (8K Video).
038 Online and Free OGG to MP4 Converter
Well, if you are getting confused about how OGG to MP4 gets converted, just utilise the best tools available around. Here we are sharing the top tool that you can consider.
❶ CloudConvert
Cloudconvert is a tool with a simple interface and allows users to convert OGG to MP4 easily. On the main page, you need to select the file and all other details, including resolution, aspect ratio, constant, quality and so on. Select all of them and be ready to get the video in the required format. The quality of the video will not get suppressed.
❷ Zamzar
Zamzar is an online tool available that will help you to do the conversion of the videos in just 3 steps. When you reach out to the main page, add file option is there. Click on it and select the format. It features various formats, and you can choose any of them as per your need. After it, hit on the convert now button and wait until the video with processed.
❸ AnyConv
AnyConv is the simplest tool available for you these days. The best part is it comes up when an innovative interface and lets you select the content easily. On the main page, select the content option that is available, and by clicking the same, select the video you wish to convert. It asks you to select some of the conditions, select all of them and wait until the final output is received to you.
❹ MiConv
Miconv comes up with an innovative yet simple-to-understand interface. When you wish to convert OGG to MP4, just visit the link and follow the on-screen instructions. On the homepage, there is an option available where you need to choose the format for conversion and upload the file after it. Within no time, there will be a file converted file available to you.
❺ Loader.To
Loader.to may appear to be a complex tool for some beginners, but in reality, it is not. At the very first, you just need to paste the URL of the video, and after that, you are all set to convert the same. There will be no restriction imposed, and quality will not be compromised at all.
❻ Onlineconvertfree.com
Onlineconvertfree.com is an online tool available that will help you to make the conversion just by a click. You may get interrupted by ads, but in reality the outcome will be worthy. Just to choose all drag and drop the file to convert the same. After it, select the format in which you wish to have it and wait until the outcome is available.
❼ Mconverter
Mconverter is a glitch-free tool available. As soon as you hit on the link, the direction appears where you can upload the file and select the format in which you wish to have it. It features video, audio, image options and all others you wish to convert.
❽ Freeconvert.com
Freeconvert.com also comes up with an innovative interface and helps you to convert the videos for free easily. The file and select the settings as per your need and hit on the convert button will stop the final output will be as same as you wanted.
Bonus: Choose Filmora to edit every bit of your video
Wondershare Filmora Video Editor is among the best tools available these days. It does not only come up with an innovative interface but helps you to edit the video without any limitation. Along with converting the video, if you wish to add on any special effect, the option is there in the same. You simply select the resolution and wait until the final outcome appears for you.
Wondershare Filmora - Best Video Editor for Mac/Windows
5,481,435 people have downloaded it.
Build unique custom animations without breaking a sweat.
Focus on creating epic stories and leave the details to Filmora’s auto features.
Start a creative adventure with drag & drop effects and endless possibilities.
Filmora simplifies advanced features to save you time and effort.
Filmora cuts out repetition so you can move on to your next creative breakthrough.
It can help you with so much of professional and interesting video editing options. You can get basic and advanced options that can help you to be a pro in editing.
Key Takeaways from This Episode
● OGG is among the best format to keep the multimedia content safe and with a small size.
● Filmora is the ultimate tool for converting OGG videos to MP4 or any other format.
● Online converting tools are available for making the conversion to OGG or vice-versa.
Also read:
- QuickTime Speed Hack How to Fast Forward Your Videos for 2024
- Updated 2024 Approved Want to Learn More About the AIFF File Format? Read This Article, Where We Tell You Everything You Need to Know
- New Slow Down Time A Beginners Guide to Making Slow-Motion Videos on Kapwing
- In 2024, The 5 Best Free Video Trimmers You Need to Try
- Updated In 2024, Smooth Operator Top Free Video Stabilization Software for Windows and macOS
- New 2024 Approved The Ultimate List Top 10 Intro Creator Tools Online Free & Paid
- Updated In 2024, Cross-Platform Video Editing 35 Top Tools for Any Device
- Updated In 2024, Get the Most Out of FCPX Expert Advice on Managing Your Macs Storage
- New Change the Pace Best GIF Speed Changer Tools Reviewed for 2024
- New Androids Best Kept Secrets 5 Free Video Stabilizer Apps for 2024
- New In 2024, Free Online Video Editing Top 10 Trimming Tools
- New In 2024, Get Rid of TikTok Logos Best Online Watermark Removers
- 2024 Approved Merge Your Videos for Free The Best Web-Based Tools
- New The Ultimate Guide to Free Video Editing on Ubuntu Top 10 Software for 2024
- Updated 2024 Approved Video Cropping 101 Learn How to Use Avidemux Like a Pro
- Updated The Best of Both Worlds 35 Video Editors for Desktop and Mobile Devices
- New In 2024, Elevate Your Editing Game 10 Best Free Plugins for FCPX
- Updated Free Video Editing Essentials Cutting and Joining Tools for Starters for 2024
- Updated In 2024, 10 Exceptional Intro Creator Platforms Free and Premium Options
- The 5 Best Animation Makers for Creating Engaging Whiteboard Videos for 2024
- Updated In 2024, What to Look for in a Video to Audio Converter A Beginners Guide
- In 2024, Top Mac Video Editing Software Options Beyond Pinnacle Studio
- 2024 Approved Online Gaming Intro Generators Our Top 10 Picks
- Updated In 2024, Say Goodbye to Cropping The Definitive Facebook Video Aspect Ratio Guide
- New 2024 Approved The Best of the Best Top 5 Online Stop Motion Creators
- New 2024 Approved Learn and Save Final Cut Pro Education Pricing You Wont Want to Miss
- Updated 2024 Approved Effortless Video Editing Top Tools with Auto-Reframing
- New In 2024, S Best Video Editors for 4K Proxy Footage Expert Recommendations
- 2024 Approved The Complete Guide to Facebook Video Aspect Ratios A One-Stop Resource
- New Streamline Your Video Editing Best FLV Editor for Windows 8 Users for 2024
- New Amazon Prime Video on Any Screen Aspect Ratio Tips and Tricks for 2024
- Updated No More Wobbles The Top 10 Free Online Video Stabilizers
- New 2024 Approved Make Movies for Free Top Online Video Makers
- 2024 Approved The Ultimate List of Vignette Apps for Mobile Free, Paid, and Everything in Between
- Updated Final Cut Pro 2023 Reversing Video Clips Like a Pro for 2024
- New 2024 Approved Unleash Your Creativity Top 4K Video Editing Software
- Updated In 2024, 7 Best Video Mergers Without Watermark
- New In 2024, The Art of Converting YouTube Videos to MP3 Choosing the Right Converter
- Updated Unlock Vertical Video Potential Top Editing Apps for Mobile for 2024
- New 2024 Approved My Top Criteria for Selecting the Best Video to Audio Converter
- New In 2024, WeVideo The Fast and Easy Way to Create Amazing Videos
- Updated 2024 Approved Free and Fabulous Top MOV Movie Editors
- New The Power of 16X9 5 Essential Facts About Ratio Calculators
- New Merge Videos Without Watermarks Top 5 Tools for 2024
- Updated Unlock Free Sound Effects for Your FCP Projects Top Resources & Tutorials
- Updated Top Time-Lapse Video Editors Free and Paid Options for 2024
- In 2024, The Updated Method to Bypass Xiaomi Redmi Note 12 Pro 5G FRP
- In 2024, Latest way to get Shiny Meltan Box in Pokémon Go Mystery Box On Honor Play 7T | Dr.fone
- Full Guide to Hard Reset Your Tecno Spark 10 4G | Dr.fone
- 7 Solutions to Fix Error Code 963 on Google Play Of Google Pixel Fold | Dr.fone
- New In 2024, Becoming a Pro in TikTok Live Shopping Your Complete Guide
- How to Update iPhone 15 without Losing Any Data? | Dr.fone
- How to Transfer Photos from Oppo A78 5G to New Android? | Dr.fone
- New Clone Yourself in Videos with Filmora
- In 2024, Is GSM Flasher ADB Legit? Full Review To Bypass Your Nokia C210FRP Lock
- In 2024, How to Fake GPS on Android without Mock Location For your Poco F5 5G | Dr.fone
- How to Downgrade Apple iPhone 6 without Losing Any Data? | Dr.fone
- Updated In 2024, Convert 4K Videos to MP4 A Step-by-Step Guide to Easy Downloads
- How To Get Out of DFU Mode on Apple iPhone 7 Plus? | Dr.fone
- How Do I Stop Someone From Tracking My Motorola Edge 40 Neo? | Dr.fone
- How to Unlock a Network Locked Samsung Galaxy A05 Phone?
- In 2024, How to Detect and Stop mSpy from Spying on Your Realme 11 5G | Dr.fone
- 2024 Approved With the Trending of Videos, More and More People Are Likely to Create Videos. To Help People Figure Out the Best Free Online Video Editing Tools, Ive Tested some Online Video Editors on the Market A
- Ultimate Guide on Vivo S17t FRP Bypass
- How to Unlock Vivo Y100i Phone Password Without Factory Reset?
- Title: New Revamp Your Footage Top Free Online Video Quality Improvement Tools for 2024
- Author: Ava
- Created at : 2024-04-29 13:22:06
- Updated at : 2024-04-30 13:22:06
- Link: https://video-content-creator.techidaily.com/new-revamp-your-footage-top-free-online-video-quality-improvement-tools-for-2024/
- License: This work is licensed under CC BY-NC-SA 4.0.
