
:max_bytes(150000):strip_icc():format(webp)/001_2654847-5b99b903c9e77c005077d0d8.jpg)
New 2024 Approved Get Noticed with These 20 Eye-Catching Adobe Premiere Intro Templates Free Download
Get Noticed with These 20 Eye-Catching Adobe Premiere Intro Templates [Free Download]
Top 20 Adobe Premiere Title/Intro Templates [Free Download]

Benjamin Arango
Mar 29, 2024• Proven solutions
One of the things that can make your output stand out from the crowd is the titles. Many people think creating eye-catching title effects is beyond them, but with Premiere Pro, you really couldn’t be more wrong.
As Premiere Pro doesn’t have built-in templates, the ability to import free Premiere Pro templates is a must. Anyone need to find a custom title style that suits the project and looks professional and carries impact.
The great thing is that there are many of these resources that are offered entirely free! If you don’t know how to add text/title to Adobe Premiere, here are steps to add text resources .
In this article, we will share with you 20 Free to download Title Templates for Premiere Pro.
- Part1: Top 15 Free Adobe Premiere Pro Title Templates
- Part2: Best 5 Premiere Pro Intro Templates Free Download
- Part3: How to Import and Customize Title Templates in Premiere
You may also like: 10 Free Star Wars Fonts to Make Your Video Amazing
Part 1: Top 15 Free Adobe Premiere Title Templates
Adding the finishing touches to a project, like creating the opening titles or end credits, is often not at the top of anyone’s priority list during the video editing process.
Nonetheless, making a unique opening sequence along with impressive animations in Adobe Premiere Pro can be a time-consuming endeavor, so instead of spending countless hours on producing a perfect combination of text and images, you can just download a title template from the Internet.
1 Premier Pro
Jarle Leirpoll runs this site, and it is a treasure trove of information, help, and advice on Premiere from a man who wrote the book (literally, it’s for sale on the site!) on Premiere.
His first title collection is consisting of 8 templates, including Lower Thirds templates, end credit template, and some special characters. However, it well worth a look around the site as there is plenty more free stuff including presets, and a whole range of tips and tricks to help with your editing.
Features:
- Free Premiere Pro templates to download
- Easy to import the title template to Premiere
- 100% ready to use
In case that you’re just a beginner of video editing software, you can start with Wondershare Filmora (Latest Filmora version 11) to add text to videos, which is powerful but easy-to-use for green hands. Download the Wondershare Filmora below.
There are hundreds of Text and Titles presets available in Filmora, which allows you to add titles, subtitles, scrolling end credits, lower 3d, and openers with ease. You can also apply some animation effects to the selected title presets.
Check the video below to find out how to add text to video with Wondershare Filmora.
Besides the built-in title presets, Wondershare Filmora (Latest Filmora version X) also provides more title templates in Filmstock , which offers lots of special effects templates.
Currently, there are Title Expansion Set, business title set, wedding title set, and lower third expansion set to download. Check the video below to watch the Title Expansion set templates.
 Download Mac Version ](https://tools.techidaily.com/wondershare/filmora/download/ )
Learn more details about How to Add Text to Video with Filmora.
2 Richard Harrington
This is another site that offers templates for download but is also a great place to visit for ideas and information. Richard approaches Premiere from a photographer’s viewpoint, and so has a slightly different view on many topics that are well worth reading.
He has links to a sizable number of templates on Richard Harrington covering a range of styles and subjects, including DVD menus, animated text, and high-quality models. Still, his blog is updated regularly and often includes free downloads.
Features:
- Supports Adobe Premiere intro templates to use
- It includes various templates and presets on Windows and Mac
- More than title templates also has DVD menus and animated text
3 ProVideoCoalition
Another all-encompassing site has a huge amount of information and knowledge to be gained. The templates are just part of the story. They are available on Pro Video Coalition and include numerous files and even some free video content showing their implementation.
Also on this page are links to some other sites offering free content or advice on various aspects of Premiere, making it well worth a visit and definitely worth its place in this top 10.
Of particular interest on this site is the regularly updated news which focuses on the latest hardware and software announcements.
Features:
- Supports lower thirds for Adobe Premiere
- You can customize the Premiere Pro intro template free download
- You can create graphic elements
4 Coremelt
This is a commercial site that offers a wide variety of high-quality plugins and templates for several video editing platforms. However, we are on the lookout for that fabulous price of free here, so a little digging finds this page , here you will find ten templates from one of their best selling products offered entirely free.
All templates are quality professionally produced products and worth the visit alone. For anyone who is looking to take their editing output to the professional level, the commercial products on offer here are well worth a look, high quality, and a reasonable cost.
Features:
- It includes 3D text and motion graphics templates
- Free and safe download the Premiere template

5 Bestproaction
Another commercial site. This one has a range of free templates and presets to download for Premiere. Fourteen open items altogether can be downloaded. This site at least deserves a browse through their catalog after a download. The emphasis here is on low cost but high quality, useful templates, and plugins to suit any project.
Even for those of us with a limited budget, there may be something that catches the eye. It is an excellent site for browsing when looking for inspiration.
Features:
- Offers multimedia products like free Premiere Pro text, title templates
- Includes professional Premiere Pro template for videographers
- You can create graphic elements

6 FXFactory
This is another commercial site that has a smattering of very high-quality free downloads on offer, including a beautiful template for the original Star Wars movie style scrolling titles.
Again, it is worth browsing the catalog when you are on the site, but all the free products can be found here .
FX Factory has also created some great video tutorials on a variety of aspects of video production that are well worth a view when you are at the site.
Features:
- Free Premiere Pro effects templates to download
- Includes a step by step Premiere Pro tutorial
7 Creative Impatience
A fantastic site full of information, tips, and opinion on all aspects of video production, it’s a great place to spend some time, with the bonus of a bunch of free downloads for Premiere.
Of particular note are the tutorials, an excellent source of information and tricks that you may not have seen before, with their YouTube channel being a great source of free guidance for editors of any sort of experience.
Features:
- Apart from free Premiere Pro templates, you can also find blogs
- Easy steps to make Premiere Pro templates
- Safe and clean to use. All real
8Filmimpact
A commercial site is offering some great products at competitive prices. At first glance, this may not seem to be a useful place for our search for the free stuff.
However, all the products do have a free trial download, and as a bonus, the trial for pack one includes four free to use templates. They are quality products too, and well worth a look.

9 Style4Type
Style4Type is an exciting site regularly updated with new free templates as well as offering technical advice and having further templates available as commercial products.
And to the side is even a free download for a PDF file that walks you through installing and using the templates within Premiere once you have them.
There are already a lot of free templates on offer covering a wide variety of styles, but they are added to with regularity, so it is a site to bookmark for the future.
Features:
- Free title templates to use including texture templates
- Professional tools to better your video

10 Premiere Beat
Lots of information on this site as its been running for a decade, it is a website that imparts a wealth of knowledge along the way on not just video editing but music.
The pack includes 21 Premiere title templates to use. Another site that you will want to visit again and again.
Features:
- High-quality Premiere Pro templates to download
- A large number of Premiere templates to use
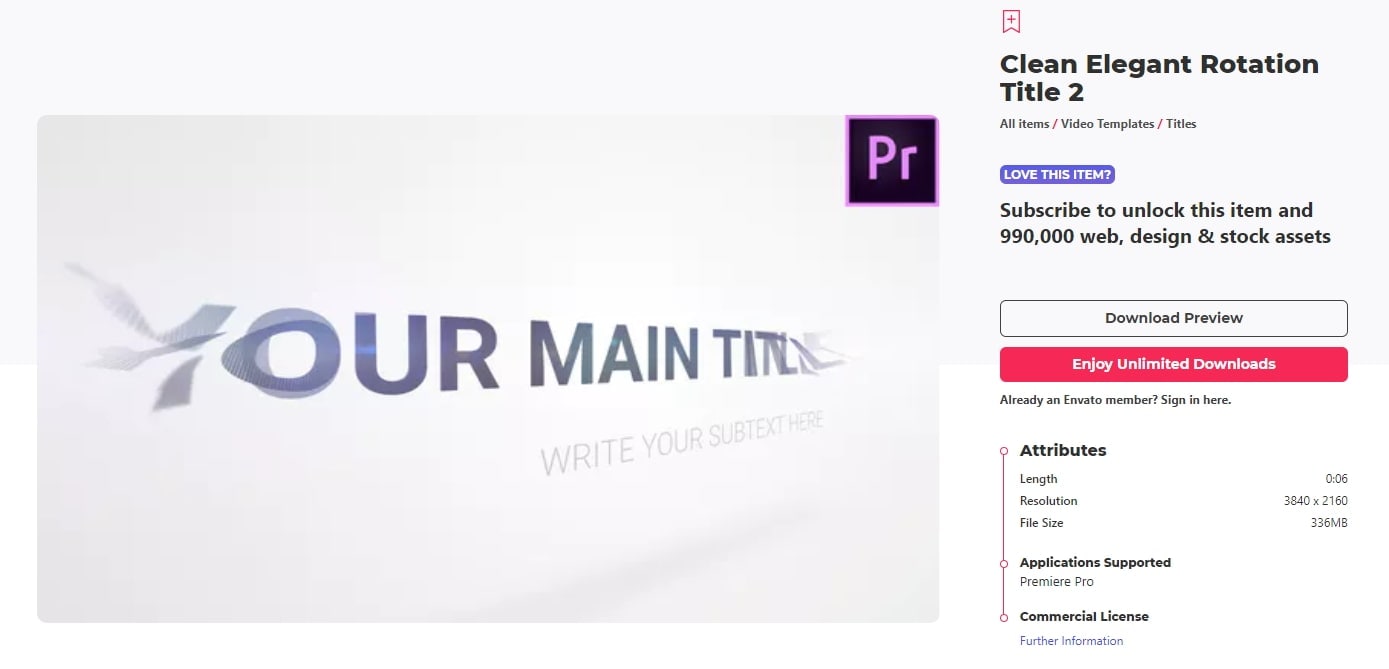
11 Clean Elegant Rotation Title
It is a clean title template without unnecessary parts. If you like simple titles, this one is best for you. You can customize in Premiere easily with a few clicks. For beginners, it also includes free tutorials to use.
Features:
- Simple and clean Premiere title templates
- Customizable in Premiere
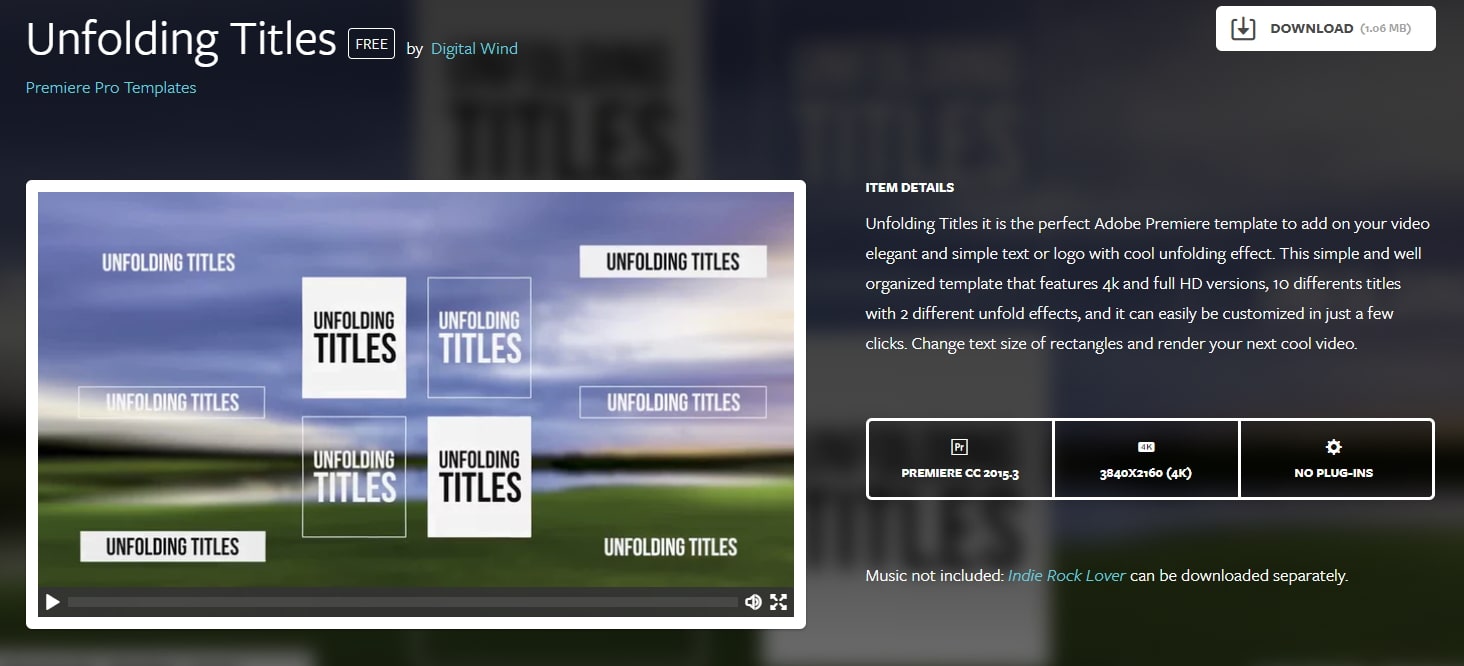
12 Unfolding Titles
It is a clean title template with an unfolding effect. Each text has two unfolding effects, which are convenient to use with customization. It supports 4K and HD versions. In this pack, it wons 10 title formats. After importing Premiere, you can also change text size.
Features:
- 20 unfolding title effects
- Supports rendering your video
13 Orange83
These are five modern title packs for Premiere. With it, you don’t need to use After Effects as you can import them to edit. The best part is you can include your logo and other stuff you like.
Features:
- Include 5 title packs
- Modern and clean titles
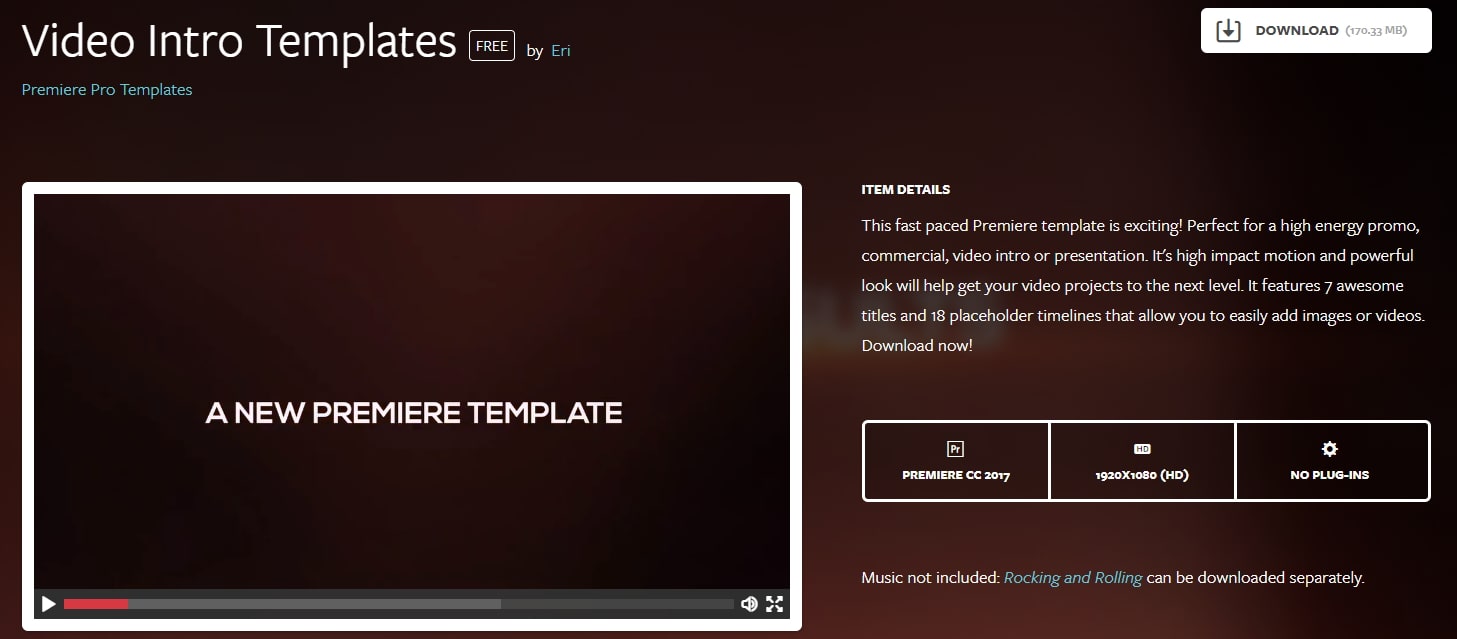
14 Video Intro Templates - Premiere Pro intro template free download
It is a free download Premiere Pro intro template that you can add to your video. It is highly recommended to use promotion and commercial video.
This intro template can be adjusted after you import it to Premiere Pro. This Premiere Pro intro template is HD, so you don’t need to worry about the whole video quality.
Features:
- 1920X1080 (HD) is supported
- This intro template doesn’t include built-in music
15 Elegant Promo - another Premiere Pro intro template free to use
It is intro template for Premiere Pro is modern and free to use. The whole style is young and energetic, which will give viewers a fresh new feeling. It includes 12 images and 26 text layers, and all of them are free to download.
You can use it for your presentation, promotional video, and product video. Besides, it doesn’t require a plug in to use this intro template in Premiere Pro.
Features:
- It includes animated intro elements.
- Use an HD intro template to make a popular video.

These are free templates, and they are enough to get anyone up and running with a new project. As said before, with the commercial enterprises that offer freebies, it’s always worth checking out their paid for output as well, you may not be in the market for it right now, but something may stick for a later time.
Part 2: Bonus: Best 5 Premiere Pro Intro Templates Free Download
Even though all websites we featured in this article offer some free intro templates for Adobe Premiere Pro. However, it is still a much better solution to buy a subscription plan on a platform if you are working on a large number of projects each month.
Let’s see which websites you can use to download the intro and title templates for Premiere Pro.
16. Motion Array
In addition to an impressive library of intro templates, Motion Array offers presets, sound effects, royalty-free music, and stock footage.
Furthermore, you can choose the software version to make sure that the templates you download can be used with the version of Adobe Premiere Pro you have installed on your computer.
The website provides you with powerful search tools, so you can select the resolution of the template, up to 8K, or choose which types of templates are going to be displayed.
Using the free subscription plan can limit your options since you’ll only be able to download free templates, and your upload storage will be limited to just 1GB.
The Pro subscription plan that can be purchased for $54 per month will grant you access to an almost endless selection of title templates as well as a huge selection of plugins for Adobe Premiere Pro.

17. Cinecom – Simple Intro for Premiere Pro
It is a designer pack that features ten pre-animated lower-thirds intro templates. You can change the duration of the font and color of the text in each template, and you can choose if you want to download a 1080 or the 4K version of the designer pack.
The templates are compatible with CS6, CC2013, CC2014, and CC2016 versions of the Premiere Pro. The Simple Titles pack can be easily installed, as you just have to drag and drop it into the software.
However, before you can download these title templates, you have to subscribe to Cinecom’s mailing list.
Even though this can be a bit inconvenient, it is very well worth the trouble since you’ll be able to transform or build upon the intro templates and use them freely in all videos you edit in Adobe Premiere Pro.
18. EnvatoElements
You can find much more than intro templates on the EnvatoElements platform since you can choose from 740.000 items you can use for anything from creating a WordPress website to preparing your next business presentation.
The Video Templates category alone features over 4000 items, including Logo Stings or Infographics assets.
There are nearly one hundred available intro templates for Adobe Premiere Pro, but downloading any of them requires you to create an account and purchase a subscription plan.
Prices start from $16.50 per month, and packages include virtually unlimited access to stock photos and videos, video templates, and much more. The EnvatoElements platform also offers assets that can be used with Final Cut Pro, Adobe After Effects or Apple Motion.

19. Videohive
Videohive is a part of the Envato Market platform that also features Web Themes and Templates, Code, Audio, or Graphic sections. It is free to use, but only a limited amount of assets can be downloaded for free.
To download an item, you must purchase it, and prices can range from $16 to $50 for a single title template.
Videohive is also a great source of title templates for Adobe After Effects, as it offers more than 5000 titles and intros that are compatible with this software.
Furthermore, you can download presets for both Premiere Pro and After Effects that can be used to create stop-motion animations, perform color correction, or make the footage look like it was captured with a VHS camera.

20. RocketStock
This option is best suited for video editors who want to create their intros because RocketStok’s Cinematic Style Library extends the scope of options provided by Premiere Pro.
Downloading all fonts except Helvetica Neue is free, but you must check which fonts you can use in commercial projects. You will have no trouble installing the fonts since you can just double-click on the font and follow the on-screen instructions.
Once you’ve installed all the fonts from the library, you can use them to replace the software’s default library. You just have to click on the Replace Style Library option that can be accessed from Premiere Pro’s Title Style tab.
If you don’t feel comfortable creating your titles or if you simply don’t have the time to create your own titles, the Free Cinematic Style Library is not the best choice for you.
On the other hand, Premiere Pro’s users who don’t often use title templates can benefit from downloading RocketStock’s intro library.

Part 3: How to Import and Customize Title Templates in Premiere
If you download the template, all the title templates support customization. You can change its size, font, color, and add 3D effects.
It is easy to import and use it to touch up your video. Check out the steps below to know how to import title templates quickly.
- Install the title template. Choose one template you like and download it to your PC. Remember to unzip it before importing it. Now install them.
- Import the title template. You just need to go to click Effects at the top. Then at right, you will find Presets in the effects section.
- Right-click on presets, and choose Import Presets. If the title template format is .mogrt, you need to open it in Essential Graphics Panel. At the bottom right corner, click the plus icon to import the title template and install it.
- Customize the title template. Once the title template is imported, drag it to the timeline. Click the Editing tab. Here you can customize colors, text, opacities, and positions. There are more options for you to explore.
- You can also copy and paste the title template to another place in the timeline. If you change one place of the pasted template, the original one will remain the same.
Note: each version of Premiere’s interface will look different, but the workflow is similar.
Conclusion
Using title templates can help you achieve a certain visual style faster, so you don’t have to spend a lot of time looking for a perfect background or animating the text.
The Internet provides almost unlimited video editing resources, but not all of these resources can be acquired for free.
Which website you will choose as a source of fresh title templates depends on how often you work on new projects in Adobe Premiere Pro.
If you want to make professional video editing and tired of Premiere, try Filmora! It includes various titles templates to use.
You can sync audio automatically, use detailed color correction to make your title and video like a movie. Download it now (FREE)!
Benjamin Arango
Benjamin Arango is a writer and a lover of all things video.
Follow @Benjamin Arango
Benjamin Arango
Mar 29, 2024• Proven solutions
One of the things that can make your output stand out from the crowd is the titles. Many people think creating eye-catching title effects is beyond them, but with Premiere Pro, you really couldn’t be more wrong.
As Premiere Pro doesn’t have built-in templates, the ability to import free Premiere Pro templates is a must. Anyone need to find a custom title style that suits the project and looks professional and carries impact.
The great thing is that there are many of these resources that are offered entirely free! If you don’t know how to add text/title to Adobe Premiere, here are steps to add text resources .
In this article, we will share with you 20 Free to download Title Templates for Premiere Pro.
- Part1: Top 15 Free Adobe Premiere Pro Title Templates
- Part2: Best 5 Premiere Pro Intro Templates Free Download
- Part3: How to Import and Customize Title Templates in Premiere
You may also like: 10 Free Star Wars Fonts to Make Your Video Amazing
Part 1: Top 15 Free Adobe Premiere Title Templates
Adding the finishing touches to a project, like creating the opening titles or end credits, is often not at the top of anyone’s priority list during the video editing process.
Nonetheless, making a unique opening sequence along with impressive animations in Adobe Premiere Pro can be a time-consuming endeavor, so instead of spending countless hours on producing a perfect combination of text and images, you can just download a title template from the Internet.
1 Premier Pro
Jarle Leirpoll runs this site, and it is a treasure trove of information, help, and advice on Premiere from a man who wrote the book (literally, it’s for sale on the site!) on Premiere.
His first title collection is consisting of 8 templates, including Lower Thirds templates, end credit template, and some special characters. However, it well worth a look around the site as there is plenty more free stuff including presets, and a whole range of tips and tricks to help with your editing.
Features:
- Free Premiere Pro templates to download
- Easy to import the title template to Premiere
- 100% ready to use
In case that you’re just a beginner of video editing software, you can start with Wondershare Filmora (Latest Filmora version 11) to add text to videos, which is powerful but easy-to-use for green hands. Download the Wondershare Filmora below.
There are hundreds of Text and Titles presets available in Filmora, which allows you to add titles, subtitles, scrolling end credits, lower 3d, and openers with ease. You can also apply some animation effects to the selected title presets.
Check the video below to find out how to add text to video with Wondershare Filmora.
Besides the built-in title presets, Wondershare Filmora (Latest Filmora version X) also provides more title templates in Filmstock , which offers lots of special effects templates.
Currently, there are Title Expansion Set, business title set, wedding title set, and lower third expansion set to download. Check the video below to watch the Title Expansion set templates.
Download Mac Version ](https://tools.techidaily.com/wondershare/filmora/download/ )
Learn more details about How to Add Text to Video with Filmora.
2 Richard Harrington
This is another site that offers templates for download but is also a great place to visit for ideas and information. Richard approaches Premiere from a photographer’s viewpoint, and so has a slightly different view on many topics that are well worth reading.
He has links to a sizable number of templates on Richard Harrington covering a range of styles and subjects, including DVD menus, animated text, and high-quality models. Still, his blog is updated regularly and often includes free downloads.
Features:
- Supports Adobe Premiere intro templates to use
- It includes various templates and presets on Windows and Mac
- More than title templates also has DVD menus and animated text
3 ProVideoCoalition
Another all-encompassing site has a huge amount of information and knowledge to be gained. The templates are just part of the story. They are available on Pro Video Coalition and include numerous files and even some free video content showing their implementation.
Also on this page are links to some other sites offering free content or advice on various aspects of Premiere, making it well worth a visit and definitely worth its place in this top 10.
Of particular interest on this site is the regularly updated news which focuses on the latest hardware and software announcements.
Features:
- Supports lower thirds for Adobe Premiere
- You can customize the Premiere Pro intro template free download
- You can create graphic elements
4 Coremelt
This is a commercial site that offers a wide variety of high-quality plugins and templates for several video editing platforms. However, we are on the lookout for that fabulous price of free here, so a little digging finds this page , here you will find ten templates from one of their best selling products offered entirely free.
All templates are quality professionally produced products and worth the visit alone. For anyone who is looking to take their editing output to the professional level, the commercial products on offer here are well worth a look, high quality, and a reasonable cost.
Features:
- It includes 3D text and motion graphics templates
- Free and safe download the Premiere template
5 Bestproaction
Another commercial site. This one has a range of free templates and presets to download for Premiere. Fourteen open items altogether can be downloaded. This site at least deserves a browse through their catalog after a download. The emphasis here is on low cost but high quality, useful templates, and plugins to suit any project.
Even for those of us with a limited budget, there may be something that catches the eye. It is an excellent site for browsing when looking for inspiration.
Features:
- Offers multimedia products like free Premiere Pro text, title templates
- Includes professional Premiere Pro template for videographers
- You can create graphic elements
6 FXFactory
This is another commercial site that has a smattering of very high-quality free downloads on offer, including a beautiful template for the original Star Wars movie style scrolling titles.
Again, it is worth browsing the catalog when you are on the site, but all the free products can be found here .
FX Factory has also created some great video tutorials on a variety of aspects of video production that are well worth a view when you are at the site.
Features:
- Free Premiere Pro effects templates to download
- Includes a step by step Premiere Pro tutorial
7 Creative Impatience
A fantastic site full of information, tips, and opinion on all aspects of video production, it’s a great place to spend some time, with the bonus of a bunch of free downloads for Premiere.
Of particular note are the tutorials, an excellent source of information and tricks that you may not have seen before, with their YouTube channel being a great source of free guidance for editors of any sort of experience.
Features:
- Apart from free Premiere Pro templates, you can also find blogs
- Easy steps to make Premiere Pro templates
- Safe and clean to use. All real
8Filmimpact
A commercial site is offering some great products at competitive prices. At first glance, this may not seem to be a useful place for our search for the free stuff.
However, all the products do have a free trial download, and as a bonus, the trial for pack one includes four free to use templates. They are quality products too, and well worth a look.
9 Style4Type
Style4Type is an exciting site regularly updated with new free templates as well as offering technical advice and having further templates available as commercial products.
And to the side is even a free download for a PDF file that walks you through installing and using the templates within Premiere once you have them.
There are already a lot of free templates on offer covering a wide variety of styles, but they are added to with regularity, so it is a site to bookmark for the future.
Features:
- Free title templates to use including texture templates
- Professional tools to better your video
10 Premiere Beat
Lots of information on this site as its been running for a decade, it is a website that imparts a wealth of knowledge along the way on not just video editing but music.
The pack includes 21 Premiere title templates to use. Another site that you will want to visit again and again.
Features:
- High-quality Premiere Pro templates to download
- A large number of Premiere templates to use
11 Clean Elegant Rotation Title
It is a clean title template without unnecessary parts. If you like simple titles, this one is best for you. You can customize in Premiere easily with a few clicks. For beginners, it also includes free tutorials to use.
Features:
- Simple and clean Premiere title templates
- Customizable in Premiere
12 Unfolding Titles
It is a clean title template with an unfolding effect. Each text has two unfolding effects, which are convenient to use with customization. It supports 4K and HD versions. In this pack, it wons 10 title formats. After importing Premiere, you can also change text size.
Features:
- 20 unfolding title effects
- Supports rendering your video
13 Orange83
These are five modern title packs for Premiere. With it, you don’t need to use After Effects as you can import them to edit. The best part is you can include your logo and other stuff you like.
Features:
- Include 5 title packs
- Modern and clean titles
14 Video Intro Templates - Premiere Pro intro template free download
It is a free download Premiere Pro intro template that you can add to your video. It is highly recommended to use promotion and commercial video.
This intro template can be adjusted after you import it to Premiere Pro. This Premiere Pro intro template is HD, so you don’t need to worry about the whole video quality.
Features:
- 1920X1080 (HD) is supported
- This intro template doesn’t include built-in music
15 Elegant Promo - another Premiere Pro intro template free to use
It is intro template for Premiere Pro is modern and free to use. The whole style is young and energetic, which will give viewers a fresh new feeling. It includes 12 images and 26 text layers, and all of them are free to download.
You can use it for your presentation, promotional video, and product video. Besides, it doesn’t require a plug in to use this intro template in Premiere Pro.
Features:
- It includes animated intro elements.
- Use an HD intro template to make a popular video.
These are free templates, and they are enough to get anyone up and running with a new project. As said before, with the commercial enterprises that offer freebies, it’s always worth checking out their paid for output as well, you may not be in the market for it right now, but something may stick for a later time.
Part 2: Bonus: Best 5 Premiere Pro Intro Templates Free Download
Even though all websites we featured in this article offer some free intro templates for Adobe Premiere Pro. However, it is still a much better solution to buy a subscription plan on a platform if you are working on a large number of projects each month.
Let’s see which websites you can use to download the intro and title templates for Premiere Pro.
16. Motion Array
In addition to an impressive library of intro templates, Motion Array offers presets, sound effects, royalty-free music, and stock footage.
Furthermore, you can choose the software version to make sure that the templates you download can be used with the version of Adobe Premiere Pro you have installed on your computer.
The website provides you with powerful search tools, so you can select the resolution of the template, up to 8K, or choose which types of templates are going to be displayed.
Using the free subscription plan can limit your options since you’ll only be able to download free templates, and your upload storage will be limited to just 1GB.
The Pro subscription plan that can be purchased for $54 per month will grant you access to an almost endless selection of title templates as well as a huge selection of plugins for Adobe Premiere Pro.
17. Cinecom – Simple Intro for Premiere Pro
It is a designer pack that features ten pre-animated lower-thirds intro templates. You can change the duration of the font and color of the text in each template, and you can choose if you want to download a 1080 or the 4K version of the designer pack.
The templates are compatible with CS6, CC2013, CC2014, and CC2016 versions of the Premiere Pro. The Simple Titles pack can be easily installed, as you just have to drag and drop it into the software.
However, before you can download these title templates, you have to subscribe to Cinecom’s mailing list.
Even though this can be a bit inconvenient, it is very well worth the trouble since you’ll be able to transform or build upon the intro templates and use them freely in all videos you edit in Adobe Premiere Pro.
18. EnvatoElements
You can find much more than intro templates on the EnvatoElements platform since you can choose from 740.000 items you can use for anything from creating a WordPress website to preparing your next business presentation.
The Video Templates category alone features over 4000 items, including Logo Stings or Infographics assets.
There are nearly one hundred available intro templates for Adobe Premiere Pro, but downloading any of them requires you to create an account and purchase a subscription plan.
Prices start from $16.50 per month, and packages include virtually unlimited access to stock photos and videos, video templates, and much more. The EnvatoElements platform also offers assets that can be used with Final Cut Pro, Adobe After Effects or Apple Motion.
19. Videohive
Videohive is a part of the Envato Market platform that also features Web Themes and Templates, Code, Audio, or Graphic sections. It is free to use, but only a limited amount of assets can be downloaded for free.
To download an item, you must purchase it, and prices can range from $16 to $50 for a single title template.
Videohive is also a great source of title templates for Adobe After Effects, as it offers more than 5000 titles and intros that are compatible with this software.
Furthermore, you can download presets for both Premiere Pro and After Effects that can be used to create stop-motion animations, perform color correction, or make the footage look like it was captured with a VHS camera.
20. RocketStock
This option is best suited for video editors who want to create their intros because RocketStok’s Cinematic Style Library extends the scope of options provided by Premiere Pro.
Downloading all fonts except Helvetica Neue is free, but you must check which fonts you can use in commercial projects. You will have no trouble installing the fonts since you can just double-click on the font and follow the on-screen instructions.
Once you’ve installed all the fonts from the library, you can use them to replace the software’s default library. You just have to click on the Replace Style Library option that can be accessed from Premiere Pro’s Title Style tab.
If you don’t feel comfortable creating your titles or if you simply don’t have the time to create your own titles, the Free Cinematic Style Library is not the best choice for you.
On the other hand, Premiere Pro’s users who don’t often use title templates can benefit from downloading RocketStock’s intro library.
Part 3: How to Import and Customize Title Templates in Premiere
If you download the template, all the title templates support customization. You can change its size, font, color, and add 3D effects.
It is easy to import and use it to touch up your video. Check out the steps below to know how to import title templates quickly.
- Install the title template. Choose one template you like and download it to your PC. Remember to unzip it before importing it. Now install them.
- Import the title template. You just need to go to click Effects at the top. Then at right, you will find Presets in the effects section.
- Right-click on presets, and choose Import Presets. If the title template format is .mogrt, you need to open it in Essential Graphics Panel. At the bottom right corner, click the plus icon to import the title template and install it.
- Customize the title template. Once the title template is imported, drag it to the timeline. Click the Editing tab. Here you can customize colors, text, opacities, and positions. There are more options for you to explore.
- You can also copy and paste the title template to another place in the timeline. If you change one place of the pasted template, the original one will remain the same.
Note: each version of Premiere’s interface will look different, but the workflow is similar.
Conclusion
Using title templates can help you achieve a certain visual style faster, so you don’t have to spend a lot of time looking for a perfect background or animating the text.
The Internet provides almost unlimited video editing resources, but not all of these resources can be acquired for free.
Which website you will choose as a source of fresh title templates depends on how often you work on new projects in Adobe Premiere Pro.
If you want to make professional video editing and tired of Premiere, try Filmora! It includes various titles templates to use.
You can sync audio automatically, use detailed color correction to make your title and video like a movie. Download it now (FREE)!
Benjamin Arango
Benjamin Arango is a writer and a lover of all things video.
Follow @Benjamin Arango
Top-Rated 4K Video Editing Tools for Creators
Best 4K Video Editing Software in 2024

Max Wales
Mar 27, 2024• Proven solutions
With the popularity of 4K Cameras and action cams , it is time to use a professional video editing software for handling your delicate 4k video footage.
There are countless software options for video editing, but not all are created equally. And importantly in current times, many do not yet have support for 4K editing. Don’t be left behind - below you will find ten of the best and most trusted video editing applications that do support 4K videos; as this technology becomes more widely used throughout the film making community.
(All features of the samples are subjected to the time.)
- P1: Quick Comparison of Top 4K Video Editors
- P2: Best Free and Paid 4K Video Editors
- P3: FAQs about 4K Video Editors
Comparison of Top 4K Video Editors
Whenever you choose a video editing software, you should always consider if your computer meets the requirements for installing and using a professional video editor , as well as the usability of the video editing software and your budget. We have listed these factors below for your quick check.
And in this top list of best video editing software, we have picked up both free 4K video editing software and paid 4k video editor for you to choose. Please keep in mind that the list is in no particular order of ranking, and the price may vary over time.
| Software Name | Supported Platforms | Price | Ease of Use | System Requirements |
|---|---|---|---|---|
| Wondershare Filmora X | Windows, Mac | Freemium, $49.99-$79.99 | Easy | Intel i3 processor +; 8GB for 4K |
| iMovie | OS X El Capitan | Free | Easy | 4GB of RAM; an OpenCL-capable graphics card |
| CyberLink PowerDirector 19 Ultra | Windows 7/8/10 | $99.99 | Intermediate | Intel Core™ i-series or AMD Phenom II or above; 8GB RAM |
| Vegas Pro | Windows 7/8/10 | $399.99 | Quite Hard | 2.5 GHz 4-core processor; 8 GB RAM |
| Vegas Movie Studio 17 | Windows 7/8/10 | $32.99 | Easy | 2GHZ processor, 8GB RAM |
| Adobe Premiere Pro | Windows & Mac | $20.99/mo. | Quite Hard | Multicore processor with 64-bit support; 8 GB of RAM |
| Final Cut Pro | macOS 10.13.2 or later | $299.99 | Quite Hard | 8GB RAM; Intel HD Graphics 3000 or later |
| Magix Movie Edit Pro | Windows 7/8/10 | $69.99 | Easy | 2.4 GHz processor; 8 GB of RAM or higher |
Top 4K Video Editing Software in 2024 [Free & Paid]
We have listed the top best 4k video editing software for beginners and professionals based on its features, pros, cons and price. Let’s check it in detail.
1. Wondershare Filmora
The latest version of Filmora video editor is the stripped back, simpler option for video editors who do not want the complexity, advanced features and extra cost of the professional video editing software. It features an interface that has been created for ease of use, but there is also the option to select between Expert or Quick editing modes, depending upon your skill level and needs.

Cool effects include the particularly interesting Hollywood style effects, sound effects and stunning templates. Other interesting and new features include the Green Screen and Scene Detection options. The software can also automatically fix the footage with lighting or color issues which can result in a much more polished end result.
The newly added Action Cam Tool allows you to merge, cut and edit 4k videos shot by your action cameras, smartphones or other 4k cameras in minutes.

Filmora features the ability to import and edit 4K videos with ease. After launching Filmora, create a new project by clicking New Project in the Get Started window and then go to Project Settings to change the resolution to 3840 x 2160 (16:9 4K UHD) or 4096 x 2160 (DCI 4K) based on your need.

Not sure the differences between these two options, check our guide about What is 4K to get a clue.
The default project setting is 1920 x 1080 (16:9 Full HD), if you didn’t set up the project settings at the beginning, Filmora will prompt up a window asking you to change the project settings to match the 4K video. You can click Match to Media to change the project settings quickly.

Editing 4K videos requires high computer performance, to avoid your computer overrunning, Filmora can create proxy files to load the video in lower resolution during editing, but rending the final export video with the original full quality. You can also customize the playback quality of the 4K videos to half quality or even 1/6 quality for smoother editing.

When exporting to 4K Ultra High Definition Quality, just click the Settings button in the Export window to enter the Settings window to adjust the resolution to 3840 x 2160 or 4096 x 2160. Besides, you can also change the frame rate and bit rate as well.

2. iMovie
If you are a Mac user and have iMovie 10.1 or version above, you can now edit 4K videos on your Mac with iMovie for free. iMovie is a free 4K video editing software for Mac. You can also import movies and trailers from iMovie for iPhone and iPad.

With iMovie for iOS and macOS, you can enjoy your videos like never before. It’s easy to browse your clips and create Hollywood-style trailers and stunning 4K-resolution movies. You can even start editing on iPhone or iPad, then finish on your Mac. And when you’re ready to premiere your movie on all your devices, iMovie Theater rolls out the red carpet.
It should be noted that 4K video editing requires a Mac from 2011 or later with at least 4GB of RAM. To playback 4K video in full resolution, you’ll need an iMac with Retina display or Mac Pro connected to a 4K display.
3. CyberLink PowerDirector Ultra
Video makers who want a very powerful, professional-level video editing program are often shocked by the price tag. However, they find that CyberLink PowerDirector Ultra, with a more beginner-friendly interface and easier to use, has virtually everything just as other programs with a higher price.

It’s hard to look past PowerDirector Ultra if you need 4k support, and if you don’t want to sacrifice on advanced features that allow you to create professional-looking videos, even if you are a beginner or have minimal experience with video editing.
This latest edition of PowerDirector supports 64-bit processors for faster editing, and of course, new support for 4K resolution videos. At under $100, CyberLink PowerDirector 19 Ultra comes amazingly close to being as advanced and capable as software that is priced multiple times more than it; making it an ideal choice for the budget-conscious video editing enthusiast.
4. Vegas Pro
One of the higher end video editing software options is the highly renowned non-linear editor (NLE) Magix Vegas Pro. Now up to version 18, this software is used by professionals and amateurs alike. Vegas Pro 18 comes with native support for 4K video, with maximum frame sizes of up to 4096 x 4096. There is native support for XAVC and XAVC S files, plus files from Red Epic and Red One. There are a number of extras and plugins included in Vegas Pro, including DVD Architect Pro.

Complete support for 4K editing puts Vegas Pro at the forefront of software in this genre, while you can also edit SD, HD, 2K and 3D videos, using Sony’s intuitive drag and drop interface. There are a huge number of tools and effects available, allowing complete control, creativity, and flexibility within the editing environment which is easily accessible to those who may even be brand new to editing videos in an NLE application.
The software is available at a cost of $399(on sale)/ $599.99(regularly); and the price is the same whether you select a download version, or the physical packaged version.
5. Vegas Movie Studio
At only $39.99, Studio 17 Platinum is just a fraction of the cost of Sony’s fully fledged editor, Vegas Pro. Magix Movie Studio 17 Platinum is a basic video editing application, suited for the beginner and home user. With an emphasis on giving users the ability to easily create and share their videos on social media sites, or creating your own home DVDs, the workflow and interface has been designed to be as simple and intuitive as possible to use, without the extensive and more complex abilities of a high end application like Sony Vegas Pro.
Notable features include a simple way of selecting the best output format with the Make Movie dialog, the choice of using the Simple Edit Mode or Advanced Edit Mode, fast direct upload to YouTube 4K, Color Match plug-in, and lots more.
6. Adobe Premiere Pro
Another video editing application that is considered to be at the highest end is Adobe’s Premier Pro. As with most of Adobe’s software, Premiere Pro is now part of the Creative Cloud plan. This requires subscription to use the application via Adobe’s cloud service.
The sheer number of features within Premiere Pro CC is extensive. But the latest version has been designed to provide a faster workflow during editing, which will be appreciated by both new and seasoned users alike. New features that are worth noting in the CC version include live text templates, which integrates seamlessly with After Effects, native support for a range of new formats, automatic backing up to the Cloud, improvements to masking and tracking, and the ability to export in new industry standard formats.
The minimum cost to access a CC plan that includes Premiere Pro is $20.99 per month. However many users will likely be inclined to select the $52.99 per month plan which includes Premiere Pro and After Effects, as well as Photoshop and more.
7. Apple Final Cut Pro X
The professional level video editing application for Mac is the very well known Apple Final Cut Pro X. Used extensively in the professional movie industry, as well as amongst amateurs, the latest version comes with full support for full resolution 4K ProRes in multiple streams (which is made for working particularly fast on the new Mac Pro).
There are hundreds of features worthy of listing, however some of the most important and interesting ones include the Magnetic Timeline which has been designed to avoid sync problems or small unwanted gaps when editing, easy organization of media with keywords and metadata, multicam clip editing, multi channel audio editing.
8. MAGIX Movie Edit Pro 2021
Movie Edit Pro 2021 is another affordable video editing solution for home and amateur users that now has full support for 4K videos. This application is available in three versions: deluxe, Plus and Premium, with the Premium version containing the most features and capabilities.
The inbuilt automatic wizards in the basic version of Movie Edit Pro make it easy for those with little or no experience in what can be the daunting process of editing videos. The software includes more than 1500 effects and templates, editing on up to 99 tracks (in the Plus and Premium versions). There is also support for multicam editing, and the ability to easily export your finished product to a range of media and social video websites.
Most Frequently Asked Questions about 4K Video Editor
1. What is the best 4k video editor for Windows PC?
Each video editor listed above has its advantages over others. For example, if you are using Filmora to handle 4K video footage, you can create a proxy smaller file, as well as preview it on a lower resolution to improve the editing efficiency. Filmora has pre-programmed many transitions, effects, filters and elements, which can help you make the video better and faster.
2. Is there any free 4k video editor?
If you are running Windows10, you will find that the inbuilt Photos app only allows you to export from 540p, 720p, and 1080p, no 4K.
For Mac users, the good news is that you can work with 4k and 60 frames per second in the free inbuilt video editor iMovie.
And if there are some other video editing software which is missed from the list, please leave a comment and let us know. But before you leave, do not forget to download and try our latest video editing software Filmora to edit your 4K video footage.
Max Wales
Max Wales is a writer and a lover of all things video.
Follow @Max Wales
Max Wales
Mar 27, 2024• Proven solutions
With the popularity of 4K Cameras and action cams , it is time to use a professional video editing software for handling your delicate 4k video footage.
There are countless software options for video editing, but not all are created equally. And importantly in current times, many do not yet have support for 4K editing. Don’t be left behind - below you will find ten of the best and most trusted video editing applications that do support 4K videos; as this technology becomes more widely used throughout the film making community.
(All features of the samples are subjected to the time.)
- P1: Quick Comparison of Top 4K Video Editors
- P2: Best Free and Paid 4K Video Editors
- P3: FAQs about 4K Video Editors
Comparison of Top 4K Video Editors
Whenever you choose a video editing software, you should always consider if your computer meets the requirements for installing and using a professional video editor , as well as the usability of the video editing software and your budget. We have listed these factors below for your quick check.
And in this top list of best video editing software, we have picked up both free 4K video editing software and paid 4k video editor for you to choose. Please keep in mind that the list is in no particular order of ranking, and the price may vary over time.
| Software Name | Supported Platforms | Price | Ease of Use | System Requirements |
|---|---|---|---|---|
| Wondershare Filmora X | Windows, Mac | Freemium, $49.99-$79.99 | Easy | Intel i3 processor +; 8GB for 4K |
| iMovie | OS X El Capitan | Free | Easy | 4GB of RAM; an OpenCL-capable graphics card |
| CyberLink PowerDirector 19 Ultra | Windows 7/8/10 | $99.99 | Intermediate | Intel Core™ i-series or AMD Phenom II or above; 8GB RAM |
| Vegas Pro | Windows 7/8/10 | $399.99 | Quite Hard | 2.5 GHz 4-core processor; 8 GB RAM |
| Vegas Movie Studio 17 | Windows 7/8/10 | $32.99 | Easy | 2GHZ processor, 8GB RAM |
| Adobe Premiere Pro | Windows & Mac | $20.99/mo. | Quite Hard | Multicore processor with 64-bit support; 8 GB of RAM |
| Final Cut Pro | macOS 10.13.2 or later | $299.99 | Quite Hard | 8GB RAM; Intel HD Graphics 3000 or later |
| Magix Movie Edit Pro | Windows 7/8/10 | $69.99 | Easy | 2.4 GHz processor; 8 GB of RAM or higher |
Top 4K Video Editing Software in 2024 [Free & Paid]
We have listed the top best 4k video editing software for beginners and professionals based on its features, pros, cons and price. Let’s check it in detail.
1. Wondershare Filmora
The latest version of Filmora video editor is the stripped back, simpler option for video editors who do not want the complexity, advanced features and extra cost of the professional video editing software. It features an interface that has been created for ease of use, but there is also the option to select between Expert or Quick editing modes, depending upon your skill level and needs.
Cool effects include the particularly interesting Hollywood style effects, sound effects and stunning templates. Other interesting and new features include the Green Screen and Scene Detection options. The software can also automatically fix the footage with lighting or color issues which can result in a much more polished end result.
The newly added Action Cam Tool allows you to merge, cut and edit 4k videos shot by your action cameras, smartphones or other 4k cameras in minutes.
Filmora features the ability to import and edit 4K videos with ease. After launching Filmora, create a new project by clicking New Project in the Get Started window and then go to Project Settings to change the resolution to 3840 x 2160 (16:9 4K UHD) or 4096 x 2160 (DCI 4K) based on your need.
Not sure the differences between these two options, check our guide about What is 4K to get a clue.
The default project setting is 1920 x 1080 (16:9 Full HD), if you didn’t set up the project settings at the beginning, Filmora will prompt up a window asking you to change the project settings to match the 4K video. You can click Match to Media to change the project settings quickly.
Editing 4K videos requires high computer performance, to avoid your computer overrunning, Filmora can create proxy files to load the video in lower resolution during editing, but rending the final export video with the original full quality. You can also customize the playback quality of the 4K videos to half quality or even 1/6 quality for smoother editing.
When exporting to 4K Ultra High Definition Quality, just click the Settings button in the Export window to enter the Settings window to adjust the resolution to 3840 x 2160 or 4096 x 2160. Besides, you can also change the frame rate and bit rate as well.
2. iMovie
If you are a Mac user and have iMovie 10.1 or version above, you can now edit 4K videos on your Mac with iMovie for free. iMovie is a free 4K video editing software for Mac. You can also import movies and trailers from iMovie for iPhone and iPad.
With iMovie for iOS and macOS, you can enjoy your videos like never before. It’s easy to browse your clips and create Hollywood-style trailers and stunning 4K-resolution movies. You can even start editing on iPhone or iPad, then finish on your Mac. And when you’re ready to premiere your movie on all your devices, iMovie Theater rolls out the red carpet.
It should be noted that 4K video editing requires a Mac from 2011 or later with at least 4GB of RAM. To playback 4K video in full resolution, you’ll need an iMac with Retina display or Mac Pro connected to a 4K display.
3. CyberLink PowerDirector Ultra
Video makers who want a very powerful, professional-level video editing program are often shocked by the price tag. However, they find that CyberLink PowerDirector Ultra, with a more beginner-friendly interface and easier to use, has virtually everything just as other programs with a higher price.

It’s hard to look past PowerDirector Ultra if you need 4k support, and if you don’t want to sacrifice on advanced features that allow you to create professional-looking videos, even if you are a beginner or have minimal experience with video editing.
This latest edition of PowerDirector supports 64-bit processors for faster editing, and of course, new support for 4K resolution videos. At under $100, CyberLink PowerDirector 19 Ultra comes amazingly close to being as advanced and capable as software that is priced multiple times more than it; making it an ideal choice for the budget-conscious video editing enthusiast.
4. Vegas Pro
One of the higher end video editing software options is the highly renowned non-linear editor (NLE) Magix Vegas Pro. Now up to version 18, this software is used by professionals and amateurs alike. Vegas Pro 18 comes with native support for 4K video, with maximum frame sizes of up to 4096 x 4096. There is native support for XAVC and XAVC S files, plus files from Red Epic and Red One. There are a number of extras and plugins included in Vegas Pro, including DVD Architect Pro.
Complete support for 4K editing puts Vegas Pro at the forefront of software in this genre, while you can also edit SD, HD, 2K and 3D videos, using Sony’s intuitive drag and drop interface. There are a huge number of tools and effects available, allowing complete control, creativity, and flexibility within the editing environment which is easily accessible to those who may even be brand new to editing videos in an NLE application.
The software is available at a cost of $399(on sale)/ $599.99(regularly); and the price is the same whether you select a download version, or the physical packaged version.
5. Vegas Movie Studio
At only $39.99, Studio 17 Platinum is just a fraction of the cost of Sony’s fully fledged editor, Vegas Pro. Magix Movie Studio 17 Platinum is a basic video editing application, suited for the beginner and home user. With an emphasis on giving users the ability to easily create and share their videos on social media sites, or creating your own home DVDs, the workflow and interface has been designed to be as simple and intuitive as possible to use, without the extensive and more complex abilities of a high end application like Sony Vegas Pro.
Notable features include a simple way of selecting the best output format with the Make Movie dialog, the choice of using the Simple Edit Mode or Advanced Edit Mode, fast direct upload to YouTube 4K, Color Match plug-in, and lots more.
6. Adobe Premiere Pro
Another video editing application that is considered to be at the highest end is Adobe’s Premier Pro. As with most of Adobe’s software, Premiere Pro is now part of the Creative Cloud plan. This requires subscription to use the application via Adobe’s cloud service.
The sheer number of features within Premiere Pro CC is extensive. But the latest version has been designed to provide a faster workflow during editing, which will be appreciated by both new and seasoned users alike. New features that are worth noting in the CC version include live text templates, which integrates seamlessly with After Effects, native support for a range of new formats, automatic backing up to the Cloud, improvements to masking and tracking, and the ability to export in new industry standard formats.
The minimum cost to access a CC plan that includes Premiere Pro is $20.99 per month. However many users will likely be inclined to select the $52.99 per month plan which includes Premiere Pro and After Effects, as well as Photoshop and more.
7. Apple Final Cut Pro X
The professional level video editing application for Mac is the very well known Apple Final Cut Pro X. Used extensively in the professional movie industry, as well as amongst amateurs, the latest version comes with full support for full resolution 4K ProRes in multiple streams (which is made for working particularly fast on the new Mac Pro).
There are hundreds of features worthy of listing, however some of the most important and interesting ones include the Magnetic Timeline which has been designed to avoid sync problems or small unwanted gaps when editing, easy organization of media with keywords and metadata, multicam clip editing, multi channel audio editing.
8. MAGIX Movie Edit Pro 2021
Movie Edit Pro 2021 is another affordable video editing solution for home and amateur users that now has full support for 4K videos. This application is available in three versions: deluxe, Plus and Premium, with the Premium version containing the most features and capabilities.
The inbuilt automatic wizards in the basic version of Movie Edit Pro make it easy for those with little or no experience in what can be the daunting process of editing videos. The software includes more than 1500 effects and templates, editing on up to 99 tracks (in the Plus and Premium versions). There is also support for multicam editing, and the ability to easily export your finished product to a range of media and social video websites.
Most Frequently Asked Questions about 4K Video Editor
1. What is the best 4k video editor for Windows PC?
Each video editor listed above has its advantages over others. For example, if you are using Filmora to handle 4K video footage, you can create a proxy smaller file, as well as preview it on a lower resolution to improve the editing efficiency. Filmora has pre-programmed many transitions, effects, filters and elements, which can help you make the video better and faster.
2. Is there any free 4k video editor?
If you are running Windows10, you will find that the inbuilt Photos app only allows you to export from 540p, 720p, and 1080p, no 4K.
For Mac users, the good news is that you can work with 4k and 60 frames per second in the free inbuilt video editor iMovie.
And if there are some other video editing software which is missed from the list, please leave a comment and let us know. But before you leave, do not forget to download and try our latest video editing software Filmora to edit your 4K video footage.
Max Wales
Max Wales is a writer and a lover of all things video.
Follow @Max Wales
The Best Free Face Generator Websites to Create Synthetic Identities
While signing up for a social media account, you may not want to use your real photograph as your profile picture, but at the same time, you might not find it ethical to use someone else’s image either. This is where a face generation portal comes into play. You can easily create a virtual face that looks almost like you and sometimes even better with a face generator.
Similarly, run a business where you want to publish your clients’ reviews without showing their real photos as they might not like the idea. You can use a good face generator online tool to create a virtual face that resembles their look and post it along with their feedback.
Considering the above scenarios and many others that may come up over time, the following list some of the best free online face generators to create fake faces.
Watch Video! Best Free Online Face Generators
Best Free Online Face Generators to Get Virtual Faces in 2022
1. Generated Photos: Faces
Website: https://generated.photos/faces
This online portal enables you to create virtual faces by specifying the physical attributes of a character, such as gender, age, hair color, eye color, and much more. You can be as creative as you want to generate a face that appears somewhat like you with the available options. Once a look is generated, you can download and use it as needed.
The steps that are given below explain how you can use Generated Photos’ Faces section to create and download a virtual face:
- Launch your favorite web browser and go to the URL given above, and then you will see all free AI-generated photos on this website.

- Use the filters given in the left pane to define your character’s physical attributes and click Apply from the bottom to get the results. You can customize the face from its head post, gender, age, hair, eye, and emotion aspects.
- Click your preferred character from the AI-generated faces, and then click Download from the page that opens next. Choose your preferred method to sign up, and then sign in to download the virtual face to your PC.
2. Generated Photos: Anonymizer
Website: https://generated.photos/anonymizer
Anonymizer is another section from the Generated Photos portal that allows you to upload your image. Then it uses AI technology to generate similar virtual faces that you can download and use wherever needed.
However, sometimes the pictures that the website creates may not resemble your face as closely as you expect them to be, but that’s OK. Isn’t it? The main idea is to keep your privacy intact, and that’s what Generated Photos: Anonymizer does.
You can learn how to use this section by following the instructions given below:
- Use the URL given above to get to the Anonymizer’s web page and then click Upload photo;
- Select and upload your photo from your PC to the portal and wait while Anonymizer uses AI to generate similar faces.
- Click the photo that you want to use, and when the next page opens up, click Sign up or sign in to download the photo and use it wherever needed

3. Generated Photos Face Generator
Website: https://generated.photos/face-generator
This online face generator from Generated Photos allows you to create a unique realt-time face from scratch in one click. And if you don’t like the face generated, you can change the parameters such as gender, skin tone, hair, eye and head pose.
Generated Photos Face Generator tool is a good choice for people who don’t want to upload any photos online, and need to customize the face at maximum.
Below is a brief tutorial about how to generate a face with it step by step:
- Go to the website give above and then click the Generate faces
- Select the parameters accordingly based on your needs. You can generate the same face young or old with different emotions.

You can then download the generated photo by signing up or logging in, but you need to pay to remove the watermark.
4. Massless
Website: https://massless.io/tool/face-maker-ai
Massless allows you to use its tools to sketch a portrait, and then it uses AI technology to generate a virtual face out of your drawing. However, because you can’t always be precise while sketching with the mouse, it would be good to have access to a digital drawing pad to create the faces with a pen. With Massless, you can explore your creativity to the full and draw beautiful faces to use them as your avatar.
You can follow the procedure given below to use Massless to draw virtual faces:
- Open a web browser, and visit the URL given above. Click any icons from the toolbox at the top (E.g., Nose).
- Draw a shape on its corresponding face area on the left (E.g., Nose), and wait while the portal automatically updates the photo on the right.
- Repeat the process to sketch other parts of the face, and click the More icon (with three vertical dots) from the top-right corner.
- Click Download images from the page that opens next to download the photo to your PC and use it wherever needed.

5. This Person Does Not Exist
Website: https://thispersondoesnotexist.com/
This free online virtual face generator is probably the easiest and quickest. As you go to the website, it displays a random realistic image of a person that may not exist. If you don’t like the idea, you can change it with merely a single mouse click. Because the portal doesn’t have any Download button at the time of this writing, you must rely on the web browser’s default downloading process to get the image to your PC.
You can follow the instructions that are given below to switch between the images and download the one you like:
- Use your preferred web browser (Google Chrome here) to visit the URL provided above, and then notice the random image that appears on the page;
- Click Another from the box that appears at the bottom-right corner to change the image, repeat this process until you find a good photo for your avatar, and then right-click anywhere on the image.
- Click Save image from the context menu to save the photo. And then go to the default download folder to access the downloaded image, and use the picture wherever needed.
Note: Different browsers may have this feature with other names

6. BoredHumans
Website: https://boredhumans.com/faces.php
This web portal is identical to the previous one as it generates random virtual faces with merely one mouse click. Even this website doesn’t have any Download button to help you download the image. Therefore, you must use the browser’s built-in feature to obtain the photo you want to save to your PC.
You can learn how to use BoredHumans to generate virtual faces and download them to your computer by following the steps given below:
- Open a web browser (Google Chrome here) and visit the URL provided above, and then click Generate Another Fake Human if you don’t like the one that appears;
- Keep clicking the button until you find a face that can be used as your avatar. Alternatively, you can click the Generate A Human button to create a less realistic image of a random person.

- Right-click the image and click Save image to download the photo to your PC; and then get to the default download location to access the photo and use it wherever needed.
7. faceMaker
Website: https://facemaker.uvrg.org/
faceMaker allows you to generate virtual faces out of the fine details that you specify during the creation process. These details are adjusted using the sliders that affect the corresponding physical attributes of the avatars. For example, you can modify the lips, eye color, hair, face roundness, mouse depth, jaw shape, etc. using their respective sliders.
You can follow the steps that are given below to learn how to create a virtual face using faceMaker, and save it to your PC to use it as an avatar:
- Use your preferred web browser to visit the URL given above and click Start from the main page.
- Fill out the questionnaire by choosing your preferred options and agreeing to the term and conditions.
- Click Start and then click Continue on the next page. Use the sliders on the left and right panels to customize the face as needed, and once done, you can use any screen capturing tool to take a snapshot and remove the sliders by cropping the image, thus having only the virtual face.

- Save the cropped photo on your PC, and then back on the webpage, click Finished from the bottom-right corner.

- On the next page, choose the radio buttons according to your choice. Once done, click Yes, submit now from the bottom to submit the customized virtual face to the portal.

Conclusion
With all the cybercrime reports circulating everywhere nowadays, it is important to stay cautious about what you post on any social media website. To add an extra layer of security, you can avoid using your real photograph as a profile picture, and go with the fake faces instead. You can generate these virtual faces using any of the free online face generator websites, some of which even allow you to define the shape of a face quite minutely. Because the generated faces are not of any real human, they can be used as your avatar without any risk.
Wondershare Filmora
Get started easily with Filmora’s powerful performance, intuitive interface, and countless effects!
Try It Free Try It Free Try It Free Learn More about Video Editing

Best Free Online Face Generators to Get Virtual Faces in 2022
1. Generated Photos: Faces
Website: https://generated.photos/faces
This online portal enables you to create virtual faces by specifying the physical attributes of a character, such as gender, age, hair color, eye color, and much more. You can be as creative as you want to generate a face that appears somewhat like you with the available options. Once a look is generated, you can download and use it as needed.
The steps that are given below explain how you can use Generated Photos’ Faces section to create and download a virtual face:
- Launch your favorite web browser and go to the URL given above, and then you will see all free AI-generated photos on this website.
- Use the filters given in the left pane to define your character’s physical attributes and click Apply from the bottom to get the results. You can customize the face from its head post, gender, age, hair, eye, and emotion aspects.
- Click your preferred character from the AI-generated faces, and then click Download from the page that opens next. Choose your preferred method to sign up, and then sign in to download the virtual face to your PC.
2. Generated Photos: Anonymizer
Website: https://generated.photos/anonymizer
Anonymizer is another section from the Generated Photos portal that allows you to upload your image. Then it uses AI technology to generate similar virtual faces that you can download and use wherever needed.
However, sometimes the pictures that the website creates may not resemble your face as closely as you expect them to be, but that’s OK. Isn’t it? The main idea is to keep your privacy intact, and that’s what Generated Photos: Anonymizer does.
You can learn how to use this section by following the instructions given below:
- Use the URL given above to get to the Anonymizer’s web page and then click Upload photo;
- Select and upload your photo from your PC to the portal and wait while Anonymizer uses AI to generate similar faces.
- Click the photo that you want to use, and when the next page opens up, click Sign up or sign in to download the photo and use it wherever needed
3. Generated Photos Face Generator
Website: https://generated.photos/face-generator
This online face generator from Generated Photos allows you to create a unique realt-time face from scratch in one click. And if you don’t like the face generated, you can change the parameters such as gender, skin tone, hair, eye and head pose.
Generated Photos Face Generator tool is a good choice for people who don’t want to upload any photos online, and need to customize the face at maximum.
Below is a brief tutorial about how to generate a face with it step by step:
- Go to the website give above and then click the Generate faces
- Select the parameters accordingly based on your needs. You can generate the same face young or old with different emotions.
You can then download the generated photo by signing up or logging in, but you need to pay to remove the watermark.
4. Massless
Website: https://massless.io/tool/face-maker-ai
Massless allows you to use its tools to sketch a portrait, and then it uses AI technology to generate a virtual face out of your drawing. However, because you can’t always be precise while sketching with the mouse, it would be good to have access to a digital drawing pad to create the faces with a pen. With Massless, you can explore your creativity to the full and draw beautiful faces to use them as your avatar.
You can follow the procedure given below to use Massless to draw virtual faces:
- Open a web browser, and visit the URL given above. Click any icons from the toolbox at the top (E.g., Nose).
- Draw a shape on its corresponding face area on the left (E.g., Nose), and wait while the portal automatically updates the photo on the right.
- Repeat the process to sketch other parts of the face, and click the More icon (with three vertical dots) from the top-right corner.
- Click Download images from the page that opens next to download the photo to your PC and use it wherever needed.
5. This Person Does Not Exist
Website: https://thispersondoesnotexist.com/
This free online virtual face generator is probably the easiest and quickest. As you go to the website, it displays a random realistic image of a person that may not exist. If you don’t like the idea, you can change it with merely a single mouse click. Because the portal doesn’t have any Download button at the time of this writing, you must rely on the web browser’s default downloading process to get the image to your PC.
You can follow the instructions that are given below to switch between the images and download the one you like:
- Use your preferred web browser (Google Chrome here) to visit the URL provided above, and then notice the random image that appears on the page;
- Click Another from the box that appears at the bottom-right corner to change the image, repeat this process until you find a good photo for your avatar, and then right-click anywhere on the image.
- Click Save image from the context menu to save the photo. And then go to the default download folder to access the downloaded image, and use the picture wherever needed.
Note: Different browsers may have this feature with other names
6. BoredHumans
Website: https://boredhumans.com/faces.php
This web portal is identical to the previous one as it generates random virtual faces with merely one mouse click. Even this website doesn’t have any Download button to help you download the image. Therefore, you must use the browser’s built-in feature to obtain the photo you want to save to your PC.
You can learn how to use BoredHumans to generate virtual faces and download them to your computer by following the steps given below:
- Open a web browser (Google Chrome here) and visit the URL provided above, and then click Generate Another Fake Human if you don’t like the one that appears;
- Keep clicking the button until you find a face that can be used as your avatar. Alternatively, you can click the Generate A Human button to create a less realistic image of a random person.
- Right-click the image and click Save image to download the photo to your PC; and then get to the default download location to access the photo and use it wherever needed.
7. faceMaker
Website: https://facemaker.uvrg.org/
faceMaker allows you to generate virtual faces out of the fine details that you specify during the creation process. These details are adjusted using the sliders that affect the corresponding physical attributes of the avatars. For example, you can modify the lips, eye color, hair, face roundness, mouse depth, jaw shape, etc. using their respective sliders.
You can follow the steps that are given below to learn how to create a virtual face using faceMaker, and save it to your PC to use it as an avatar:
- Use your preferred web browser to visit the URL given above and click Start from the main page.
- Fill out the questionnaire by choosing your preferred options and agreeing to the term and conditions.
- Click Start and then click Continue on the next page. Use the sliders on the left and right panels to customize the face as needed, and once done, you can use any screen capturing tool to take a snapshot and remove the sliders by cropping the image, thus having only the virtual face.
- Save the cropped photo on your PC, and then back on the webpage, click Finished from the bottom-right corner.
- On the next page, choose the radio buttons according to your choice. Once done, click Yes, submit now from the bottom to submit the customized virtual face to the portal.
Conclusion
With all the cybercrime reports circulating everywhere nowadays, it is important to stay cautious about what you post on any social media website. To add an extra layer of security, you can avoid using your real photograph as a profile picture, and go with the fake faces instead. You can generate these virtual faces using any of the free online face generator websites, some of which even allow you to define the shape of a face quite minutely. Because the generated faces are not of any real human, they can be used as your avatar without any risk.
Wondershare Filmora
Get started easily with Filmora’s powerful performance, intuitive interface, and countless effects!
Try It Free Try It Free Try It Free Learn More about Video Editing
5 Facts About 16X9 Ratio Calculator You Didn’t Know
5 Facts About 16x9 Ratio Calculator You Didn’t Know
An easy yet powerful editor
Numerous effects to choose from
Detailed tutorials provided by the official channel
This article explains major concepts about 16x9 ratio calculator and applies them even if you are a novice.
Read it to conclude the aspect ratio and the type of editing you need for your videos.
In this article
01 [What is Aspect Ratio?](#Part 1)
02 [What’s 16:9 Ratio Calculator?](#Part 2)
03 [Top 16:9 Resolutions](#Part 3)
04 [How to Calculate 16:9 Aspect Ratios?](#Part 4)
05 [How to Use Aspect Ratio Calculator?](#Part 5)
06 [How to Shift Through Aspect Ratio You Prefer in Filmora?](#Part 6)
Part 1 What is aspect ratio?
Aspect ratio is the proportionality ratio that relates between the width and height of the image. When you set your television screen, you often see something like 16:9 in the aspect ratio. These numbers are not related to the quality of the images whatsoever. They mean that the screen’s width will be almost twice as high as its height.
However, most television screens have an aspect ratio that looks like a square. The same does not apply to most cinema screens found in a hall. Thanks to the electricians who made those screens to be rectangular. That makes sure that you don’t miss out on any movie clip because of the low aspect ratio.
Initially, the aspect ratio mainly got restricted to Mathematical aspects like geometry. With time, the term got introduced in the films where it was used to relate the width and height of various images on screens, hence the16*9 aspect ratio calculator.
Usually, the aspect ratio refers to the long side concerning the shorter side of the shape. For example, it can be represented by two unknowns, x: y. The values do not mean much because numbers can substitute them.
Perhaps you have encountered these common aspect ratios: IMAX (1.43:1), Academy Film standard (1.43:1), and the famous golden video with an aspect ratio of 1.6180:1.
Having adequate knowledge about aspect ratios is of great importance. You will have to use an aspect ratio calculator when you want to resize your image to fit the specific location without cutting some sections.
Part 2 What is the 16:9 aspect ratio calculator?
The most significant similarity is the aspect ratio of 16:9. The 16:9 ratio dates back to 2009, when the ratio introduced was declared to be used globally. To prove it, take a minute and check the aspect ratios of your television screen or smartphone. Also, confirm the next time you go to the cinema to watch a movie.
You can take a beautiful photo with a nice image before posting on social media because of the 16:9 aspect ratio. Nowadays, this aspect ratio is a part of most screens and cameras. Even the HD videos always get recorded in the international format ratio.
The16 * 9 aspect ratiocalculator will help you operate correctly for high-quality images. It also helps in the conversion of inches to centimeters and vice versa. For a digital device, pixels are the most common units of images.
Part 3 Top 16:9 resolutions
These are the most common resolutions that are available. The units are in pixels, in descending order.
● 15360×8640 (16K UHD)
● 7680 × 4320 (8K UHD)
● 5120 × 2880 (5K)
● 3840 × 2160 (4K UHD)
● 3200 × 1800 (QHD+)
● 2560 × 1440 (QHD)
● 1920 × 1080 (Full HD)
● 1600 × 900 (HD+)
● 1366 × 768 (WXGA)
● 1280 × 720 (HD)
● 960 × 540 (qHD)
● 854 × 480 (FWVGA)
● 640 × 360 (nHD)
Part 4 How to calculate the 16:9 Aspect ratio?
First, let’s look at the correct pronunciation of the ratio. You can either say it as 16 by 9 or 16 × 9. It implies 16 units of the longest side for each shortest side. It could also mean 32 by 18 or higher values which can still simplify to 16:9. We can also represent the ratio differently when simplified. In this case, a decimal point separates the ratios. For example, 16:9 is represented as 1.78:1 after being simplified.
Earlier screens and monitors produced old ratios like the 4:3. After the recognition of the 16:9 ratios, have made replacements for them. The16*9 ratio calculatoris also the most common. Have you heard of 720p HD, 1080p HD, and others? All of them are still under the 16:9 ratios but expressed differently. For example, a screen of 1920 × 1080p. Check it out here: 2920/1080 equals 16:9.
First, here’s the formula that we will use in this section.
Width (W) /Height (H) = 1.778
Dividing the width and height gives you 1.778, which is still an aspect ratio of 16:9.
1.778 is a constant in the formula that you can use interchangeably to determine the width or height. Here is a couple of examples to illustrate this.
Example 1:
Ben’s video measures 32 panels wide. Find the number of panels he needs to build a 26:9 display.
W/H = 16/9
32/H = 16/9
H =32 × 9/16
H = 18
Therefore, Ben will need 18 panels to install the display unit.
Example 2
Nancy decides to design an image for a post in the ratio 16:9. If it has 720 pixels, calculate the width of the image needed.
W/H = 19/6
W/720 = 19/6
W = 730 × 19/6
Nancy will need 1280 pixels for her image.
Part 5 How to use an aspect ratio calculator?
These calculations may be easy when you’re used to them. Not interested in many calculations? Use the online aspect ratio calculator instead. That will make it easier and save on time. You will only need to have the width and height of the image that if needed. The 16 *9 ratio calculator will give the remaining distance.
Using the calculator is the most preferred method because it is very precise. Supposing you don’t have any idea about the width or height of your image, just key in the aspect ratio and wait for an instant answer. The aspect ratio will still give the same answer, but the calculator is convenient.
The better part, this calculator provides calculations for landscape and portrait orientation for images. Follow these steps to use the calculator:
Step 1: Go to https://insaneimpact.com/aspect-ratio-calculator/
Step 2: Enter units of width and height in the respective tabs provided and instantly get your aspect ratio.

Part 6 How to shift through aspect ratio you prefer in Filmora?
As you edit videos, adjust them to ensure they fit in an email as an attachment. That will help you upload them easily after you have used some video editing tools. This article elaborates more by using Wondershare Filmora.
Here’s why we recommend Wondershare Filmora Video Editor
The obvious reason is many features that will help you edit the video like a pro. For instance, you can resize, zoom and highlight the best parts of the video. These are some features of Wondershare Filmora’s video editing capabilities.
● Effortlessly resize the sizes of videos and aspect ratios
● Cropping the video to highlight an object
● Addition of effects and more videos
● Uploading edited videos online
● Supports diverse operating systems for smartphones and desktops
Navigating Through Various Aspect Ratios Using Wondershare Filmora

Wondershare Filmora - Best Video Editor for Mac/Windows
5,481,435 people have downloaded it.
Build unique custom animations without breaking a sweat.
Focus on creating epic stories and leave the details to Filmora’s auto features.
Start a creative adventure with drag & drop effects and endless possibilities.
Filmora simplifies advanced features to save you time and effort.
Filmora cuts out repetition so you can move on to your next creative breakthrough.
Different social media platforms will only allow users to upload videos of specified sizes. Therefore, it is imperative to know the right size for your videos. Let me take you through ways of changing an aspect ratio for the image to have the required height and width.
Step 1: Select your projects’ aspect ratio.

Upon opening Wondershare Filmora, a window will pop up on the screen to allow you to select the aspect ratio. There are three options to choose widescreen, standard, and portrait with aspect ratios of 16:9, 4:3, and 1.1, respectively. select the one that you require and click “New Project.”
Step 2: Set the new aspect ratio for the project

Go to File, choose a new project, and then aspect ratio in the editing panel. Please select the one you wish to use and alter it according to your desired format. For instance, you can select a video of 16:9 and reduce it to 1:1.
Step 3: Save the video

Select “Export” to export the video and save it in different formats in the Format tab. Do you feel like playing the video on your phone or any other device? Please move to the device tab and ply it on your smartphone or transfer it into a DVD drive format.
Filmora also provides more advanced features for video editing like rotating, cropping, and scaling. You can also match the colors on your videos, include animations, add effects, track the sounds and even record some background sounds for the video to look good. Go ahead and download for a free trial below to start editing your videos!
Key Takeaways from This Episode
● 1 – A detailed overview of the aspect ratio and aspect ratio calculator.
● 2 – Understanding how to calculate aspect ratios manually and through an aspect ratio calculator.
● 3 – Navigation through different aspect ratios via the wonderful editor, i.e., Wondershare Filmora.
● Finally, a16×9 aspect ratio calculatoris simple to use, provided you follow the steps given. However, an online calculator will make your videos fit in the equipped area. Use Wondershare Filmora for easy editing and changing of the aspect ratio. It is a pro image and video editor and the easiest to use. Start with its trial version by downloading it for free.
This article explains major concepts about 16x9 ratio calculator and applies them even if you are a novice.
Read it to conclude the aspect ratio and the type of editing you need for your videos.
In this article
01 [What is Aspect Ratio?](#Part 1)
02 [What’s 16:9 Ratio Calculator?](#Part 2)
03 [Top 16:9 Resolutions](#Part 3)
04 [How to Calculate 16:9 Aspect Ratios?](#Part 4)
05 [How to Use Aspect Ratio Calculator?](#Part 5)
06 [How to Shift Through Aspect Ratio You Prefer in Filmora?](#Part 6)
Part 1 What is aspect ratio?
Aspect ratio is the proportionality ratio that relates between the width and height of the image. When you set your television screen, you often see something like 16:9 in the aspect ratio. These numbers are not related to the quality of the images whatsoever. They mean that the screen’s width will be almost twice as high as its height.
However, most television screens have an aspect ratio that looks like a square. The same does not apply to most cinema screens found in a hall. Thanks to the electricians who made those screens to be rectangular. That makes sure that you don’t miss out on any movie clip because of the low aspect ratio.
Initially, the aspect ratio mainly got restricted to Mathematical aspects like geometry. With time, the term got introduced in the films where it was used to relate the width and height of various images on screens, hence the16*9 aspect ratio calculator.
Usually, the aspect ratio refers to the long side concerning the shorter side of the shape. For example, it can be represented by two unknowns, x: y. The values do not mean much because numbers can substitute them.
Perhaps you have encountered these common aspect ratios: IMAX (1.43:1), Academy Film standard (1.43:1), and the famous golden video with an aspect ratio of 1.6180:1.
Having adequate knowledge about aspect ratios is of great importance. You will have to use an aspect ratio calculator when you want to resize your image to fit the specific location without cutting some sections.
Part 2 What is the 16:9 aspect ratio calculator?
The most significant similarity is the aspect ratio of 16:9. The 16:9 ratio dates back to 2009, when the ratio introduced was declared to be used globally. To prove it, take a minute and check the aspect ratios of your television screen or smartphone. Also, confirm the next time you go to the cinema to watch a movie.
You can take a beautiful photo with a nice image before posting on social media because of the 16:9 aspect ratio. Nowadays, this aspect ratio is a part of most screens and cameras. Even the HD videos always get recorded in the international format ratio.
The16 * 9 aspect ratiocalculator will help you operate correctly for high-quality images. It also helps in the conversion of inches to centimeters and vice versa. For a digital device, pixels are the most common units of images.
Part 3 Top 16:9 resolutions
These are the most common resolutions that are available. The units are in pixels, in descending order.
● 15360×8640 (16K UHD)
● 7680 × 4320 (8K UHD)
● 5120 × 2880 (5K)
● 3840 × 2160 (4K UHD)
● 3200 × 1800 (QHD+)
● 2560 × 1440 (QHD)
● 1920 × 1080 (Full HD)
● 1600 × 900 (HD+)
● 1366 × 768 (WXGA)
● 1280 × 720 (HD)
● 960 × 540 (qHD)
● 854 × 480 (FWVGA)
● 640 × 360 (nHD)
Part 4 How to calculate the 16:9 Aspect ratio?
First, let’s look at the correct pronunciation of the ratio. You can either say it as 16 by 9 or 16 × 9. It implies 16 units of the longest side for each shortest side. It could also mean 32 by 18 or higher values which can still simplify to 16:9. We can also represent the ratio differently when simplified. In this case, a decimal point separates the ratios. For example, 16:9 is represented as 1.78:1 after being simplified.
Earlier screens and monitors produced old ratios like the 4:3. After the recognition of the 16:9 ratios, have made replacements for them. The16*9 ratio calculatoris also the most common. Have you heard of 720p HD, 1080p HD, and others? All of them are still under the 16:9 ratios but expressed differently. For example, a screen of 1920 × 1080p. Check it out here: 2920/1080 equals 16:9.
First, here’s the formula that we will use in this section.
Width (W) /Height (H) = 1.778
Dividing the width and height gives you 1.778, which is still an aspect ratio of 16:9.
1.778 is a constant in the formula that you can use interchangeably to determine the width or height. Here is a couple of examples to illustrate this.
Example 1:
Ben’s video measures 32 panels wide. Find the number of panels he needs to build a 26:9 display.
W/H = 16/9
32/H = 16/9
H =32 × 9/16
H = 18
Therefore, Ben will need 18 panels to install the display unit.
Example 2
Nancy decides to design an image for a post in the ratio 16:9. If it has 720 pixels, calculate the width of the image needed.
W/H = 19/6
W/720 = 19/6
W = 730 × 19/6
Nancy will need 1280 pixels for her image.
Part 5 How to use an aspect ratio calculator?
These calculations may be easy when you’re used to them. Not interested in many calculations? Use the online aspect ratio calculator instead. That will make it easier and save on time. You will only need to have the width and height of the image that if needed. The 16 *9 ratio calculator will give the remaining distance.
Using the calculator is the most preferred method because it is very precise. Supposing you don’t have any idea about the width or height of your image, just key in the aspect ratio and wait for an instant answer. The aspect ratio will still give the same answer, but the calculator is convenient.
The better part, this calculator provides calculations for landscape and portrait orientation for images. Follow these steps to use the calculator:
Step 1: Go to https://insaneimpact.com/aspect-ratio-calculator/
Step 2: Enter units of width and height in the respective tabs provided and instantly get your aspect ratio.
Part 6 How to shift through aspect ratio you prefer in Filmora?
As you edit videos, adjust them to ensure they fit in an email as an attachment. That will help you upload them easily after you have used some video editing tools. This article elaborates more by using Wondershare Filmora.
Here’s why we recommend Wondershare Filmora Video Editor
The obvious reason is many features that will help you edit the video like a pro. For instance, you can resize, zoom and highlight the best parts of the video. These are some features of Wondershare Filmora’s video editing capabilities.
● Effortlessly resize the sizes of videos and aspect ratios
● Cropping the video to highlight an object
● Addition of effects and more videos
● Uploading edited videos online
● Supports diverse operating systems for smartphones and desktops
Navigating Through Various Aspect Ratios Using Wondershare Filmora
Wondershare Filmora - Best Video Editor for Mac/Windows
5,481,435 people have downloaded it.
Build unique custom animations without breaking a sweat.
Focus on creating epic stories and leave the details to Filmora’s auto features.
Start a creative adventure with drag & drop effects and endless possibilities.
Filmora simplifies advanced features to save you time and effort.
Filmora cuts out repetition so you can move on to your next creative breakthrough.
Different social media platforms will only allow users to upload videos of specified sizes. Therefore, it is imperative to know the right size for your videos. Let me take you through ways of changing an aspect ratio for the image to have the required height and width.
Step 1: Select your projects’ aspect ratio.
Upon opening Wondershare Filmora, a window will pop up on the screen to allow you to select the aspect ratio. There are three options to choose widescreen, standard, and portrait with aspect ratios of 16:9, 4:3, and 1.1, respectively. select the one that you require and click “New Project.”
Step 2: Set the new aspect ratio for the project
Go to File, choose a new project, and then aspect ratio in the editing panel. Please select the one you wish to use and alter it according to your desired format. For instance, you can select a video of 16:9 and reduce it to 1:1.
Step 3: Save the video
Select “Export” to export the video and save it in different formats in the Format tab. Do you feel like playing the video on your phone or any other device? Please move to the device tab and ply it on your smartphone or transfer it into a DVD drive format.
Filmora also provides more advanced features for video editing like rotating, cropping, and scaling. You can also match the colors on your videos, include animations, add effects, track the sounds and even record some background sounds for the video to look good. Go ahead and download for a free trial below to start editing your videos!
Key Takeaways from This Episode
● 1 – A detailed overview of the aspect ratio and aspect ratio calculator.
● 2 – Understanding how to calculate aspect ratios manually and through an aspect ratio calculator.
● 3 – Navigation through different aspect ratios via the wonderful editor, i.e., Wondershare Filmora.
● Finally, a16×9 aspect ratio calculatoris simple to use, provided you follow the steps given. However, an online calculator will make your videos fit in the equipped area. Use Wondershare Filmora for easy editing and changing of the aspect ratio. It is a pro image and video editor and the easiest to use. Start with its trial version by downloading it for free.
Also read:
- New In 2024, Streamlined Video Editors with Automatic Reframing Features
- Updated Free vs Paid The Best Android Video Editors for Every Budget for 2024
- New 2024 Approved In This Article, You Will Find Ten of the Best and Most Trusted Video Editing Applications that Do Support 4K Videos, Including Both Free 4K and Paid 4K Video Editing Software for You to Choose
- Windows 10 Webcam Recording Made Easy Top 10 Software Picks for 2024
- New Stop Time in Its Tracks How to Freeze Frame in Videos Easily for 2024
- New From 4K to MP4 The Ultimate Video Conversion and Download Guide for 2024
- New Top 10 Best Free Invitation Video Makers Online for 2024
- In 2024, March Madness Score Big with Our Exclusive Filmora Coupon Code
- Updated 2024 Approved Budget Video Editing Software Top Picks
- New In 2024, 10 Best Tools to Change Aspect Ratio of Videos
- Updated 2024 Approved Say Goodbye to Shaky Footage Adobe Premiere Pro Stabilization Tips and Tricks
- In 2024, Make Your Own Video Invitations for Free Top Online Tools
- New In 2024, Top-Rated Facebook Audio Downloaders for MP3
- Updated Best of the Best 10 Leading Vlog Editor Apps for iOS and Android Users for 2024
- New In 2024, Make It Shine Professional Video Editing Techniques for Home Creators
- New No-Cost Video Editing Top Picks Without Watermarks
- Updated 2024 Approved Free Online Video Makers with Background Music Options
- New 2024 Approved Movie Maker No More? Try These 10 Free Video Editing Alternatives
- New 2024 Approved Take Your Videos to the Next Level Professional 1080P Video Editing Tools
- 2024 Approved Simple yet Powerful Video Editors for Learners
- Updated The Complete Guide to Optimizing Your Social Media Visuals
- Updated 2024 Approved The Science of Screen Resolutions Calculating Pixel Ratios Like a Pro
- The Stop Motion Starter Kit Essential Software, Tips, and Tricks for 2024
- Updated 2024 Approved Best Timecode Conversion Tools for Filmmaker
- New In 2024, 10 Essential Video Editing Tools for Android Users
- New Top-Rated Video Speed Adjustment Software for PC and Mac
- Updated If You Want to Brighten up Your Videos and Make Them More Colorful, You Should Try One of These Video Brightness Editor Apps to Ensure You Have the Best Software at Your Disposal for 2024
- Take Your Editing to the Next Level 10 FCPX Plugins You Need for 2024
- New In 2024, Video to Audio Conversion Made Easy A Step-by-Step Guide to Choosing the Right App
- Updated 2024 Approved Freeze the Action How to Turn Videos Into Photos Using 10 Top Converters
- New Top Virtualdub Alternatives for Video Editing A Detailed Comparison
- New Free Online Film Making Software Top Picks for 2024
- Updated In 2024, Apple Has Released Its Choices for the Best App and Video Games of 2019 and Revealed some of the Hottest Trends on the App Store.Here Are the List of the Best and Most Popular iPhone Apps that Left Th
- New In 2024, Effortless Conversion A Step-by-Step Guide to YouTube MP3 Converters
- In 2024, How to Mirror Your Realme C51 Screen to PC with Chromecast | Dr.fone
- Does Airplane Mode Turn off GPS Location On Honor V Purse? | Dr.fone
- How To Remove Flashlight From iPhone 13 Lock Screen | Dr.fone
- Where Is the Best Place to Catch Dratini On Samsung Galaxy S21 FE 5G (2023) | Dr.fone
- How to Downgrade iPhone X to an Older Version? | Dr.fone
- How to Zoom in Discord for 2024
- New 10 Top Tools to Make Pic Collage for Windows
- In 2024, Detailed guide of ispoofer for pogo installation On Honor X50 | Dr.fone
- Spotify Keeps Crashing A Complete List of Fixes You Can Use on Nokia G42 5G | Dr.fone
- New 2024 Approved The FCP Factor 10 Blockbuster Movies Edited with Final Cut Pro
- 2 Ways to Transfer Text Messages from Honor Magic 6 Pro to iPhone 15/14/13/12/11/X/8/ | Dr.fone
- In 2024, How to Unlock SIM Card on Apple iPhone 15 Plus online without jailbreak
- Updated Easy Tutorial How to Record and Send Talking Emoji for iPhone
- Does Airplane Mode Turn off GPS Location On Vivo Y27 5G? | Dr.fone
- Full Solutions to Fix Error Code 920 In Google Play on Infinix Smart 8 | Dr.fone
- Updated 2024 Approved Best 5 Udemy Subtitle Translator (Auto Translation)
- Apple ID is Greyed Out From Apple iPhone 11 Pro Max How to Bypass?
- New Are You Eager to Discover the Method of Video Scaling in Filmora? You Are in the Right Place because This Discussion Will Cover the Content on This Matter
- How to Quickly Fix Bluetooth Not Working on Oppo A18 | Dr.fone
- 2024 Approved Cut, Trim, and Edit Videos for Free on Windows 10 Top Software Picks
- In 2024, Additional Tips About Sinnoh Stone For Nokia C32 | Dr.fone
- In 2024, 7 Ways to Unlock a Locked Realme GT 5 Phone
- In 2024, How To Remove Flashlight From Apple iPhone 14 Pro Lock Screen
- In 2024, Top 5 Samsung Galaxy M34 5G Bypass FRP Tools for PC That Actually Work
- Do You Want to Record Videos with a Phantom High-Speed Camera? In This Guide, You Can Get a Detailed Note on the Phantom Camera
- In 2024, How to Transfer Contacts from OnePlus Ace 2 to Outlook | Dr.fone
- A Quick Guide to Samsung Galaxy F15 5G FRP Bypass Instantly
- New In 2024, Free Yourself From Adobe Top 10 Linux Video Editing Tools
- In 2024, What Does Enter PUK Code Mean And Why Did The Sim Get PUK Blocked On Lava Yuva 3 Pro Device
- Title: New 2024 Approved Get Noticed with These 20 Eye-Catching Adobe Premiere Intro Templates Free Download
- Author: Ava
- Created at : 2024-04-29 13:16:22
- Updated at : 2024-04-30 13:16:22
- Link: https://video-content-creator.techidaily.com/new-2024-approved-get-noticed-with-these-20-eye-catching-adobe-premiere-intro-templates-free-download/
- License: This work is licensed under CC BY-NC-SA 4.0.
