:max_bytes(150000):strip_icc():format(webp)/ps5controller-0d702b25f7fa47b482999811cfc7af39.jpg)
In 2024, Slow Motion Video Playback on VLC A Beginners Guide

Slow Motion Video Playback on VLC: A Beginner’s Guide
While the files of the most common formats like MP4, WAV, etc. may look identical, they might be compiled using varied codecs which may or may not support any random player that you install on your PC. The reason why VLC media player is used by the majority of users worldwide is the versatility in the codecs that it supports natively.
Furthermore, the app is available for almost every platform, i.e., Windows, Mac, Linux, iOS, and Android, and is absolutely free to download and use.
With that said, the following sections explain how to manage the playback speed of a video while using VLC media player to add a slow motion effect to video. Here you will learn how to play slow motion on VLC on Windows, Mac, and iOS/Android, and also how to set the default speed for the app so that every time a video is played, the speed remains according to your preference.
In this article
01 How to Play Video in Slow Motion Effects on Windows with VLC?
02 How to Play Slow Motion Effects on Mac with VLC?
03 How to Control Playback Speed in VLC Media Player on Android and iOS?
04 How to Set up the Default Playback Speed on VLC?
Part 1: How to Play Video in Slow Motion Effects on Windows with VLC?
VLC is one of the best media players to play videos in slow motion . You can follow the instructions that are given below to learn how to play a video in slow motion in VLC on a Windows PC:
Step 1: Start Video Playback
Launch VLC on your Windows computer (a Windows 11 PC is used here for illustrations), click Media from the menu bar at the top, click Open File from the menu, and locate and open a video that you want to watch in slow motion. If VLC is your default media player, simply double-clicking the clip automatically opens the file in the app.

Step 2: Reduce the Playback Speed (In Decrements of 0.10x)
Once the playback begins, press the Spacebar on the keyboard to pause the video. Next, go to the Playback menu from the top, go to Speed, and click Slower (fine) once. This will reduce the speed to 0.90x. Clicking Slower (fine) again will further slow down the video to 0.80x speed. You can repeat this process until you reduce the speed to your desired level. Press Spacebar again to resume the playback in slow motion.
Note: The lowest speed that you can go to using this process is 0.03x.

Step 3: Reduce the Playback Speed (In Decrements in Percentage)
Pause the playback and go to Playback > Speed as explained in the previous step. From the list that comes up, click Slower (the last option). This will reduce the speed to 0.67x. Click Slower again and the speed will further go down to 0.50x. You can repeat this process until you reach your desired playback speed. Press Spacebar to resume the playback in slow motion. With this method, you can reduce the speed to as low as 0.02x.
Note: You can click Normal from the Speed submenu to play the video at normal speed.

Step 4: Using the Shortcut Keys (Optional)
You can press the left square bracket ‘[‘ on your keyboard to reduce the speed in decrements of 0.10x. To get back to the normal speed, press the equals to ‘=’ key. Likewise, pressing the right square bracket ‘]’ increases the speed by 0.10x.
Note: As it is with the Slower (fine) and Slower options, you can use Faster (fine) to add 0.10x increments to the speed, and Faster to increase percentage-wise. Also, if Faster (fine) is clicked repeatedly or its shortcut key is used multiple times, the speed can be increased up to 31.25x. On the other hand, by using the Faster option repeatedly, the speed can be increased to more than 100x.
Part 2: How to Play Slow Motion Effects on Mac with VLC?
The process of slowing down the video playback in VLC on a Mac computer is almost identical to that in Windows. You can learn how to get this done by following the steps that are given below:
Step 1: Open and Pause the Video
Locate and right-click the video that you want to play in slow motion, go to Open With from the context menu, and click VLC from the submenu. Once the clip opens, click the Pause button from the bottom as explained in the previous section.
Step 2: Reduce the Playback Speed
Click Playback from the menu bar at the top, and drag the Playback Speed slider to the left to reduce the speed of the video.

Step 3: Resume the Playback
Click anywhere on the screen to close the Playback menu, and then click the Play button from the bottom to resume the video playback in slow motion.
Part 3: How to Control Playback Speed in VLC Media Player on Android and iOS?
Although the playback speed of a video on both Android and iOS devices can be controlled with a slider, the location where the controller is placed on the two platforms varies, and so does the process of reaching there. Both the methods are explained below for your convenience:
Play Video in Slow Motion on Android with VLC
Step 1: Pause the Playback
Launch VLC on your Android phone (Samsung Galaxy Note 10+ is used here for illustrations), locate and open the video in VLC, tap anywhere on the screen, and tap the Pause button from the bottom to pause the playback.
Step 2: Set a Slower Playback Speed
Tap the More icon from the bottom-right corner, tap Playback speed from the menu that appears, and drag the slider that is present at the bottom to the left to reduce the speed. Alternatively, you can also repeatedly tap the down arrow that is present at the right of the slider to slow down the speed in the decrements of 0.05x.

Step 3: Resume the Playback
Tap anywhere on the screen, and when the Playback speed slider disappears, tap the screen one more time. Now, tap the Play icon from the bottom to resume the video playback.
Play Video in Slow Motion on iPhone with VLC
Step 1: Pause the Playback
Assuming that you have already added the video to the VLC library by connecting it to iTunes, launch the app on your iOS device (iPhone 13 Pro Max is used here for illustrations). Tap the video that you want to play in slow motion, and then tap the Pause icon from the bottom.
Step 2: Reduce the Playback Speed
Tap anywhere on the screen, and tap the Clock icon from the lower-left corner. Next, drag the Playback speed slider to the left to reduce the playback speed.

Step 3: Resume the Playback
Right after decreasing the speed, tap the Play icon from the bottom to resume the playback. If the controllers disappear, you can tap anywhere on the screen again, and then tap the Play icon.
Part 4: How to Set up the Default Playback Speed on VLC?
The processes of setting up default playback speed on different platforms and devices vary. For your convenience, all of them are explained below:
Set up Default Playback Speed in VLC on Windows
- Go to Tools > Preferences in VLC media player, and then click the All button from the Show settings section at the bottom.
- Select Input / Codecs from the left pane of the Advanced Preferences box, and then specify your preferred speed in the Playback speed field that is present under the Playback control section on the right window
- Click Save to save the changes

Set up Default Playback Speed in VLC on Mac
- Launch VLC, and go to VLC media player from the menu bar, and then click Preferences; and then click Show All from the bottom of the Preferences box to display all preferences setting options;

- Click the Input / Codecs from the left pane, and then define your preferred speed in the Playback speed field under the Playback control section in the right window, and then click Save to save the changes.

How to Change VLC Media Player Default Speed on Android
Note: At the time of this writing, the Android version of VLC doesn’t allow you to set a global default playback speed. However, you can set it on a per video basis. This means that every time that video is played, the playback speed will remain what you set for it. You must do this for each video in your VLC library individually.
- Launch VLC, and then tap More from the bottom-right corner; next, tap SETTINGS from the upper-left area;
- Tap Video from the Extra settings section, and then check the Save Playback Speed box

How to Change VLC Media Player Default Speed on iOS and iPhone
- Tap Settings from the Home screen, and then scroll down and tap VLC
- Tap Default playback speed from the GENERIC section, and then tap to select a playback speed from the available list to set it as the default.

Conclusion
It is pretty convenient to reduce the playback speed in VLC media player regardless of the platform or device you are using. While the processes of getting the job might be different, the principle behind it remains the same. When on Windows, the playback speed can be decreased to 0.02x and can be increased to more than 100x. This facility is not available on Mac, iOS, or Android platforms. Also, if you want, you can set the default playback speed for the videos so that every time a clip is played, the pace remains what you specified as default.
02 How to Play Slow Motion Effects on Mac with VLC?
03 How to Control Playback Speed in VLC Media Player on Android and iOS?
04 How to Set up the Default Playback Speed on VLC?
Part 1: How to Play Video in Slow Motion Effects on Windows with VLC?
VLC is one of the best media players to play videos in slow motion . You can follow the instructions that are given below to learn how to play a video in slow motion in VLC on a Windows PC:
Step 1: Start Video Playback
Launch VLC on your Windows computer (a Windows 11 PC is used here for illustrations), click Media from the menu bar at the top, click Open File from the menu, and locate and open a video that you want to watch in slow motion. If VLC is your default media player, simply double-clicking the clip automatically opens the file in the app.

Step 2: Reduce the Playback Speed (In Decrements of 0.10x)
Once the playback begins, press the Spacebar on the keyboard to pause the video. Next, go to the Playback menu from the top, go to Speed, and click Slower (fine) once. This will reduce the speed to 0.90x. Clicking Slower (fine) again will further slow down the video to 0.80x speed. You can repeat this process until you reduce the speed to your desired level. Press Spacebar again to resume the playback in slow motion.
Note: The lowest speed that you can go to using this process is 0.03x.

Step 3: Reduce the Playback Speed (In Decrements in Percentage)
Pause the playback and go to Playback > Speed as explained in the previous step. From the list that comes up, click Slower (the last option). This will reduce the speed to 0.67x. Click Slower again and the speed will further go down to 0.50x. You can repeat this process until you reach your desired playback speed. Press Spacebar to resume the playback in slow motion. With this method, you can reduce the speed to as low as 0.02x.
Note: You can click Normal from the Speed submenu to play the video at normal speed.

Step 4: Using the Shortcut Keys (Optional)
You can press the left square bracket ‘[‘ on your keyboard to reduce the speed in decrements of 0.10x. To get back to the normal speed, press the equals to ‘=’ key. Likewise, pressing the right square bracket ‘]’ increases the speed by 0.10x.
Note: As it is with the Slower (fine) and Slower options, you can use Faster (fine) to add 0.10x increments to the speed, and Faster to increase percentage-wise. Also, if Faster (fine) is clicked repeatedly or its shortcut key is used multiple times, the speed can be increased up to 31.25x. On the other hand, by using the Faster option repeatedly, the speed can be increased to more than 100x.
Part 2: How to Play Slow Motion Effects on Mac with VLC?
The process of slowing down the video playback in VLC on a Mac computer is almost identical to that in Windows. You can learn how to get this done by following the steps that are given below:
Step 1: Open and Pause the Video
Locate and right-click the video that you want to play in slow motion, go to Open With from the context menu, and click VLC from the submenu. Once the clip opens, click the Pause button from the bottom as explained in the previous section.
Step 2: Reduce the Playback Speed
Click Playback from the menu bar at the top, and drag the Playback Speed slider to the left to reduce the speed of the video.

Step 3: Resume the Playback
Click anywhere on the screen to close the Playback menu, and then click the Play button from the bottom to resume the video playback in slow motion.
Part 3: How to Control Playback Speed in VLC Media Player on Android and iOS?
Although the playback speed of a video on both Android and iOS devices can be controlled with a slider, the location where the controller is placed on the two platforms varies, and so does the process of reaching there. Both the methods are explained below for your convenience:
Play Video in Slow Motion on Android with VLC
Step 1: Pause the Playback
Launch VLC on your Android phone (Samsung Galaxy Note 10+ is used here for illustrations), locate and open the video in VLC, tap anywhere on the screen, and tap the Pause button from the bottom to pause the playback.
Step 2: Set a Slower Playback Speed
Tap the More icon from the bottom-right corner, tap Playback speed from the menu that appears, and drag the slider that is present at the bottom to the left to reduce the speed. Alternatively, you can also repeatedly tap the down arrow that is present at the right of the slider to slow down the speed in the decrements of 0.05x.

Step 3: Resume the Playback
Tap anywhere on the screen, and when the Playback speed slider disappears, tap the screen one more time. Now, tap the Play icon from the bottom to resume the video playback.
Play Video in Slow Motion on iPhone with VLC
Step 1: Pause the Playback
Assuming that you have already added the video to the VLC library by connecting it to iTunes, launch the app on your iOS device (iPhone 13 Pro Max is used here for illustrations). Tap the video that you want to play in slow motion, and then tap the Pause icon from the bottom.
Step 2: Reduce the Playback Speed
Tap anywhere on the screen, and tap the Clock icon from the lower-left corner. Next, drag the Playback speed slider to the left to reduce the playback speed.

Step 3: Resume the Playback
Right after decreasing the speed, tap the Play icon from the bottom to resume the playback. If the controllers disappear, you can tap anywhere on the screen again, and then tap the Play icon.
Part 4: How to Set up the Default Playback Speed on VLC?
The processes of setting up default playback speed on different platforms and devices vary. For your convenience, all of them are explained below:
Set up Default Playback Speed in VLC on Windows
- Go to Tools > Preferences in VLC media player, and then click the All button from the Show settings section at the bottom.
- Select Input / Codecs from the left pane of the Advanced Preferences box, and then specify your preferred speed in the Playback speed field that is present under the Playback control section on the right window
- Click Save to save the changes

Set up Default Playback Speed in VLC on Mac
- Launch VLC, and go to VLC media player from the menu bar, and then click Preferences; and then click Show All from the bottom of the Preferences box to display all preferences setting options;

- Click the Input / Codecs from the left pane, and then define your preferred speed in the Playback speed field under the Playback control section in the right window, and then click Save to save the changes.

How to Change VLC Media Player Default Speed on Android
Note: At the time of this writing, the Android version of VLC doesn’t allow you to set a global default playback speed. However, you can set it on a per video basis. This means that every time that video is played, the playback speed will remain what you set for it. You must do this for each video in your VLC library individually.
- Launch VLC, and then tap More from the bottom-right corner; next, tap SETTINGS from the upper-left area;
- Tap Video from the Extra settings section, and then check the Save Playback Speed box

How to Change VLC Media Player Default Speed on iOS and iPhone
- Tap Settings from the Home screen, and then scroll down and tap VLC
- Tap Default playback speed from the GENERIC section, and then tap to select a playback speed from the available list to set it as the default.

Conclusion
It is pretty convenient to reduce the playback speed in VLC media player regardless of the platform or device you are using. While the processes of getting the job might be different, the principle behind it remains the same. When on Windows, the playback speed can be decreased to 0.02x and can be increased to more than 100x. This facility is not available on Mac, iOS, or Android platforms. Also, if you want, you can set the default playback speed for the videos so that every time a clip is played, the pace remains what you specified as default.
02 How to Play Slow Motion Effects on Mac with VLC?
03 How to Control Playback Speed in VLC Media Player on Android and iOS?
04 How to Set up the Default Playback Speed on VLC?
Part 1: How to Play Video in Slow Motion Effects on Windows with VLC?
VLC is one of the best media players to play videos in slow motion . You can follow the instructions that are given below to learn how to play a video in slow motion in VLC on a Windows PC:
Step 1: Start Video Playback
Launch VLC on your Windows computer (a Windows 11 PC is used here for illustrations), click Media from the menu bar at the top, click Open File from the menu, and locate and open a video that you want to watch in slow motion. If VLC is your default media player, simply double-clicking the clip automatically opens the file in the app.

Step 2: Reduce the Playback Speed (In Decrements of 0.10x)
Once the playback begins, press the Spacebar on the keyboard to pause the video. Next, go to the Playback menu from the top, go to Speed, and click Slower (fine) once. This will reduce the speed to 0.90x. Clicking Slower (fine) again will further slow down the video to 0.80x speed. You can repeat this process until you reduce the speed to your desired level. Press Spacebar again to resume the playback in slow motion.
Note: The lowest speed that you can go to using this process is 0.03x.

Step 3: Reduce the Playback Speed (In Decrements in Percentage)
Pause the playback and go to Playback > Speed as explained in the previous step. From the list that comes up, click Slower (the last option). This will reduce the speed to 0.67x. Click Slower again and the speed will further go down to 0.50x. You can repeat this process until you reach your desired playback speed. Press Spacebar to resume the playback in slow motion. With this method, you can reduce the speed to as low as 0.02x.
Note: You can click Normal from the Speed submenu to play the video at normal speed.

Step 4: Using the Shortcut Keys (Optional)
You can press the left square bracket ‘[‘ on your keyboard to reduce the speed in decrements of 0.10x. To get back to the normal speed, press the equals to ‘=’ key. Likewise, pressing the right square bracket ‘]’ increases the speed by 0.10x.
Note: As it is with the Slower (fine) and Slower options, you can use Faster (fine) to add 0.10x increments to the speed, and Faster to increase percentage-wise. Also, if Faster (fine) is clicked repeatedly or its shortcut key is used multiple times, the speed can be increased up to 31.25x. On the other hand, by using the Faster option repeatedly, the speed can be increased to more than 100x.
Part 2: How to Play Slow Motion Effects on Mac with VLC?
The process of slowing down the video playback in VLC on a Mac computer is almost identical to that in Windows. You can learn how to get this done by following the steps that are given below:
Step 1: Open and Pause the Video
Locate and right-click the video that you want to play in slow motion, go to Open With from the context menu, and click VLC from the submenu. Once the clip opens, click the Pause button from the bottom as explained in the previous section.
Step 2: Reduce the Playback Speed
Click Playback from the menu bar at the top, and drag the Playback Speed slider to the left to reduce the speed of the video.

Step 3: Resume the Playback
Click anywhere on the screen to close the Playback menu, and then click the Play button from the bottom to resume the video playback in slow motion.
Part 3: How to Control Playback Speed in VLC Media Player on Android and iOS?
Although the playback speed of a video on both Android and iOS devices can be controlled with a slider, the location where the controller is placed on the two platforms varies, and so does the process of reaching there. Both the methods are explained below for your convenience:
Play Video in Slow Motion on Android with VLC
Step 1: Pause the Playback
Launch VLC on your Android phone (Samsung Galaxy Note 10+ is used here for illustrations), locate and open the video in VLC, tap anywhere on the screen, and tap the Pause button from the bottom to pause the playback.
Step 2: Set a Slower Playback Speed
Tap the More icon from the bottom-right corner, tap Playback speed from the menu that appears, and drag the slider that is present at the bottom to the left to reduce the speed. Alternatively, you can also repeatedly tap the down arrow that is present at the right of the slider to slow down the speed in the decrements of 0.05x.

Step 3: Resume the Playback
Tap anywhere on the screen, and when the Playback speed slider disappears, tap the screen one more time. Now, tap the Play icon from the bottom to resume the video playback.
Play Video in Slow Motion on iPhone with VLC
Step 1: Pause the Playback
Assuming that you have already added the video to the VLC library by connecting it to iTunes, launch the app on your iOS device (iPhone 13 Pro Max is used here for illustrations). Tap the video that you want to play in slow motion, and then tap the Pause icon from the bottom.
Step 2: Reduce the Playback Speed
Tap anywhere on the screen, and tap the Clock icon from the lower-left corner. Next, drag the Playback speed slider to the left to reduce the playback speed.

Step 3: Resume the Playback
Right after decreasing the speed, tap the Play icon from the bottom to resume the playback. If the controllers disappear, you can tap anywhere on the screen again, and then tap the Play icon.
Part 4: How to Set up the Default Playback Speed on VLC?
The processes of setting up default playback speed on different platforms and devices vary. For your convenience, all of them are explained below:
Set up Default Playback Speed in VLC on Windows
- Go to Tools > Preferences in VLC media player, and then click the All button from the Show settings section at the bottom.
- Select Input / Codecs from the left pane of the Advanced Preferences box, and then specify your preferred speed in the Playback speed field that is present under the Playback control section on the right window
- Click Save to save the changes

Set up Default Playback Speed in VLC on Mac
- Launch VLC, and go to VLC media player from the menu bar, and then click Preferences; and then click Show All from the bottom of the Preferences box to display all preferences setting options;

- Click the Input / Codecs from the left pane, and then define your preferred speed in the Playback speed field under the Playback control section in the right window, and then click Save to save the changes.

How to Change VLC Media Player Default Speed on Android
Note: At the time of this writing, the Android version of VLC doesn’t allow you to set a global default playback speed. However, you can set it on a per video basis. This means that every time that video is played, the playback speed will remain what you set for it. You must do this for each video in your VLC library individually.
- Launch VLC, and then tap More from the bottom-right corner; next, tap SETTINGS from the upper-left area;
- Tap Video from the Extra settings section, and then check the Save Playback Speed box

How to Change VLC Media Player Default Speed on iOS and iPhone
- Tap Settings from the Home screen, and then scroll down and tap VLC
- Tap Default playback speed from the GENERIC section, and then tap to select a playback speed from the available list to set it as the default.

Conclusion
It is pretty convenient to reduce the playback speed in VLC media player regardless of the platform or device you are using. While the processes of getting the job might be different, the principle behind it remains the same. When on Windows, the playback speed can be decreased to 0.02x and can be increased to more than 100x. This facility is not available on Mac, iOS, or Android platforms. Also, if you want, you can set the default playback speed for the videos so that every time a clip is played, the pace remains what you specified as default.
02 How to Play Slow Motion Effects on Mac with VLC?
03 How to Control Playback Speed in VLC Media Player on Android and iOS?
04 How to Set up the Default Playback Speed on VLC?
Part 1: How to Play Video in Slow Motion Effects on Windows with VLC?
VLC is one of the best media players to play videos in slow motion . You can follow the instructions that are given below to learn how to play a video in slow motion in VLC on a Windows PC:
Step 1: Start Video Playback
Launch VLC on your Windows computer (a Windows 11 PC is used here for illustrations), click Media from the menu bar at the top, click Open File from the menu, and locate and open a video that you want to watch in slow motion. If VLC is your default media player, simply double-clicking the clip automatically opens the file in the app.

Step 2: Reduce the Playback Speed (In Decrements of 0.10x)
Once the playback begins, press the Spacebar on the keyboard to pause the video. Next, go to the Playback menu from the top, go to Speed, and click Slower (fine) once. This will reduce the speed to 0.90x. Clicking Slower (fine) again will further slow down the video to 0.80x speed. You can repeat this process until you reduce the speed to your desired level. Press Spacebar again to resume the playback in slow motion.
Note: The lowest speed that you can go to using this process is 0.03x.

Step 3: Reduce the Playback Speed (In Decrements in Percentage)
Pause the playback and go to Playback > Speed as explained in the previous step. From the list that comes up, click Slower (the last option). This will reduce the speed to 0.67x. Click Slower again and the speed will further go down to 0.50x. You can repeat this process until you reach your desired playback speed. Press Spacebar to resume the playback in slow motion. With this method, you can reduce the speed to as low as 0.02x.
Note: You can click Normal from the Speed submenu to play the video at normal speed.

Step 4: Using the Shortcut Keys (Optional)
You can press the left square bracket ‘[‘ on your keyboard to reduce the speed in decrements of 0.10x. To get back to the normal speed, press the equals to ‘=’ key. Likewise, pressing the right square bracket ‘]’ increases the speed by 0.10x.
Note: As it is with the Slower (fine) and Slower options, you can use Faster (fine) to add 0.10x increments to the speed, and Faster to increase percentage-wise. Also, if Faster (fine) is clicked repeatedly or its shortcut key is used multiple times, the speed can be increased up to 31.25x. On the other hand, by using the Faster option repeatedly, the speed can be increased to more than 100x.
Part 2: How to Play Slow Motion Effects on Mac with VLC?
The process of slowing down the video playback in VLC on a Mac computer is almost identical to that in Windows. You can learn how to get this done by following the steps that are given below:
Step 1: Open and Pause the Video
Locate and right-click the video that you want to play in slow motion, go to Open With from the context menu, and click VLC from the submenu. Once the clip opens, click the Pause button from the bottom as explained in the previous section.
Step 2: Reduce the Playback Speed
Click Playback from the menu bar at the top, and drag the Playback Speed slider to the left to reduce the speed of the video.

Step 3: Resume the Playback
Click anywhere on the screen to close the Playback menu, and then click the Play button from the bottom to resume the video playback in slow motion.
Part 3: How to Control Playback Speed in VLC Media Player on Android and iOS?
Although the playback speed of a video on both Android and iOS devices can be controlled with a slider, the location where the controller is placed on the two platforms varies, and so does the process of reaching there. Both the methods are explained below for your convenience:
Play Video in Slow Motion on Android with VLC
Step 1: Pause the Playback
Launch VLC on your Android phone (Samsung Galaxy Note 10+ is used here for illustrations), locate and open the video in VLC, tap anywhere on the screen, and tap the Pause button from the bottom to pause the playback.
Step 2: Set a Slower Playback Speed
Tap the More icon from the bottom-right corner, tap Playback speed from the menu that appears, and drag the slider that is present at the bottom to the left to reduce the speed. Alternatively, you can also repeatedly tap the down arrow that is present at the right of the slider to slow down the speed in the decrements of 0.05x.

Step 3: Resume the Playback
Tap anywhere on the screen, and when the Playback speed slider disappears, tap the screen one more time. Now, tap the Play icon from the bottom to resume the video playback.
Play Video in Slow Motion on iPhone with VLC
Step 1: Pause the Playback
Assuming that you have already added the video to the VLC library by connecting it to iTunes, launch the app on your iOS device (iPhone 13 Pro Max is used here for illustrations). Tap the video that you want to play in slow motion, and then tap the Pause icon from the bottom.
Step 2: Reduce the Playback Speed
Tap anywhere on the screen, and tap the Clock icon from the lower-left corner. Next, drag the Playback speed slider to the left to reduce the playback speed.

Step 3: Resume the Playback
Right after decreasing the speed, tap the Play icon from the bottom to resume the playback. If the controllers disappear, you can tap anywhere on the screen again, and then tap the Play icon.
Part 4: How to Set up the Default Playback Speed on VLC?
The processes of setting up default playback speed on different platforms and devices vary. For your convenience, all of them are explained below:
Set up Default Playback Speed in VLC on Windows
- Go to Tools > Preferences in VLC media player, and then click the All button from the Show settings section at the bottom.
- Select Input / Codecs from the left pane of the Advanced Preferences box, and then specify your preferred speed in the Playback speed field that is present under the Playback control section on the right window
- Click Save to save the changes

Set up Default Playback Speed in VLC on Mac
- Launch VLC, and go to VLC media player from the menu bar, and then click Preferences; and then click Show All from the bottom of the Preferences box to display all preferences setting options;

- Click the Input / Codecs from the left pane, and then define your preferred speed in the Playback speed field under the Playback control section in the right window, and then click Save to save the changes.

How to Change VLC Media Player Default Speed on Android
Note: At the time of this writing, the Android version of VLC doesn’t allow you to set a global default playback speed. However, you can set it on a per video basis. This means that every time that video is played, the playback speed will remain what you set for it. You must do this for each video in your VLC library individually.
- Launch VLC, and then tap More from the bottom-right corner; next, tap SETTINGS from the upper-left area;
- Tap Video from the Extra settings section, and then check the Save Playback Speed box

How to Change VLC Media Player Default Speed on iOS and iPhone
- Tap Settings from the Home screen, and then scroll down and tap VLC
- Tap Default playback speed from the GENERIC section, and then tap to select a playback speed from the available list to set it as the default.

Conclusion
It is pretty convenient to reduce the playback speed in VLC media player regardless of the platform or device you are using. While the processes of getting the job might be different, the principle behind it remains the same. When on Windows, the playback speed can be decreased to 0.02x and can be increased to more than 100x. This facility is not available on Mac, iOS, or Android platforms. Also, if you want, you can set the default playback speed for the videos so that every time a clip is played, the pace remains what you specified as default.
The Secret to Irresistible Thumbnails: YouTube Size, Design, and Best Practices
YouTube Thumbnail Size Template & Practical Tactics for You
An easy yet powerful editor
Numerous effects to choose from
Detailed tutorials provided by the official channel
A YouTube thumbnail is like a cover page of your video that creates the first impression. Though a default thumbnail is created for each video by YouTube, you can always customize it and make it more appealing and attractive.

More in detail about Youtube thumbnail size template, tips, and others can be learned from the following content.
In this article
01 [Youtube Thumbnail Specifications ](#Part 1)
02 [Youtube Thumbnail Templates](#Part 2)
03 [Top 5 Tips for Creating Effective Thumbnails](#Part 3)
04 [How to Add a Customized Thumbnail to a Youtube Video](#Part 4)
Part 1 YouTube Thumbnail Specifications
To stand out from the crowd and create an impact over the viewers, a well-customized thumbnail works great. A customized thumbnail proves effective in ways more than one like encouraging attention, increasing engagement, giving a professional look, portraying your personality, and much more. The right size of the thumbnail is an important consideration and the following are the suggested YouTube video thumbnail dimensions.
● An ideal width and height of YouTube thumbnail size is 1280 X 720 pixels
● The size of the thumbnail should be kept under 2MB.
● Use the thumbnail in JPEG, PNG, BMP, or GIF format.
● The ideal thumbnail ratio for YouTube has to be kept at 16:9.
● The width of the thumbnail should not be less than 640 pixels.

Part 2 YouTube Thumbnail Templates
If you are struggling to find the right thumbnail for your video, templates are a great rescue. There are several sites and programs where you can find multiple templates that can be customized and edited to suit your requirements. We have shortlisted a few sites where you can check different types of interesting templates for the YouTube thumbnails.
● Canva: This online site has a huge collection of free as well as paid video thumbnails in different categories, and types. You can filter the collection of templates based on style and theme. The templates can be further customized as needed after which they can be downloaded to be used on YouTube.

● VistaCreate: Interesting template designs are available at this site to be used as a YouTube video thumbnail. You can even create your own design or customize the ones available. The site also has an option to choose the desired thumbnail design using the search bar.

● Postermywall: YouTube templates in an array of designs, themes, and genres are available at this site. There are also Youtube Thumbnail Size Template and from these you can choose the one that matches the personality of your video and customize it as per the requirements. The search bar to look for your choice of template is also available.

● Visme: Templates for all types of video thumbnails are available at this site to choose from. You simply need to choose the template as per your choice and you are all set to have an impressive thumbnail for your video. You can even look for your choice of design using the search bar.

● Snappa: There is a wide selection of templates in different categories at this site that can be used for creating a customized thumbnail for your YouTube videos. The templates are free and you need to create a free account on the site to use them.

Part 3 Top 5 Tips For Creating Effective Thumbnails
To make your thumbnails interesting and effective we have shortlisted a few useful tips as below.
● Keep it clutter-free: It’s always good to keep your thumbnail simple and clean without any clutter. If you use too many elements in a thumbnail, they will look messy when watched on a mobile device.
● Using a still image from the video: Though you can set a customized thumbnail for your videos, an automatic image is also selected by YouTube. It might be a possibility that the image automatically selected is good enough and effective and thus creating a customized thumbnail is not required.
● Using editing software like Wondershare Filmora Video Editor for creating customized graphics: A good editing software can be used for creating an effective and impressive image. Wondershare Filmora is one such professional tool that can be considered. This Windows and Mac-based program can let you edit your images using multiple features. Simple and fast to use, the software also supports batch processing so that multiple files as thumbnails for multiple videos can be created at a time. Additional features supported by the software include motion tracking, adding text and tiles, adding overlays and filters, adding transitions and elements, color tuning, and more.
Wondershare Filmora
Get started easily with Filmora’s powerful performance, intuitive interface, and countless effects!
Try It Free Try It Free Try It Free Learn More >

● Use eye-catchy titles: Using catchy titles in your thumbnails is an effective way to grab the attention of the viewers. A title will give a glimpse to the viewers of the content of the video.
● Try different designs: If you are not sure about a thumbnail design, create multiple ones and then add them to the video one by one. Select the design that goes best and looks attractive.

Part 4 How to Add A Customized Thumbnail To A Youtube Video
Once a customized thumbnail image is created, the next step is to add it to the video on your YouTube. The process is simple and quick and involves the following steps.
Step 1. Open your YouTube account and add the new video using the camera-plus icon. Alternatively, to add a thumbnail to the already uploaded video, go to the Studio dashboard and tap on the video for editing the settings.
Step 2. At the bottom of the video settings window, you can see the 3 thumbnails generated automatically. To upload the customized image, click on the Custom thumbnail box at the bottom right-hand side.
Step 3. Browse and import the created thumbnail image and click on the Upload button.
The selected image will not be used as the thumbnail for the video.

Key Takeaways from This Episode
● A YouTube thumbnail works as the cover for your video and is the first thing that will get the attention and the interest of the viewer.
● YouTube video thumbnail dimensions as recommended must be used.
● Several pre-designed templates are available for creating interesting thumbnails.
● To create an effective thumbnail, several tips and tricks can be used like using editing software like Wondershare Filmora.
A YouTube thumbnail is like a cover page of your video that creates the first impression. Though a default thumbnail is created for each video by YouTube, you can always customize it and make it more appealing and attractive.

More in detail about Youtube thumbnail size template, tips, and others can be learned from the following content.
In this article
01 [Youtube Thumbnail Specifications ](#Part 1)
02 [Youtube Thumbnail Templates](#Part 2)
03 [Top 5 Tips for Creating Effective Thumbnails](#Part 3)
04 [How to Add a Customized Thumbnail to a Youtube Video](#Part 4)
Part 1 YouTube Thumbnail Specifications
To stand out from the crowd and create an impact over the viewers, a well-customized thumbnail works great. A customized thumbnail proves effective in ways more than one like encouraging attention, increasing engagement, giving a professional look, portraying your personality, and much more. The right size of the thumbnail is an important consideration and the following are the suggested YouTube video thumbnail dimensions.
● An ideal width and height of YouTube thumbnail size is 1280 X 720 pixels
● The size of the thumbnail should be kept under 2MB.
● Use the thumbnail in JPEG, PNG, BMP, or GIF format.
● The ideal thumbnail ratio for YouTube has to be kept at 16:9.
● The width of the thumbnail should not be less than 640 pixels.

Part 2 YouTube Thumbnail Templates
If you are struggling to find the right thumbnail for your video, templates are a great rescue. There are several sites and programs where you can find multiple templates that can be customized and edited to suit your requirements. We have shortlisted a few sites where you can check different types of interesting templates for the YouTube thumbnails.
● Canva: This online site has a huge collection of free as well as paid video thumbnails in different categories, and types. You can filter the collection of templates based on style and theme. The templates can be further customized as needed after which they can be downloaded to be used on YouTube.

● VistaCreate: Interesting template designs are available at this site to be used as a YouTube video thumbnail. You can even create your own design or customize the ones available. The site also has an option to choose the desired thumbnail design using the search bar.

● Postermywall: YouTube templates in an array of designs, themes, and genres are available at this site. There are also Youtube Thumbnail Size Template and from these you can choose the one that matches the personality of your video and customize it as per the requirements. The search bar to look for your choice of template is also available.

● Visme: Templates for all types of video thumbnails are available at this site to choose from. You simply need to choose the template as per your choice and you are all set to have an impressive thumbnail for your video. You can even look for your choice of design using the search bar.

● Snappa: There is a wide selection of templates in different categories at this site that can be used for creating a customized thumbnail for your YouTube videos. The templates are free and you need to create a free account on the site to use them.

Part 3 Top 5 Tips For Creating Effective Thumbnails
To make your thumbnails interesting and effective we have shortlisted a few useful tips as below.
● Keep it clutter-free: It’s always good to keep your thumbnail simple and clean without any clutter. If you use too many elements in a thumbnail, they will look messy when watched on a mobile device.
● Using a still image from the video: Though you can set a customized thumbnail for your videos, an automatic image is also selected by YouTube. It might be a possibility that the image automatically selected is good enough and effective and thus creating a customized thumbnail is not required.
● Using editing software like Wondershare Filmora Video Editor for creating customized graphics: A good editing software can be used for creating an effective and impressive image. Wondershare Filmora is one such professional tool that can be considered. This Windows and Mac-based program can let you edit your images using multiple features. Simple and fast to use, the software also supports batch processing so that multiple files as thumbnails for multiple videos can be created at a time. Additional features supported by the software include motion tracking, adding text and tiles, adding overlays and filters, adding transitions and elements, color tuning, and more.
Wondershare Filmora
Get started easily with Filmora’s powerful performance, intuitive interface, and countless effects!
Try It Free Try It Free Try It Free Learn More >

● Use eye-catchy titles: Using catchy titles in your thumbnails is an effective way to grab the attention of the viewers. A title will give a glimpse to the viewers of the content of the video.
● Try different designs: If you are not sure about a thumbnail design, create multiple ones and then add them to the video one by one. Select the design that goes best and looks attractive.

Part 4 How to Add A Customized Thumbnail To A Youtube Video
Once a customized thumbnail image is created, the next step is to add it to the video on your YouTube. The process is simple and quick and involves the following steps.
Step 1. Open your YouTube account and add the new video using the camera-plus icon. Alternatively, to add a thumbnail to the already uploaded video, go to the Studio dashboard and tap on the video for editing the settings.
Step 2. At the bottom of the video settings window, you can see the 3 thumbnails generated automatically. To upload the customized image, click on the Custom thumbnail box at the bottom right-hand side.
Step 3. Browse and import the created thumbnail image and click on the Upload button.
The selected image will not be used as the thumbnail for the video.

Key Takeaways from This Episode
● A YouTube thumbnail works as the cover for your video and is the first thing that will get the attention and the interest of the viewer.
● YouTube video thumbnail dimensions as recommended must be used.
● Several pre-designed templates are available for creating interesting thumbnails.
● To create an effective thumbnail, several tips and tricks can be used like using editing software like Wondershare Filmora.
A YouTube thumbnail is like a cover page of your video that creates the first impression. Though a default thumbnail is created for each video by YouTube, you can always customize it and make it more appealing and attractive.

More in detail about Youtube thumbnail size template, tips, and others can be learned from the following content.
In this article
01 [Youtube Thumbnail Specifications ](#Part 1)
02 [Youtube Thumbnail Templates](#Part 2)
03 [Top 5 Tips for Creating Effective Thumbnails](#Part 3)
04 [How to Add a Customized Thumbnail to a Youtube Video](#Part 4)
Part 1 YouTube Thumbnail Specifications
To stand out from the crowd and create an impact over the viewers, a well-customized thumbnail works great. A customized thumbnail proves effective in ways more than one like encouraging attention, increasing engagement, giving a professional look, portraying your personality, and much more. The right size of the thumbnail is an important consideration and the following are the suggested YouTube video thumbnail dimensions.
● An ideal width and height of YouTube thumbnail size is 1280 X 720 pixels
● The size of the thumbnail should be kept under 2MB.
● Use the thumbnail in JPEG, PNG, BMP, or GIF format.
● The ideal thumbnail ratio for YouTube has to be kept at 16:9.
● The width of the thumbnail should not be less than 640 pixels.

Part 2 YouTube Thumbnail Templates
If you are struggling to find the right thumbnail for your video, templates are a great rescue. There are several sites and programs where you can find multiple templates that can be customized and edited to suit your requirements. We have shortlisted a few sites where you can check different types of interesting templates for the YouTube thumbnails.
● Canva: This online site has a huge collection of free as well as paid video thumbnails in different categories, and types. You can filter the collection of templates based on style and theme. The templates can be further customized as needed after which they can be downloaded to be used on YouTube.

● VistaCreate: Interesting template designs are available at this site to be used as a YouTube video thumbnail. You can even create your own design or customize the ones available. The site also has an option to choose the desired thumbnail design using the search bar.

● Postermywall: YouTube templates in an array of designs, themes, and genres are available at this site. There are also Youtube Thumbnail Size Template and from these you can choose the one that matches the personality of your video and customize it as per the requirements. The search bar to look for your choice of template is also available.

● Visme: Templates for all types of video thumbnails are available at this site to choose from. You simply need to choose the template as per your choice and you are all set to have an impressive thumbnail for your video. You can even look for your choice of design using the search bar.

● Snappa: There is a wide selection of templates in different categories at this site that can be used for creating a customized thumbnail for your YouTube videos. The templates are free and you need to create a free account on the site to use them.

Part 3 Top 5 Tips For Creating Effective Thumbnails
To make your thumbnails interesting and effective we have shortlisted a few useful tips as below.
● Keep it clutter-free: It’s always good to keep your thumbnail simple and clean without any clutter. If you use too many elements in a thumbnail, they will look messy when watched on a mobile device.
● Using a still image from the video: Though you can set a customized thumbnail for your videos, an automatic image is also selected by YouTube. It might be a possibility that the image automatically selected is good enough and effective and thus creating a customized thumbnail is not required.
● Using editing software like Wondershare Filmora Video Editor for creating customized graphics: A good editing software can be used for creating an effective and impressive image. Wondershare Filmora is one such professional tool that can be considered. This Windows and Mac-based program can let you edit your images using multiple features. Simple and fast to use, the software also supports batch processing so that multiple files as thumbnails for multiple videos can be created at a time. Additional features supported by the software include motion tracking, adding text and tiles, adding overlays and filters, adding transitions and elements, color tuning, and more.
Wondershare Filmora
Get started easily with Filmora’s powerful performance, intuitive interface, and countless effects!
Try It Free Try It Free Try It Free Learn More >

● Use eye-catchy titles: Using catchy titles in your thumbnails is an effective way to grab the attention of the viewers. A title will give a glimpse to the viewers of the content of the video.
● Try different designs: If you are not sure about a thumbnail design, create multiple ones and then add them to the video one by one. Select the design that goes best and looks attractive.

Part 4 How to Add A Customized Thumbnail To A Youtube Video
Once a customized thumbnail image is created, the next step is to add it to the video on your YouTube. The process is simple and quick and involves the following steps.
Step 1. Open your YouTube account and add the new video using the camera-plus icon. Alternatively, to add a thumbnail to the already uploaded video, go to the Studio dashboard and tap on the video for editing the settings.
Step 2. At the bottom of the video settings window, you can see the 3 thumbnails generated automatically. To upload the customized image, click on the Custom thumbnail box at the bottom right-hand side.
Step 3. Browse and import the created thumbnail image and click on the Upload button.
The selected image will not be used as the thumbnail for the video.

Key Takeaways from This Episode
● A YouTube thumbnail works as the cover for your video and is the first thing that will get the attention and the interest of the viewer.
● YouTube video thumbnail dimensions as recommended must be used.
● Several pre-designed templates are available for creating interesting thumbnails.
● To create an effective thumbnail, several tips and tricks can be used like using editing software like Wondershare Filmora.
A YouTube thumbnail is like a cover page of your video that creates the first impression. Though a default thumbnail is created for each video by YouTube, you can always customize it and make it more appealing and attractive.

More in detail about Youtube thumbnail size template, tips, and others can be learned from the following content.
In this article
01 [Youtube Thumbnail Specifications ](#Part 1)
02 [Youtube Thumbnail Templates](#Part 2)
03 [Top 5 Tips for Creating Effective Thumbnails](#Part 3)
04 [How to Add a Customized Thumbnail to a Youtube Video](#Part 4)
Part 1 YouTube Thumbnail Specifications
To stand out from the crowd and create an impact over the viewers, a well-customized thumbnail works great. A customized thumbnail proves effective in ways more than one like encouraging attention, increasing engagement, giving a professional look, portraying your personality, and much more. The right size of the thumbnail is an important consideration and the following are the suggested YouTube video thumbnail dimensions.
● An ideal width and height of YouTube thumbnail size is 1280 X 720 pixels
● The size of the thumbnail should be kept under 2MB.
● Use the thumbnail in JPEG, PNG, BMP, or GIF format.
● The ideal thumbnail ratio for YouTube has to be kept at 16:9.
● The width of the thumbnail should not be less than 640 pixels.

Part 2 YouTube Thumbnail Templates
If you are struggling to find the right thumbnail for your video, templates are a great rescue. There are several sites and programs where you can find multiple templates that can be customized and edited to suit your requirements. We have shortlisted a few sites where you can check different types of interesting templates for the YouTube thumbnails.
● Canva: This online site has a huge collection of free as well as paid video thumbnails in different categories, and types. You can filter the collection of templates based on style and theme. The templates can be further customized as needed after which they can be downloaded to be used on YouTube.

● VistaCreate: Interesting template designs are available at this site to be used as a YouTube video thumbnail. You can even create your own design or customize the ones available. The site also has an option to choose the desired thumbnail design using the search bar.

● Postermywall: YouTube templates in an array of designs, themes, and genres are available at this site. There are also Youtube Thumbnail Size Template and from these you can choose the one that matches the personality of your video and customize it as per the requirements. The search bar to look for your choice of template is also available.

● Visme: Templates for all types of video thumbnails are available at this site to choose from. You simply need to choose the template as per your choice and you are all set to have an impressive thumbnail for your video. You can even look for your choice of design using the search bar.

● Snappa: There is a wide selection of templates in different categories at this site that can be used for creating a customized thumbnail for your YouTube videos. The templates are free and you need to create a free account on the site to use them.

Part 3 Top 5 Tips For Creating Effective Thumbnails
To make your thumbnails interesting and effective we have shortlisted a few useful tips as below.
● Keep it clutter-free: It’s always good to keep your thumbnail simple and clean without any clutter. If you use too many elements in a thumbnail, they will look messy when watched on a mobile device.
● Using a still image from the video: Though you can set a customized thumbnail for your videos, an automatic image is also selected by YouTube. It might be a possibility that the image automatically selected is good enough and effective and thus creating a customized thumbnail is not required.
● Using editing software like Wondershare Filmora Video Editor for creating customized graphics: A good editing software can be used for creating an effective and impressive image. Wondershare Filmora is one such professional tool that can be considered. This Windows and Mac-based program can let you edit your images using multiple features. Simple and fast to use, the software also supports batch processing so that multiple files as thumbnails for multiple videos can be created at a time. Additional features supported by the software include motion tracking, adding text and tiles, adding overlays and filters, adding transitions and elements, color tuning, and more.
Wondershare Filmora
Get started easily with Filmora’s powerful performance, intuitive interface, and countless effects!
Try It Free Try It Free Try It Free Learn More >

● Use eye-catchy titles: Using catchy titles in your thumbnails is an effective way to grab the attention of the viewers. A title will give a glimpse to the viewers of the content of the video.
● Try different designs: If you are not sure about a thumbnail design, create multiple ones and then add them to the video one by one. Select the design that goes best and looks attractive.

Part 4 How to Add A Customized Thumbnail To A Youtube Video
Once a customized thumbnail image is created, the next step is to add it to the video on your YouTube. The process is simple and quick and involves the following steps.
Step 1. Open your YouTube account and add the new video using the camera-plus icon. Alternatively, to add a thumbnail to the already uploaded video, go to the Studio dashboard and tap on the video for editing the settings.
Step 2. At the bottom of the video settings window, you can see the 3 thumbnails generated automatically. To upload the customized image, click on the Custom thumbnail box at the bottom right-hand side.
Step 3. Browse and import the created thumbnail image and click on the Upload button.
The selected image will not be used as the thumbnail for the video.

Key Takeaways from This Episode
● A YouTube thumbnail works as the cover for your video and is the first thing that will get the attention and the interest of the viewer.
● YouTube video thumbnail dimensions as recommended must be used.
● Several pre-designed templates are available for creating interesting thumbnails.
● To create an effective thumbnail, several tips and tricks can be used like using editing software like Wondershare Filmora.
Unbiased Comparison: Final Cut Pro vs LumaFusion for Video Post-Production
LumaFusion vs Final Cut Pro X: Which Do You Need?

Shanoon Cox
Oct 26, 2023• Proven solutions
Deciding which option to go for when you have two high-performance video editing software like LumaFusion and Final Cut Pro X can be a tough choice to make.
LumaFusion was originally a hands-on video editing app on iOS, adapted to iPad and iPhone alone. At the same time, Final Cut Pro X was designed to run on Mac.
With the recent compatibility of LumaFusion on the M1 MacBook Air, which surfaced in 2020, there have been recent concerns from expert users that very soon, these iOS Pro editing giants may lock horns in no time; if the latter sees more advanced upgrades.
This article will be giving you a concise yet comprehensive comparison of this editing software, what features to expect, and professional advice to help you choose which one suits your editing needs. Stick with me as I take you on this brief journey into the creative world of LumaFusion and Final Cut Pro X.
Pros and Cons of Final Cut Pro X and LumaFusion
| Pros of LumaFusion | Pros of Final Cut Pro X |
|---|---|
| Portable. You can access all features on the phone | Allows constant autosave |
| Runs on the , which is twice as fast as the . | Integrates well with studio products |
| straightforward interface; easy to navigate | Professional and rich Interface and layout |
| Allows to trim out unused media before export. | Comes with custom transitions |
| Enhance stability and performance | Sync well with other Apple products |
| Quick response while looking for Storyblocks | Perfect for Hi-tech video manipulation |
| Cons of LumaFusion | Cons of Final Cut Pro X |
| Difficult with large projects and multi-task | Relatively expensive |
| Advanced features like motion tracking and missing | Advanced tools are unfriendly for beginners |
| Advantages like touch control are limited in Mac | Exclusively on Mac |
Since LumaFusion is less complex because of its user interface flexibility, most users who do not see a need for advanced video manipulation features tend to use it. All you need to do is drag and drop, and in a few minutes, you will be through with your editing process.
However, since Final Cut Pro X adopts highly advanced features and effects, it is best for Pro users who want to edit projects which need major manipulation and complex editing. We still have to keep our fingers crossed for subsequent LumaFusion upgrades since it recently welcomed compatibility on Mac.
But in the meantime, if you need an editing process with all the professional features and high manipulation toolsets, then Final Cut Pro X is the best option for you.
Price comparison between Final Cut Pro X Vs LumaFusion
Final Cut Pro X Price
Final Cut Pro X comes with a free 90-day trial option on the recent version, and of course, it is only available exclusively on Mac App Store.
Within the trial period, you would not have access to the 1000+ royalty-free sound effects in the premium version. Still, you can use other unique features for editing, like color correction, adding effects, organizing, editing, and importing and exporting files in different formats.

During the 90-free trial, you can purchase your Final Cut Pro X, which comes with the Logic Pro built-in for $299, or try the Pro Apps Bundle for Education which has the Final Cut Pro X, Logic Pro, Compressor, MainStage, and Motion pre-installed for just $199, which gives you a direct and automatic update on purchase. Final Cut Pro comes with a 6 years license span.
LumaFusion Price
Compared to other video editing apps in the same category as LumaFision, it has a very flexible pricing system. And since users prefer something with creativity and have a simple interface, it is evident while many new users choose to enjoy the fluid system it portends.
For a fantastic software like this, offering multiple editing with professional and highly detailed effects, audio, and color, a one-off payment as low as $29.99 is just so perfect.

Though it comes with no trial policy, recent updates and fixes show that LumaFusion can generally be a dominating app in the editing world.
Plus, you can always try Filmora for free, it’s popular among beginners and professionals!
Final Cut Pro X Vs LumaFusion: Interface
Final Cut Pro X
Many features endeared Final Cut Pro versions to expert users, but more precise advance features like trackless Magnetic Timeline view and great tools for splitting and trimming videos made it more impressive. You can edit, split or trim your videos with a few clicks of your mouse and easily undo any move if you prefer to leave previous options.

Final Cut Pro X comes with a highly efficient tool known as the Compound Clips. This feature helps you group your clips, effects, and audio in a single space, so they become a perfectly synchronized piece.
Also, it comes with the Roles feature, which helps explain a particular clip, ranging from videos to titles, dialog, effect, etc. It is a great organizing tool, which enables you to identify what kind of track you are playing.
LumaFusion
LumaFusion is well-known for its portability and easy-to-use interface, which is why I recommend it for beginners. However, LumaFusion is in many ways like a professional video editing tool, with editing interface features like preview monitor, search panel, source clip which helps you identify your timeline edit on the fascinating multitrack timeline.

Though many users prefer it to other mobile-based editing apps, others think it is best to introduce it fully on the Mac version because the buttons look a lot more complex for an App. Also, stating that the use of the preview screen is almost irrelevant since it isn’t big due to the mobile display screen.
However, with a simple drag and drop feature, it is easy to fall in love with this tool, as the interface doesn’t look as complex as some make it seem.
Summary for Final Cut Pro X Vs LumaFusion
Is LumaFusion worth it?
It is no story that the LumaFusion Team has tried their best in developing an amazing piece like this. And with the pace at which it is welcoming many advanced features, it could turn out to be one of the most used editing software on iOS. Sadly, you cannot run LumaFusion on Android or Windows now, but hopefully, subsequent upgrades and adjustments could introduce other device and OS compatibility.
Ultimately, if you are looking for a low-budget app to work on a minor project with less stress and more productivity, then LumaFusion is the best option for you. You will most likely cut down the stress of carrying a larger screen and clicking on your mouse at intervals by 70%.
Also, with a one-time payment of just $29, you can just save your two days lunch money to enjoy your editing process forever! I’m just saying that you don’t have to break a bank to get one.
However, if you are looking for a software or editing tool to handle a huge project with advanced effects, this option isn’t just what you should try out.
Why should you try Final Cut Pro X?
High definition editing options, professional audio effects, and at least 1300 royalty-free sound effects are some reasons Pro editors will always run to Final Cut. Though all software has setbacks, Final Cut Pro X has proven efficient as an advanced tool for professionals who want to deliver their best. It has more intricate features which provide more detailed effects and manipulations in simple click and drag patterns.
So if you are looking for software to handle bulk editing projects, Final Cut Pro X is the best option for you, as against the latter. Even though it costs a whopping $199 for the Pro Bundle option, it is well worth it.
Final Cut Pro X in every ramification is more suitable to Pro users because their designers focused on making it ideal for complex projects, which is why many professional editors prefer it. But the highly flexible and fluid user interface of LumaFusion has recently endeared it to many.
Quite evidently, either of them serves the same purpose and at a very proficient level, but your choice strictly depends on what you want to use them for. So first, consider that factor before setting out to buy any of them.

Shanoon Cox
Shanoon Cox is a writer and a lover of all things video.
Follow @Shanoon Cox
Shanoon Cox
Oct 26, 2023• Proven solutions
Deciding which option to go for when you have two high-performance video editing software like LumaFusion and Final Cut Pro X can be a tough choice to make.
LumaFusion was originally a hands-on video editing app on iOS, adapted to iPad and iPhone alone. At the same time, Final Cut Pro X was designed to run on Mac.
With the recent compatibility of LumaFusion on the M1 MacBook Air, which surfaced in 2020, there have been recent concerns from expert users that very soon, these iOS Pro editing giants may lock horns in no time; if the latter sees more advanced upgrades.
This article will be giving you a concise yet comprehensive comparison of this editing software, what features to expect, and professional advice to help you choose which one suits your editing needs. Stick with me as I take you on this brief journey into the creative world of LumaFusion and Final Cut Pro X.
Pros and Cons of Final Cut Pro X and LumaFusion
| Pros of LumaFusion | Pros of Final Cut Pro X |
|---|---|
| Portable. You can access all features on the phone | Allows constant autosave |
| Runs on the , which is twice as fast as the . | Integrates well with studio products |
| straightforward interface; easy to navigate | Professional and rich Interface and layout |
| Allows to trim out unused media before export. | Comes with custom transitions |
| Enhance stability and performance | Sync well with other Apple products |
| Quick response while looking for Storyblocks | Perfect for Hi-tech video manipulation |
| Cons of LumaFusion | Cons of Final Cut Pro X |
| Difficult with large projects and multi-task | Relatively expensive |
| Advanced features like motion tracking and missing | Advanced tools are unfriendly for beginners |
| Advantages like touch control are limited in Mac | Exclusively on Mac |
Since LumaFusion is less complex because of its user interface flexibility, most users who do not see a need for advanced video manipulation features tend to use it. All you need to do is drag and drop, and in a few minutes, you will be through with your editing process.
However, since Final Cut Pro X adopts highly advanced features and effects, it is best for Pro users who want to edit projects which need major manipulation and complex editing. We still have to keep our fingers crossed for subsequent LumaFusion upgrades since it recently welcomed compatibility on Mac.
But in the meantime, if you need an editing process with all the professional features and high manipulation toolsets, then Final Cut Pro X is the best option for you.
Price comparison between Final Cut Pro X Vs LumaFusion
Final Cut Pro X Price
Final Cut Pro X comes with a free 90-day trial option on the recent version, and of course, it is only available exclusively on Mac App Store.
Within the trial period, you would not have access to the 1000+ royalty-free sound effects in the premium version. Still, you can use other unique features for editing, like color correction, adding effects, organizing, editing, and importing and exporting files in different formats.

During the 90-free trial, you can purchase your Final Cut Pro X, which comes with the Logic Pro built-in for $299, or try the Pro Apps Bundle for Education which has the Final Cut Pro X, Logic Pro, Compressor, MainStage, and Motion pre-installed for just $199, which gives you a direct and automatic update on purchase. Final Cut Pro comes with a 6 years license span.
LumaFusion Price
Compared to other video editing apps in the same category as LumaFision, it has a very flexible pricing system. And since users prefer something with creativity and have a simple interface, it is evident while many new users choose to enjoy the fluid system it portends.
For a fantastic software like this, offering multiple editing with professional and highly detailed effects, audio, and color, a one-off payment as low as $29.99 is just so perfect.

Though it comes with no trial policy, recent updates and fixes show that LumaFusion can generally be a dominating app in the editing world.
Plus, you can always try Filmora for free, it’s popular among beginners and professionals!
Final Cut Pro X Vs LumaFusion: Interface
Final Cut Pro X
Many features endeared Final Cut Pro versions to expert users, but more precise advance features like trackless Magnetic Timeline view and great tools for splitting and trimming videos made it more impressive. You can edit, split or trim your videos with a few clicks of your mouse and easily undo any move if you prefer to leave previous options.

Final Cut Pro X comes with a highly efficient tool known as the Compound Clips. This feature helps you group your clips, effects, and audio in a single space, so they become a perfectly synchronized piece.
Also, it comes with the Roles feature, which helps explain a particular clip, ranging from videos to titles, dialog, effect, etc. It is a great organizing tool, which enables you to identify what kind of track you are playing.
LumaFusion
LumaFusion is well-known for its portability and easy-to-use interface, which is why I recommend it for beginners. However, LumaFusion is in many ways like a professional video editing tool, with editing interface features like preview monitor, search panel, source clip which helps you identify your timeline edit on the fascinating multitrack timeline.

Though many users prefer it to other mobile-based editing apps, others think it is best to introduce it fully on the Mac version because the buttons look a lot more complex for an App. Also, stating that the use of the preview screen is almost irrelevant since it isn’t big due to the mobile display screen.
However, with a simple drag and drop feature, it is easy to fall in love with this tool, as the interface doesn’t look as complex as some make it seem.
Summary for Final Cut Pro X Vs LumaFusion
Is LumaFusion worth it?
It is no story that the LumaFusion Team has tried their best in developing an amazing piece like this. And with the pace at which it is welcoming many advanced features, it could turn out to be one of the most used editing software on iOS. Sadly, you cannot run LumaFusion on Android or Windows now, but hopefully, subsequent upgrades and adjustments could introduce other device and OS compatibility.
Ultimately, if you are looking for a low-budget app to work on a minor project with less stress and more productivity, then LumaFusion is the best option for you. You will most likely cut down the stress of carrying a larger screen and clicking on your mouse at intervals by 70%.
Also, with a one-time payment of just $29, you can just save your two days lunch money to enjoy your editing process forever! I’m just saying that you don’t have to break a bank to get one.
However, if you are looking for a software or editing tool to handle a huge project with advanced effects, this option isn’t just what you should try out.
Why should you try Final Cut Pro X?
High definition editing options, professional audio effects, and at least 1300 royalty-free sound effects are some reasons Pro editors will always run to Final Cut. Though all software has setbacks, Final Cut Pro X has proven efficient as an advanced tool for professionals who want to deliver their best. It has more intricate features which provide more detailed effects and manipulations in simple click and drag patterns.
So if you are looking for software to handle bulk editing projects, Final Cut Pro X is the best option for you, as against the latter. Even though it costs a whopping $199 for the Pro Bundle option, it is well worth it.
Final Cut Pro X in every ramification is more suitable to Pro users because their designers focused on making it ideal for complex projects, which is why many professional editors prefer it. But the highly flexible and fluid user interface of LumaFusion has recently endeared it to many.
Quite evidently, either of them serves the same purpose and at a very proficient level, but your choice strictly depends on what you want to use them for. So first, consider that factor before setting out to buy any of them.

Shanoon Cox
Shanoon Cox is a writer and a lover of all things video.
Follow @Shanoon Cox
Shanoon Cox
Oct 26, 2023• Proven solutions
Deciding which option to go for when you have two high-performance video editing software like LumaFusion and Final Cut Pro X can be a tough choice to make.
LumaFusion was originally a hands-on video editing app on iOS, adapted to iPad and iPhone alone. At the same time, Final Cut Pro X was designed to run on Mac.
With the recent compatibility of LumaFusion on the M1 MacBook Air, which surfaced in 2020, there have been recent concerns from expert users that very soon, these iOS Pro editing giants may lock horns in no time; if the latter sees more advanced upgrades.
This article will be giving you a concise yet comprehensive comparison of this editing software, what features to expect, and professional advice to help you choose which one suits your editing needs. Stick with me as I take you on this brief journey into the creative world of LumaFusion and Final Cut Pro X.
Pros and Cons of Final Cut Pro X and LumaFusion
| Pros of LumaFusion | Pros of Final Cut Pro X |
|---|---|
| Portable. You can access all features on the phone | Allows constant autosave |
| Runs on the , which is twice as fast as the . | Integrates well with studio products |
| straightforward interface; easy to navigate | Professional and rich Interface and layout |
| Allows to trim out unused media before export. | Comes with custom transitions |
| Enhance stability and performance | Sync well with other Apple products |
| Quick response while looking for Storyblocks | Perfect for Hi-tech video manipulation |
| Cons of LumaFusion | Cons of Final Cut Pro X |
| Difficult with large projects and multi-task | Relatively expensive |
| Advanced features like motion tracking and missing | Advanced tools are unfriendly for beginners |
| Advantages like touch control are limited in Mac | Exclusively on Mac |
Since LumaFusion is less complex because of its user interface flexibility, most users who do not see a need for advanced video manipulation features tend to use it. All you need to do is drag and drop, and in a few minutes, you will be through with your editing process.
However, since Final Cut Pro X adopts highly advanced features and effects, it is best for Pro users who want to edit projects which need major manipulation and complex editing. We still have to keep our fingers crossed for subsequent LumaFusion upgrades since it recently welcomed compatibility on Mac.
But in the meantime, if you need an editing process with all the professional features and high manipulation toolsets, then Final Cut Pro X is the best option for you.
Price comparison between Final Cut Pro X Vs LumaFusion
Final Cut Pro X Price
Final Cut Pro X comes with a free 90-day trial option on the recent version, and of course, it is only available exclusively on Mac App Store.
Within the trial period, you would not have access to the 1000+ royalty-free sound effects in the premium version. Still, you can use other unique features for editing, like color correction, adding effects, organizing, editing, and importing and exporting files in different formats.

During the 90-free trial, you can purchase your Final Cut Pro X, which comes with the Logic Pro built-in for $299, or try the Pro Apps Bundle for Education which has the Final Cut Pro X, Logic Pro, Compressor, MainStage, and Motion pre-installed for just $199, which gives you a direct and automatic update on purchase. Final Cut Pro comes with a 6 years license span.
LumaFusion Price
Compared to other video editing apps in the same category as LumaFision, it has a very flexible pricing system. And since users prefer something with creativity and have a simple interface, it is evident while many new users choose to enjoy the fluid system it portends.
For a fantastic software like this, offering multiple editing with professional and highly detailed effects, audio, and color, a one-off payment as low as $29.99 is just so perfect.

Though it comes with no trial policy, recent updates and fixes show that LumaFusion can generally be a dominating app in the editing world.
Plus, you can always try Filmora for free, it’s popular among beginners and professionals!
Final Cut Pro X Vs LumaFusion: Interface
Final Cut Pro X
Many features endeared Final Cut Pro versions to expert users, but more precise advance features like trackless Magnetic Timeline view and great tools for splitting and trimming videos made it more impressive. You can edit, split or trim your videos with a few clicks of your mouse and easily undo any move if you prefer to leave previous options.

Final Cut Pro X comes with a highly efficient tool known as the Compound Clips. This feature helps you group your clips, effects, and audio in a single space, so they become a perfectly synchronized piece.
Also, it comes with the Roles feature, which helps explain a particular clip, ranging from videos to titles, dialog, effect, etc. It is a great organizing tool, which enables you to identify what kind of track you are playing.
LumaFusion
LumaFusion is well-known for its portability and easy-to-use interface, which is why I recommend it for beginners. However, LumaFusion is in many ways like a professional video editing tool, with editing interface features like preview monitor, search panel, source clip which helps you identify your timeline edit on the fascinating multitrack timeline.

Though many users prefer it to other mobile-based editing apps, others think it is best to introduce it fully on the Mac version because the buttons look a lot more complex for an App. Also, stating that the use of the preview screen is almost irrelevant since it isn’t big due to the mobile display screen.
However, with a simple drag and drop feature, it is easy to fall in love with this tool, as the interface doesn’t look as complex as some make it seem.
Summary for Final Cut Pro X Vs LumaFusion
Is LumaFusion worth it?
It is no story that the LumaFusion Team has tried their best in developing an amazing piece like this. And with the pace at which it is welcoming many advanced features, it could turn out to be one of the most used editing software on iOS. Sadly, you cannot run LumaFusion on Android or Windows now, but hopefully, subsequent upgrades and adjustments could introduce other device and OS compatibility.
Ultimately, if you are looking for a low-budget app to work on a minor project with less stress and more productivity, then LumaFusion is the best option for you. You will most likely cut down the stress of carrying a larger screen and clicking on your mouse at intervals by 70%.
Also, with a one-time payment of just $29, you can just save your two days lunch money to enjoy your editing process forever! I’m just saying that you don’t have to break a bank to get one.
However, if you are looking for a software or editing tool to handle a huge project with advanced effects, this option isn’t just what you should try out.
Why should you try Final Cut Pro X?
High definition editing options, professional audio effects, and at least 1300 royalty-free sound effects are some reasons Pro editors will always run to Final Cut. Though all software has setbacks, Final Cut Pro X has proven efficient as an advanced tool for professionals who want to deliver their best. It has more intricate features which provide more detailed effects and manipulations in simple click and drag patterns.
So if you are looking for software to handle bulk editing projects, Final Cut Pro X is the best option for you, as against the latter. Even though it costs a whopping $199 for the Pro Bundle option, it is well worth it.
Final Cut Pro X in every ramification is more suitable to Pro users because their designers focused on making it ideal for complex projects, which is why many professional editors prefer it. But the highly flexible and fluid user interface of LumaFusion has recently endeared it to many.
Quite evidently, either of them serves the same purpose and at a very proficient level, but your choice strictly depends on what you want to use them for. So first, consider that factor before setting out to buy any of them.

Shanoon Cox
Shanoon Cox is a writer and a lover of all things video.
Follow @Shanoon Cox
Shanoon Cox
Oct 26, 2023• Proven solutions
Deciding which option to go for when you have two high-performance video editing software like LumaFusion and Final Cut Pro X can be a tough choice to make.
LumaFusion was originally a hands-on video editing app on iOS, adapted to iPad and iPhone alone. At the same time, Final Cut Pro X was designed to run on Mac.
With the recent compatibility of LumaFusion on the M1 MacBook Air, which surfaced in 2020, there have been recent concerns from expert users that very soon, these iOS Pro editing giants may lock horns in no time; if the latter sees more advanced upgrades.
This article will be giving you a concise yet comprehensive comparison of this editing software, what features to expect, and professional advice to help you choose which one suits your editing needs. Stick with me as I take you on this brief journey into the creative world of LumaFusion and Final Cut Pro X.
Pros and Cons of Final Cut Pro X and LumaFusion
| Pros of LumaFusion | Pros of Final Cut Pro X |
|---|---|
| Portable. You can access all features on the phone | Allows constant autosave |
| Runs on the , which is twice as fast as the . | Integrates well with studio products |
| straightforward interface; easy to navigate | Professional and rich Interface and layout |
| Allows to trim out unused media before export. | Comes with custom transitions |
| Enhance stability and performance | Sync well with other Apple products |
| Quick response while looking for Storyblocks | Perfect for Hi-tech video manipulation |
| Cons of LumaFusion | Cons of Final Cut Pro X |
| Difficult with large projects and multi-task | Relatively expensive |
| Advanced features like motion tracking and missing | Advanced tools are unfriendly for beginners |
| Advantages like touch control are limited in Mac | Exclusively on Mac |
Since LumaFusion is less complex because of its user interface flexibility, most users who do not see a need for advanced video manipulation features tend to use it. All you need to do is drag and drop, and in a few minutes, you will be through with your editing process.
However, since Final Cut Pro X adopts highly advanced features and effects, it is best for Pro users who want to edit projects which need major manipulation and complex editing. We still have to keep our fingers crossed for subsequent LumaFusion upgrades since it recently welcomed compatibility on Mac.
But in the meantime, if you need an editing process with all the professional features and high manipulation toolsets, then Final Cut Pro X is the best option for you.
Price comparison between Final Cut Pro X Vs LumaFusion
Final Cut Pro X Price
Final Cut Pro X comes with a free 90-day trial option on the recent version, and of course, it is only available exclusively on Mac App Store.
Within the trial period, you would not have access to the 1000+ royalty-free sound effects in the premium version. Still, you can use other unique features for editing, like color correction, adding effects, organizing, editing, and importing and exporting files in different formats.

During the 90-free trial, you can purchase your Final Cut Pro X, which comes with the Logic Pro built-in for $299, or try the Pro Apps Bundle for Education which has the Final Cut Pro X, Logic Pro, Compressor, MainStage, and Motion pre-installed for just $199, which gives you a direct and automatic update on purchase. Final Cut Pro comes with a 6 years license span.
LumaFusion Price
Compared to other video editing apps in the same category as LumaFision, it has a very flexible pricing system. And since users prefer something with creativity and have a simple interface, it is evident while many new users choose to enjoy the fluid system it portends.
For a fantastic software like this, offering multiple editing with professional and highly detailed effects, audio, and color, a one-off payment as low as $29.99 is just so perfect.

Though it comes with no trial policy, recent updates and fixes show that LumaFusion can generally be a dominating app in the editing world.
Plus, you can always try Filmora for free, it’s popular among beginners and professionals!
Final Cut Pro X Vs LumaFusion: Interface
Final Cut Pro X
Many features endeared Final Cut Pro versions to expert users, but more precise advance features like trackless Magnetic Timeline view and great tools for splitting and trimming videos made it more impressive. You can edit, split or trim your videos with a few clicks of your mouse and easily undo any move if you prefer to leave previous options.

Final Cut Pro X comes with a highly efficient tool known as the Compound Clips. This feature helps you group your clips, effects, and audio in a single space, so they become a perfectly synchronized piece.
Also, it comes with the Roles feature, which helps explain a particular clip, ranging from videos to titles, dialog, effect, etc. It is a great organizing tool, which enables you to identify what kind of track you are playing.
LumaFusion
LumaFusion is well-known for its portability and easy-to-use interface, which is why I recommend it for beginners. However, LumaFusion is in many ways like a professional video editing tool, with editing interface features like preview monitor, search panel, source clip which helps you identify your timeline edit on the fascinating multitrack timeline.

Though many users prefer it to other mobile-based editing apps, others think it is best to introduce it fully on the Mac version because the buttons look a lot more complex for an App. Also, stating that the use of the preview screen is almost irrelevant since it isn’t big due to the mobile display screen.
However, with a simple drag and drop feature, it is easy to fall in love with this tool, as the interface doesn’t look as complex as some make it seem.
Summary for Final Cut Pro X Vs LumaFusion
Is LumaFusion worth it?
It is no story that the LumaFusion Team has tried their best in developing an amazing piece like this. And with the pace at which it is welcoming many advanced features, it could turn out to be one of the most used editing software on iOS. Sadly, you cannot run LumaFusion on Android or Windows now, but hopefully, subsequent upgrades and adjustments could introduce other device and OS compatibility.
Ultimately, if you are looking for a low-budget app to work on a minor project with less stress and more productivity, then LumaFusion is the best option for you. You will most likely cut down the stress of carrying a larger screen and clicking on your mouse at intervals by 70%.
Also, with a one-time payment of just $29, you can just save your two days lunch money to enjoy your editing process forever! I’m just saying that you don’t have to break a bank to get one.
However, if you are looking for a software or editing tool to handle a huge project with advanced effects, this option isn’t just what you should try out.
Why should you try Final Cut Pro X?
High definition editing options, professional audio effects, and at least 1300 royalty-free sound effects are some reasons Pro editors will always run to Final Cut. Though all software has setbacks, Final Cut Pro X has proven efficient as an advanced tool for professionals who want to deliver their best. It has more intricate features which provide more detailed effects and manipulations in simple click and drag patterns.
So if you are looking for software to handle bulk editing projects, Final Cut Pro X is the best option for you, as against the latter. Even though it costs a whopping $199 for the Pro Bundle option, it is well worth it.
Final Cut Pro X in every ramification is more suitable to Pro users because their designers focused on making it ideal for complex projects, which is why many professional editors prefer it. But the highly flexible and fluid user interface of LumaFusion has recently endeared it to many.
Quite evidently, either of them serves the same purpose and at a very proficient level, but your choice strictly depends on what you want to use them for. So first, consider that factor before setting out to buy any of them.

Shanoon Cox
Shanoon Cox is a writer and a lover of all things video.
Follow @Shanoon Cox
Mobile Video Editing Made Easy: Best Free Special Effects Apps
FREE Best Video Special Effects Apps

Ollie Mattison
Mar 27, 2024• Proven solutions
For Win 7 or later (64-bit)
 Secure Download
For macOS 10.14 or later
 Secure Download
Click here to get Filmora for PC by email
or Try Filmora App for mobile >>>
download filmora app for ios ](https://app.adjust.com/b0k9hf2%5F4bsu85t ) download filmora app for android ](https://app.adjust.com/b0k9hf2%5F4bsu85t )
Every movie clip that you see on a big or small screen has been decorated using a professional video special effects app. Since special effects are added to the footages to make them look more lively and happening, it is important that only highly skilled professionals should do the job.
However, because of the advanced technologies and the robust applications that the developers are coming up with these days, no special training is required to seamlessly add special effects to the videos , and even a novice user can produce professional-level outputs on their smartphone with the help of all the options and features that these latest software programs offer.
With that said, here you will get to know about some of the best iOS and Android programs that you can use to add special effects to your videos. In addition to this, you will also learn about another most admired and widely used movie effects app that is equipped with plethora of templates that you can apply to your clips to make them look more professional.
- Part 1: Best Free Video Special Effects Apps [iOS & Android Devices]
- Part 2: 6 Best VFX Apps for iOS
- Part 3: 4 Best Video Special Effects Apps for Android
- Part 4: Add Video Effects on Desktop [Bonus]
Part 1: Best Video Special Effects Apps for Both iPhone and Android: FxGuru
We’ve find FxGuru: Movie FX Director is a special effect app which is available on both iPhone, iPad and Android devices, this video special effects app for Android and iOS has almost everything you may need in order to give your recorded videos a professional touch. From ghosts to werewolves, UFOs to dragons, and even tornadoes, earthquakes, and meteors, FxGuru has every special effect under one umbrella.
Simply put, with this app on your phone, you only have to use the device’s camera to capture video footage, and then sail away with your imagination to produce industry-standard clips for commercial promotions and/or for fun.

Click to get the Android version of this special effect app from the App Store or Google Play.
Part 2: Best VFX Video Effects Editor Apps for iPhone & iPad
If you are a proud owner of an iOS device, the following iPhone and iPad video special effects apps are something you would definitely love to try:
1. Enlight Videoleap Video Editor
With built-in video editor and easy-to-use interface, this iPhone special effects app could be the program you have been looking for all along. The software allows keyframe-based animations , chroma compositing, practically limitless redo and undo iterations, and even non-destructive video editing to make your post-production tasks simple and fun.
With all these features and options, and several more to explore, Enlight Vdeoleap Video Editor leaves no stone unturned to help you produce industry-standard outputs right on your iDevice.

Click to get this app on App Store >>
2. Action Movie FX
With around 4.5-star rating on Apple App Store, this movie effects app called Action Movie FX has several Hollywood-style effects templates that let you give more dramatic look to the videos you record from your iDevice. Since the program is a mobile app, you can apply all the VFX right on your iPhone or iPad without transferring the footages to a computer for post-production treatments.
All the built-in effects that Action Movie FX is enriched with such as ALIEN BURST, CAR SMASH, BB-8 Spark, etc. have been designed by some of the most famous artists with ample amount of experience in the field of film production.
Click to get this app on App Store >>
3. Movie FX Maker
This video special effects app is helpful to apply FX on the images to use them as stickers. Although the program is free to use, the in-app purchases give you access to more advanced movie stickers that would allow you to bring life to the still images without having you to transfer them to your PC and/or using an expensive and complex apps like Photoshop.
All you need to do in order to apply special FX to the images is, capture photos on your iDevice, and add the effects Movie FX Maker has. Post modifications, the images can be shared on your favorite social networking site instantaneously.

4. Effects Cam – Visual Effects
Yet another video special effects app, Effects Cam allows you to add special effects like fire, blasts, explosions, etc. to your images in order to make them look live. The images can be captured right from your device’s camera, or imported from other sources like your PC, phone’s memory, etc. Once imported, you can pick any of the available special FX from the app’s library, and apply it to the photo(s).

Click to get this app on App Store >>
5. Videorama Text & Video Editor
Videorama Text & Video Editor is an iPhone video special effects app that lets you do various tasks such as trim videos, split them, remove unwanted segments, etc. In addition to this, the tool is also capable of adding and animating texts that can be used as captions for the images or motion clips for information.
Apart from the above, adding special video and sound effects is another lucrative feature that Videorama has because of which the app is most admired and used by majority of people across the globe.
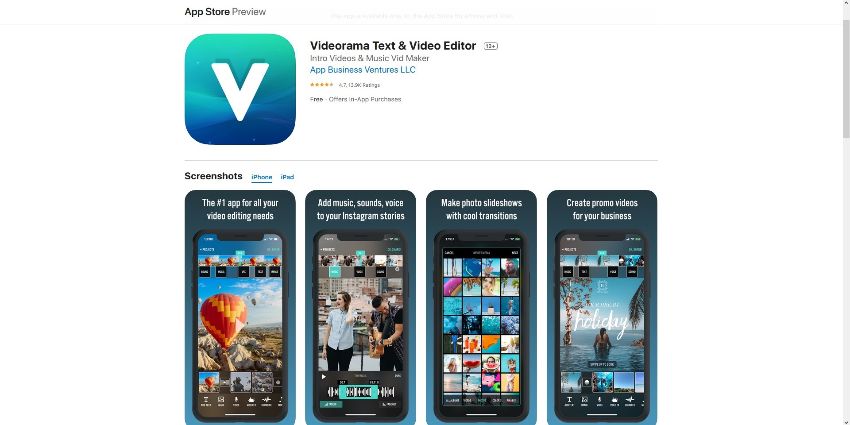
Click to get this app on App Store >>
6. LumaFX
Although LumaFX is a paid video special effects app for iOS devices, it is worth investing. The software has many features that are mostly found in professional post-production tools. These features include color correction, slow motion effect, frame-by-frame animation using the keyframes, and much more.
In addition to all the above, LumaFX also allows you to add audio effects, thus making the videos more interesting and informative that could be broadcasted for commercial gains or shared among your known ones for fun.
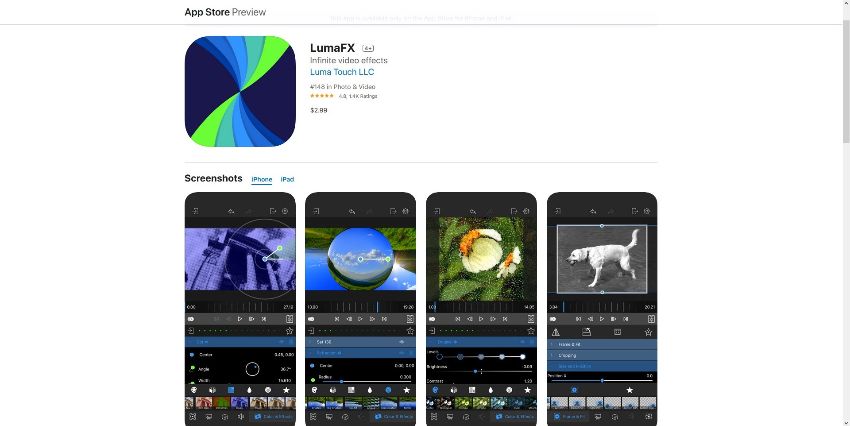
Watch Video! Best Free Video Special Effects Apps on Apple Store
Part 2: Best VFX Video Effects Editor Apps for Android
If you are an Android lover and prefer using non-Apple devices, you have plenty of options when it comes to selecting the best movie effects app that could enable you to apply special effects to the videos your smart device has or captures using its camera.
In case you are looking for an efficient video special effects app for Android, those listed below are worth your attention:
1. Movie Booth FX Free
While using Movie Booth FX Free , all you need to do is, record a footage from your camera, and add special effects to it. The three main categories that this video special effects app ships along with include Action, Sci-Fi, and Horror. Depending on the type of footage you captured, and the kind of output you want to have, you can pick any of these categories, and apply your favorite effect that is available within it.

Although the program is free to install, various other options and features can be unlocked by paying for them with in-app purchases.
2. MovieRide FX
This video special effects app for Android has several templates that allow you to apply various VFX to the footages you record using your Android device. With the effects like Space Wars, Space Walk, Thunder Bolt, Storms, etc., you can virtually live in the movies, and act like a character. Although some of the effects that MovieRide FX has are paid, you definitely won’t regret buying them considering the precision and ease at which you can decorate your clips.
3. Movie Effects Maker

Movie Effects Maker, as the name suggests, allows you to add special effects to the images you click with your smartphone. With all the VFX options this movie effects app has, you can be virtually anyone you want. For instance, with the sci-fi and horror elements, you can create stickers out of your photos portraying yourself as a hero, add animated effects to your images to make them look live, and much more.
4. Extreme VFX
With this video special effects app, all you need to do is, record a footage using your Android smart device, and begin applying special effects to them until you are satisfied with the results. Since the app allows you to add multiple VFX to the clips, nothing seems impossible when it comes to decorating the videos, and making them more engaging and entertaining, especially with you playing as the main character.
Get this special video effect app from Google Play>>
Watch Video! Best VFX Video Effects Editor Apps for Android
Part 4: How to Add Special Effects to Videos in Filmora?
Although all the apps listed above are good, when it comes to creating movies with special effects for commercial usage and public broadcasting, nothing can beat the efficiency and robustness of a movie effects app that has been designed to run on desktop computers.
Even though there are many post-production professional applications by different vendors, Wondershare Filmora has the simplest UI, and follows the most straightforward approach that allows even the novice users to add VFX to their videos.
For Win 7 or later (64-bit)
 Secure Download
For macOS 10.14 or later
 Secure Download
Click here to get Filmora for PC by email
or Try Filmora App for mobile >>>
download filmora app for ios ](https://app.adjust.com/b0k9hf2%5F4bsu85t ) download filmora app for android ](https://app.adjust.com/b0k9hf2%5F4bsu85t )
The steps given below explain how to add special effects to your recorded footages with Wondershare Filmora:
1. Import Video and Add to Timeline
Launch Wondershare Filmora, click anywhere inside the Media Bin at the upper-left section, use the Open box to import the video you want to add VFX to, hover mouse to the thumbnail of the clip, click the + icon from the middle, and click MATCH TO MEDIA from the Project Setting box when/if it appears.
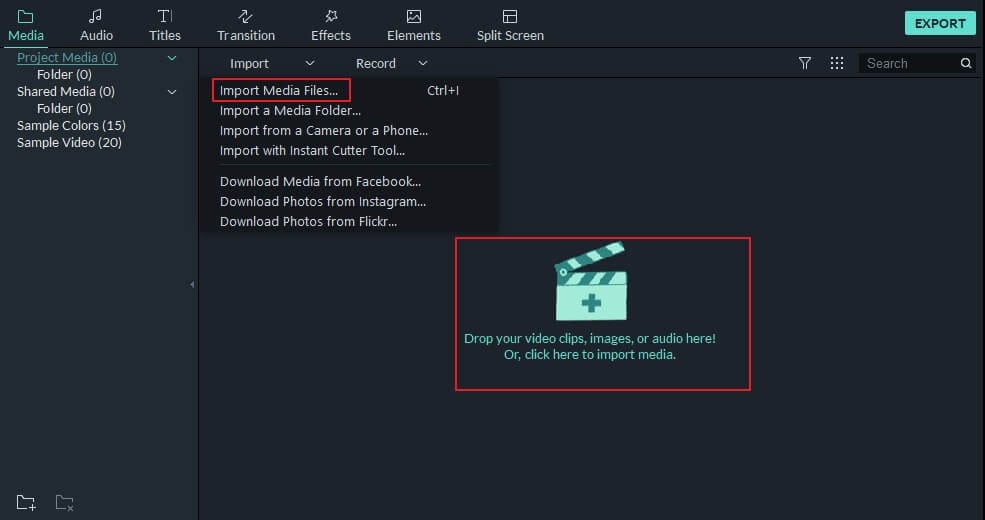
2. Add Effects and Elements
Place the Playhead (Skimmer) in the Timeline you want to apply effects from, click Effects from the standard toolbar at the top, select your preferred category from the left pane, hover mouse to the effect you want to add in the right window, and click the + icon from the center.
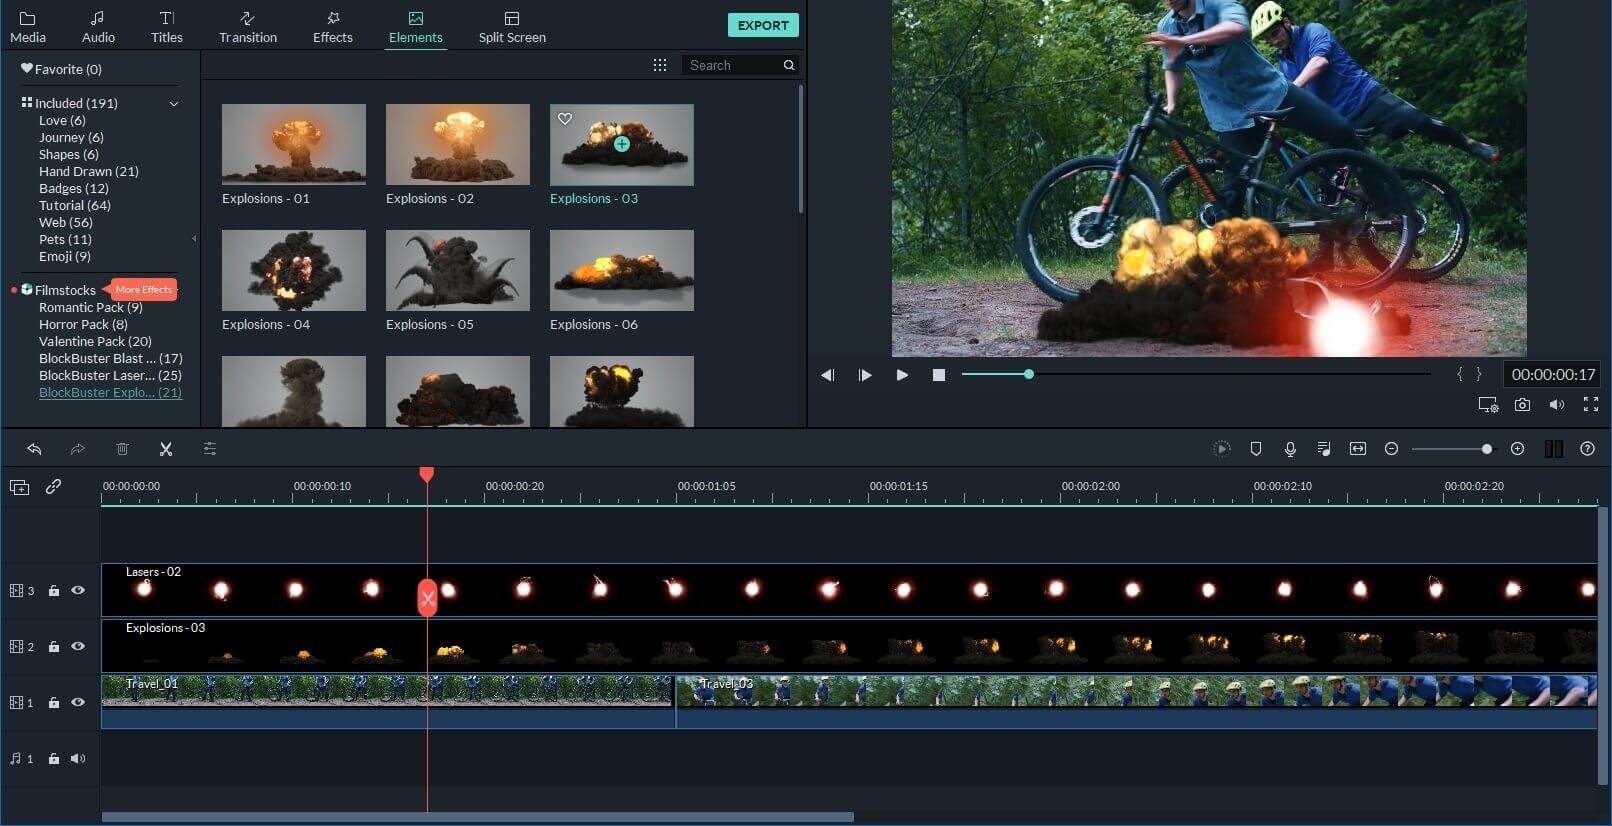
Optionally you can drag the effect in the Timeline to manage its duration. Next, go to Elements from the top, and repeat the process to add your preferred element to the footage.
Besides the included effects and elements in Filmora, you can find our more video effects on Filmstock effects store, including blockbuster, effects for holidays and vacations. Click to check the free video effects that you can get for free in Filmstock for Filmora.
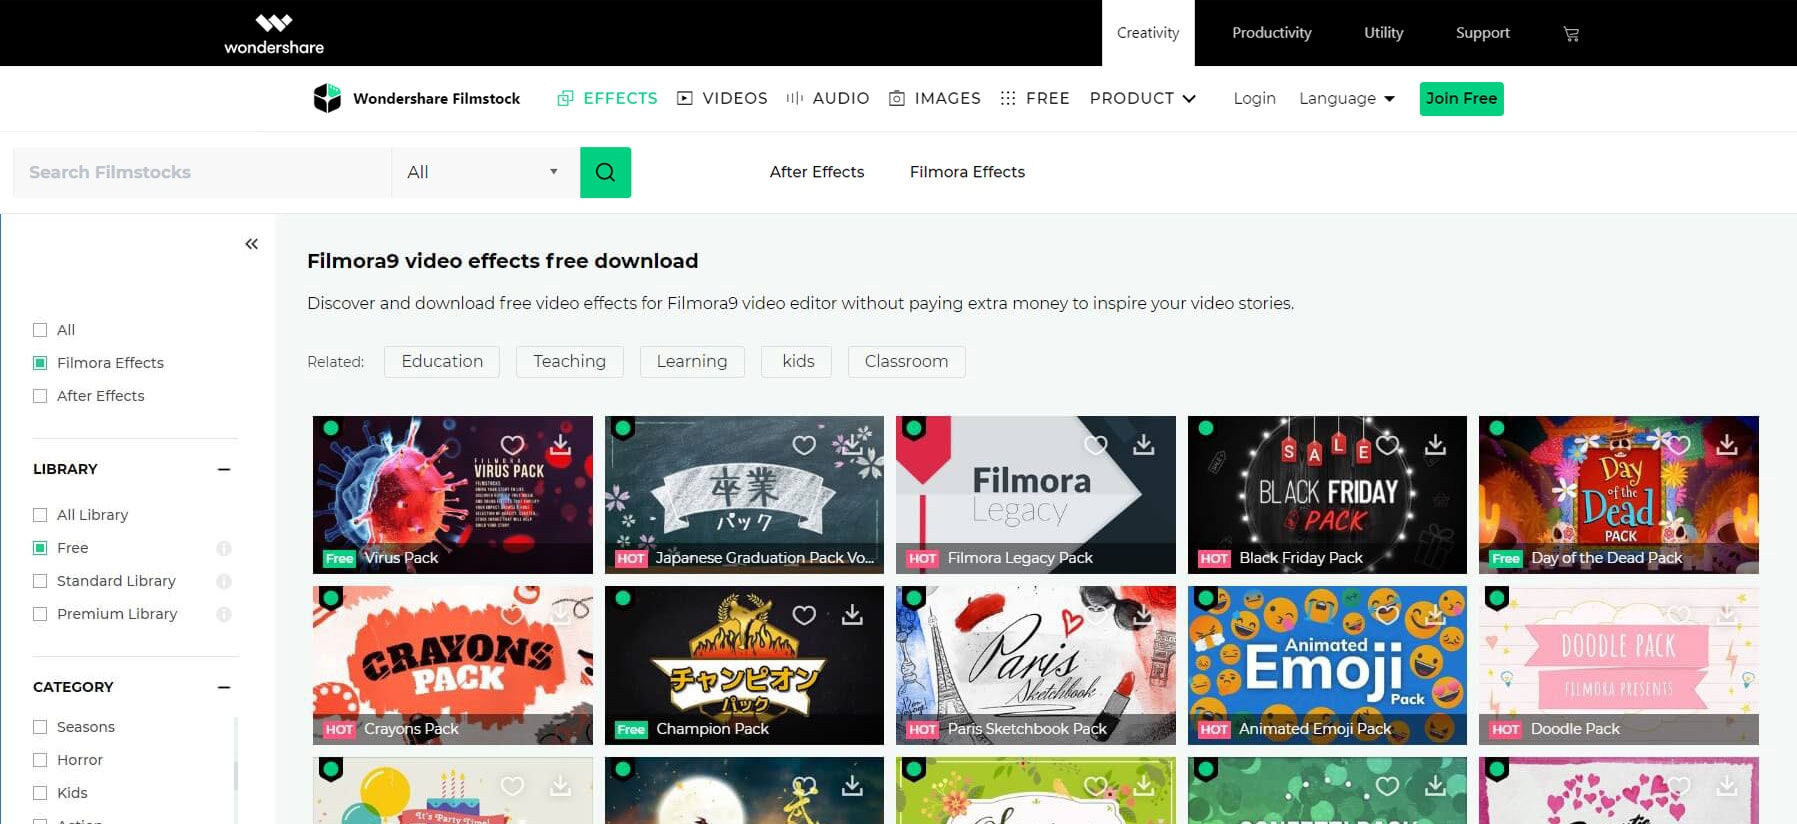
3. Export the Output
Click EXPORT from the top-center section, go to the Local tab from the top of the Export box that opens up next, choose your preferred extension from the Format list in the left pane, select a destination location in the Save to field in the right window, click SETTINGS and make necessary adjustments (optional), and click EXPORT from the bottom-right corner of the box to begin rendering and to produce the video with the special effects applied to it.

Conclusion
With all the programs listed above, selecting the best video special effects app could be a challenging task. Thanks to Wondershare Filmora that not only enables you to add effects and elements to the videos, it is also fast, lightweight, and offers simple and easy-to-use interface that can be exploited to create professional-level outputs in comparatively less time.
For Win 7 or later (64-bit)
 Secure Download
For macOS 10.14 or later
 Secure Download
Click here to get Filmora for PC by email
or Try Filmora App for mobile >>>
download filmora app for ios ](https://app.adjust.com/b0k9hf2%5F4bsu85t ) download filmora app for android ](https://app.adjust.com/b0k9hf2%5F4bsu85t )

Ollie Mattison
Ollie Mattison is a writer and a lover of all things video.
Follow @Ollie Mattison
Ollie Mattison
Mar 27, 2024• Proven solutions
For Win 7 or later (64-bit)
 Secure Download
For macOS 10.14 or later
 Secure Download
Click here to get Filmora for PC by email
or Try Filmora App for mobile >>>
download filmora app for ios ](https://app.adjust.com/b0k9hf2%5F4bsu85t ) download filmora app for android ](https://app.adjust.com/b0k9hf2%5F4bsu85t )
Every movie clip that you see on a big or small screen has been decorated using a professional video special effects app. Since special effects are added to the footages to make them look more lively and happening, it is important that only highly skilled professionals should do the job.
However, because of the advanced technologies and the robust applications that the developers are coming up with these days, no special training is required to seamlessly add special effects to the videos , and even a novice user can produce professional-level outputs on their smartphone with the help of all the options and features that these latest software programs offer.
With that said, here you will get to know about some of the best iOS and Android programs that you can use to add special effects to your videos. In addition to this, you will also learn about another most admired and widely used movie effects app that is equipped with plethora of templates that you can apply to your clips to make them look more professional.
- Part 1: Best Free Video Special Effects Apps [iOS & Android Devices]
- Part 2: 6 Best VFX Apps for iOS
- Part 3: 4 Best Video Special Effects Apps for Android
- Part 4: Add Video Effects on Desktop [Bonus]
Part 1: Best Video Special Effects Apps for Both iPhone and Android: FxGuru
We’ve find FxGuru: Movie FX Director is a special effect app which is available on both iPhone, iPad and Android devices, this video special effects app for Android and iOS has almost everything you may need in order to give your recorded videos a professional touch. From ghosts to werewolves, UFOs to dragons, and even tornadoes, earthquakes, and meteors, FxGuru has every special effect under one umbrella.
Simply put, with this app on your phone, you only have to use the device’s camera to capture video footage, and then sail away with your imagination to produce industry-standard clips for commercial promotions and/or for fun.

Click to get the Android version of this special effect app from the App Store or Google Play.
Part 2: Best VFX Video Effects Editor Apps for iPhone & iPad
If you are a proud owner of an iOS device, the following iPhone and iPad video special effects apps are something you would definitely love to try:
1. Enlight Videoleap Video Editor
With built-in video editor and easy-to-use interface, this iPhone special effects app could be the program you have been looking for all along. The software allows keyframe-based animations , chroma compositing, practically limitless redo and undo iterations, and even non-destructive video editing to make your post-production tasks simple and fun.
With all these features and options, and several more to explore, Enlight Vdeoleap Video Editor leaves no stone unturned to help you produce industry-standard outputs right on your iDevice.

Click to get this app on App Store >>
2. Action Movie FX
With around 4.5-star rating on Apple App Store, this movie effects app called Action Movie FX has several Hollywood-style effects templates that let you give more dramatic look to the videos you record from your iDevice. Since the program is a mobile app, you can apply all the VFX right on your iPhone or iPad without transferring the footages to a computer for post-production treatments.
All the built-in effects that Action Movie FX is enriched with such as ALIEN BURST, CAR SMASH, BB-8 Spark, etc. have been designed by some of the most famous artists with ample amount of experience in the field of film production.
Click to get this app on App Store >>
3. Movie FX Maker
This video special effects app is helpful to apply FX on the images to use them as stickers. Although the program is free to use, the in-app purchases give you access to more advanced movie stickers that would allow you to bring life to the still images without having you to transfer them to your PC and/or using an expensive and complex apps like Photoshop.
All you need to do in order to apply special FX to the images is, capture photos on your iDevice, and add the effects Movie FX Maker has. Post modifications, the images can be shared on your favorite social networking site instantaneously.

4. Effects Cam – Visual Effects
Yet another video special effects app, Effects Cam allows you to add special effects like fire, blasts, explosions, etc. to your images in order to make them look live. The images can be captured right from your device’s camera, or imported from other sources like your PC, phone’s memory, etc. Once imported, you can pick any of the available special FX from the app’s library, and apply it to the photo(s).

Click to get this app on App Store >>
5. Videorama Text & Video Editor
Videorama Text & Video Editor is an iPhone video special effects app that lets you do various tasks such as trim videos, split them, remove unwanted segments, etc. In addition to this, the tool is also capable of adding and animating texts that can be used as captions for the images or motion clips for information.
Apart from the above, adding special video and sound effects is another lucrative feature that Videorama has because of which the app is most admired and used by majority of people across the globe.

Click to get this app on App Store >>
6. LumaFX
Although LumaFX is a paid video special effects app for iOS devices, it is worth investing. The software has many features that are mostly found in professional post-production tools. These features include color correction, slow motion effect, frame-by-frame animation using the keyframes, and much more.
In addition to all the above, LumaFX also allows you to add audio effects, thus making the videos more interesting and informative that could be broadcasted for commercial gains or shared among your known ones for fun.

Watch Video! Best Free Video Special Effects Apps on Apple Store
Part 2: Best VFX Video Effects Editor Apps for Android
If you are an Android lover and prefer using non-Apple devices, you have plenty of options when it comes to selecting the best movie effects app that could enable you to apply special effects to the videos your smart device has or captures using its camera.
In case you are looking for an efficient video special effects app for Android, those listed below are worth your attention:
1. Movie Booth FX Free
While using Movie Booth FX Free , all you need to do is, record a footage from your camera, and add special effects to it. The three main categories that this video special effects app ships along with include Action, Sci-Fi, and Horror. Depending on the type of footage you captured, and the kind of output you want to have, you can pick any of these categories, and apply your favorite effect that is available within it.

Although the program is free to install, various other options and features can be unlocked by paying for them with in-app purchases.
2. MovieRide FX
This video special effects app for Android has several templates that allow you to apply various VFX to the footages you record using your Android device. With the effects like Space Wars, Space Walk, Thunder Bolt, Storms, etc., you can virtually live in the movies, and act like a character. Although some of the effects that MovieRide FX has are paid, you definitely won’t regret buying them considering the precision and ease at which you can decorate your clips.

3. Movie Effects Maker

Movie Effects Maker, as the name suggests, allows you to add special effects to the images you click with your smartphone. With all the VFX options this movie effects app has, you can be virtually anyone you want. For instance, with the sci-fi and horror elements, you can create stickers out of your photos portraying yourself as a hero, add animated effects to your images to make them look live, and much more.
4. Extreme VFX

With this video special effects app, all you need to do is, record a footage using your Android smart device, and begin applying special effects to them until you are satisfied with the results. Since the app allows you to add multiple VFX to the clips, nothing seems impossible when it comes to decorating the videos, and making them more engaging and entertaining, especially with you playing as the main character.
Get this special video effect app from Google Play>>
Watch Video! Best VFX Video Effects Editor Apps for Android
Part 4: How to Add Special Effects to Videos in Filmora?
Although all the apps listed above are good, when it comes to creating movies with special effects for commercial usage and public broadcasting, nothing can beat the efficiency and robustness of a movie effects app that has been designed to run on desktop computers.
Even though there are many post-production professional applications by different vendors, Wondershare Filmora has the simplest UI, and follows the most straightforward approach that allows even the novice users to add VFX to their videos.
For Win 7 or later (64-bit)
 Secure Download
For macOS 10.14 or later
 Secure Download
Click here to get Filmora for PC by email
or Try Filmora App for mobile >>>
download filmora app for ios ](https://app.adjust.com/b0k9hf2%5F4bsu85t ) download filmora app for android ](https://app.adjust.com/b0k9hf2%5F4bsu85t )
The steps given below explain how to add special effects to your recorded footages with Wondershare Filmora:
1. Import Video and Add to Timeline
Launch Wondershare Filmora, click anywhere inside the Media Bin at the upper-left section, use the Open box to import the video you want to add VFX to, hover mouse to the thumbnail of the clip, click the + icon from the middle, and click MATCH TO MEDIA from the Project Setting box when/if it appears.

2. Add Effects and Elements
Place the Playhead (Skimmer) in the Timeline you want to apply effects from, click Effects from the standard toolbar at the top, select your preferred category from the left pane, hover mouse to the effect you want to add in the right window, and click the + icon from the center.

Optionally you can drag the effect in the Timeline to manage its duration. Next, go to Elements from the top, and repeat the process to add your preferred element to the footage.
Besides the included effects and elements in Filmora, you can find our more video effects on Filmstock effects store, including blockbuster, effects for holidays and vacations. Click to check the free video effects that you can get for free in Filmstock for Filmora.

3. Export the Output
Click EXPORT from the top-center section, go to the Local tab from the top of the Export box that opens up next, choose your preferred extension from the Format list in the left pane, select a destination location in the Save to field in the right window, click SETTINGS and make necessary adjustments (optional), and click EXPORT from the bottom-right corner of the box to begin rendering and to produce the video with the special effects applied to it.

Conclusion
With all the programs listed above, selecting the best video special effects app could be a challenging task. Thanks to Wondershare Filmora that not only enables you to add effects and elements to the videos, it is also fast, lightweight, and offers simple and easy-to-use interface that can be exploited to create professional-level outputs in comparatively less time.
For Win 7 or later (64-bit)
 Secure Download
For macOS 10.14 or later
 Secure Download
Click here to get Filmora for PC by email
or Try Filmora App for mobile >>>
download filmora app for ios ](https://app.adjust.com/b0k9hf2%5F4bsu85t ) download filmora app for android ](https://app.adjust.com/b0k9hf2%5F4bsu85t )

Ollie Mattison
Ollie Mattison is a writer and a lover of all things video.
Follow @Ollie Mattison
Ollie Mattison
Mar 27, 2024• Proven solutions
For Win 7 or later (64-bit)
 Secure Download
For macOS 10.14 or later
 Secure Download
Click here to get Filmora for PC by email
or Try Filmora App for mobile >>>
download filmora app for ios ](https://app.adjust.com/b0k9hf2%5F4bsu85t ) download filmora app for android ](https://app.adjust.com/b0k9hf2%5F4bsu85t )
Every movie clip that you see on a big or small screen has been decorated using a professional video special effects app. Since special effects are added to the footages to make them look more lively and happening, it is important that only highly skilled professionals should do the job.
However, because of the advanced technologies and the robust applications that the developers are coming up with these days, no special training is required to seamlessly add special effects to the videos , and even a novice user can produce professional-level outputs on their smartphone with the help of all the options and features that these latest software programs offer.
With that said, here you will get to know about some of the best iOS and Android programs that you can use to add special effects to your videos. In addition to this, you will also learn about another most admired and widely used movie effects app that is equipped with plethora of templates that you can apply to your clips to make them look more professional.
- Part 1: Best Free Video Special Effects Apps [iOS & Android Devices]
- Part 2: 6 Best VFX Apps for iOS
- Part 3: 4 Best Video Special Effects Apps for Android
- Part 4: Add Video Effects on Desktop [Bonus]
Part 1: Best Video Special Effects Apps for Both iPhone and Android: FxGuru
We’ve find FxGuru: Movie FX Director is a special effect app which is available on both iPhone, iPad and Android devices, this video special effects app for Android and iOS has almost everything you may need in order to give your recorded videos a professional touch. From ghosts to werewolves, UFOs to dragons, and even tornadoes, earthquakes, and meteors, FxGuru has every special effect under one umbrella.
Simply put, with this app on your phone, you only have to use the device’s camera to capture video footage, and then sail away with your imagination to produce industry-standard clips for commercial promotions and/or for fun.

Click to get the Android version of this special effect app from the App Store or Google Play.
Part 2: Best VFX Video Effects Editor Apps for iPhone & iPad
If you are a proud owner of an iOS device, the following iPhone and iPad video special effects apps are something you would definitely love to try:
1. Enlight Videoleap Video Editor
With built-in video editor and easy-to-use interface, this iPhone special effects app could be the program you have been looking for all along. The software allows keyframe-based animations , chroma compositing, practically limitless redo and undo iterations, and even non-destructive video editing to make your post-production tasks simple and fun.
With all these features and options, and several more to explore, Enlight Vdeoleap Video Editor leaves no stone unturned to help you produce industry-standard outputs right on your iDevice.

Click to get this app on App Store >>
2. Action Movie FX
With around 4.5-star rating on Apple App Store, this movie effects app called Action Movie FX has several Hollywood-style effects templates that let you give more dramatic look to the videos you record from your iDevice. Since the program is a mobile app, you can apply all the VFX right on your iPhone or iPad without transferring the footages to a computer for post-production treatments.
All the built-in effects that Action Movie FX is enriched with such as ALIEN BURST, CAR SMASH, BB-8 Spark, etc. have been designed by some of the most famous artists with ample amount of experience in the field of film production.
Click to get this app on App Store >>
3. Movie FX Maker
This video special effects app is helpful to apply FX on the images to use them as stickers. Although the program is free to use, the in-app purchases give you access to more advanced movie stickers that would allow you to bring life to the still images without having you to transfer them to your PC and/or using an expensive and complex apps like Photoshop.
All you need to do in order to apply special FX to the images is, capture photos on your iDevice, and add the effects Movie FX Maker has. Post modifications, the images can be shared on your favorite social networking site instantaneously.

4. Effects Cam – Visual Effects
Yet another video special effects app, Effects Cam allows you to add special effects like fire, blasts, explosions, etc. to your images in order to make them look live. The images can be captured right from your device’s camera, or imported from other sources like your PC, phone’s memory, etc. Once imported, you can pick any of the available special FX from the app’s library, and apply it to the photo(s).

Click to get this app on App Store >>
5. Videorama Text & Video Editor
Videorama Text & Video Editor is an iPhone video special effects app that lets you do various tasks such as trim videos, split them, remove unwanted segments, etc. In addition to this, the tool is also capable of adding and animating texts that can be used as captions for the images or motion clips for information.
Apart from the above, adding special video and sound effects is another lucrative feature that Videorama has because of which the app is most admired and used by majority of people across the globe.

Click to get this app on App Store >>
6. LumaFX
Although LumaFX is a paid video special effects app for iOS devices, it is worth investing. The software has many features that are mostly found in professional post-production tools. These features include color correction, slow motion effect, frame-by-frame animation using the keyframes, and much more.
In addition to all the above, LumaFX also allows you to add audio effects, thus making the videos more interesting and informative that could be broadcasted for commercial gains or shared among your known ones for fun.

Watch Video! Best Free Video Special Effects Apps on Apple Store
Part 2: Best VFX Video Effects Editor Apps for Android
If you are an Android lover and prefer using non-Apple devices, you have plenty of options when it comes to selecting the best movie effects app that could enable you to apply special effects to the videos your smart device has or captures using its camera.
In case you are looking for an efficient video special effects app for Android, those listed below are worth your attention:
1. Movie Booth FX Free
While using Movie Booth FX Free , all you need to do is, record a footage from your camera, and add special effects to it. The three main categories that this video special effects app ships along with include Action, Sci-Fi, and Horror. Depending on the type of footage you captured, and the kind of output you want to have, you can pick any of these categories, and apply your favorite effect that is available within it.

Although the program is free to install, various other options and features can be unlocked by paying for them with in-app purchases.
2. MovieRide FX
This video special effects app for Android has several templates that allow you to apply various VFX to the footages you record using your Android device. With the effects like Space Wars, Space Walk, Thunder Bolt, Storms, etc., you can virtually live in the movies, and act like a character. Although some of the effects that MovieRide FX has are paid, you definitely won’t regret buying them considering the precision and ease at which you can decorate your clips.

3. Movie Effects Maker

Movie Effects Maker, as the name suggests, allows you to add special effects to the images you click with your smartphone. With all the VFX options this movie effects app has, you can be virtually anyone you want. For instance, with the sci-fi and horror elements, you can create stickers out of your photos portraying yourself as a hero, add animated effects to your images to make them look live, and much more.
4. Extreme VFX

With this video special effects app, all you need to do is, record a footage using your Android smart device, and begin applying special effects to them until you are satisfied with the results. Since the app allows you to add multiple VFX to the clips, nothing seems impossible when it comes to decorating the videos, and making them more engaging and entertaining, especially with you playing as the main character.
Get this special video effect app from Google Play>>
Watch Video! Best VFX Video Effects Editor Apps for Android
Part 4: How to Add Special Effects to Videos in Filmora?
Although all the apps listed above are good, when it comes to creating movies with special effects for commercial usage and public broadcasting, nothing can beat the efficiency and robustness of a movie effects app that has been designed to run on desktop computers.
Even though there are many post-production professional applications by different vendors, Wondershare Filmora has the simplest UI, and follows the most straightforward approach that allows even the novice users to add VFX to their videos.
For Win 7 or later (64-bit)
 Secure Download
For macOS 10.14 or later
 Secure Download
Click here to get Filmora for PC by email
or Try Filmora App for mobile >>>
download filmora app for ios ](https://app.adjust.com/b0k9hf2%5F4bsu85t ) download filmora app for android ](https://app.adjust.com/b0k9hf2%5F4bsu85t )
The steps given below explain how to add special effects to your recorded footages with Wondershare Filmora:
1. Import Video and Add to Timeline
Launch Wondershare Filmora, click anywhere inside the Media Bin at the upper-left section, use the Open box to import the video you want to add VFX to, hover mouse to the thumbnail of the clip, click the + icon from the middle, and click MATCH TO MEDIA from the Project Setting box when/if it appears.

2. Add Effects and Elements
Place the Playhead (Skimmer) in the Timeline you want to apply effects from, click Effects from the standard toolbar at the top, select your preferred category from the left pane, hover mouse to the effect you want to add in the right window, and click the + icon from the center.

Optionally you can drag the effect in the Timeline to manage its duration. Next, go to Elements from the top, and repeat the process to add your preferred element to the footage.
Besides the included effects and elements in Filmora, you can find our more video effects on Filmstock effects store, including blockbuster, effects for holidays and vacations. Click to check the free video effects that you can get for free in Filmstock for Filmora.

3. Export the Output
Click EXPORT from the top-center section, go to the Local tab from the top of the Export box that opens up next, choose your preferred extension from the Format list in the left pane, select a destination location in the Save to field in the right window, click SETTINGS and make necessary adjustments (optional), and click EXPORT from the bottom-right corner of the box to begin rendering and to produce the video with the special effects applied to it.

Conclusion
With all the programs listed above, selecting the best video special effects app could be a challenging task. Thanks to Wondershare Filmora that not only enables you to add effects and elements to the videos, it is also fast, lightweight, and offers simple and easy-to-use interface that can be exploited to create professional-level outputs in comparatively less time.
For Win 7 or later (64-bit)
 Secure Download
For macOS 10.14 or later
 Secure Download
Click here to get Filmora for PC by email
or Try Filmora App for mobile >>>
download filmora app for ios ](https://app.adjust.com/b0k9hf2%5F4bsu85t ) download filmora app for android ](https://app.adjust.com/b0k9hf2%5F4bsu85t )

Ollie Mattison
Ollie Mattison is a writer and a lover of all things video.
Follow @Ollie Mattison
Ollie Mattison
Mar 27, 2024• Proven solutions
For Win 7 or later (64-bit)
 Secure Download
For macOS 10.14 or later
 Secure Download
Click here to get Filmora for PC by email
or Try Filmora App for mobile >>>
download filmora app for ios ](https://app.adjust.com/b0k9hf2%5F4bsu85t ) download filmora app for android ](https://app.adjust.com/b0k9hf2%5F4bsu85t )
Every movie clip that you see on a big or small screen has been decorated using a professional video special effects app. Since special effects are added to the footages to make them look more lively and happening, it is important that only highly skilled professionals should do the job.
However, because of the advanced technologies and the robust applications that the developers are coming up with these days, no special training is required to seamlessly add special effects to the videos , and even a novice user can produce professional-level outputs on their smartphone with the help of all the options and features that these latest software programs offer.
With that said, here you will get to know about some of the best iOS and Android programs that you can use to add special effects to your videos. In addition to this, you will also learn about another most admired and widely used movie effects app that is equipped with plethora of templates that you can apply to your clips to make them look more professional.
- Part 1: Best Free Video Special Effects Apps [iOS & Android Devices]
- Part 2: 6 Best VFX Apps for iOS
- Part 3: 4 Best Video Special Effects Apps for Android
- Part 4: Add Video Effects on Desktop [Bonus]
Part 1: Best Video Special Effects Apps for Both iPhone and Android: FxGuru
We’ve find FxGuru: Movie FX Director is a special effect app which is available on both iPhone, iPad and Android devices, this video special effects app for Android and iOS has almost everything you may need in order to give your recorded videos a professional touch. From ghosts to werewolves, UFOs to dragons, and even tornadoes, earthquakes, and meteors, FxGuru has every special effect under one umbrella.
Simply put, with this app on your phone, you only have to use the device’s camera to capture video footage, and then sail away with your imagination to produce industry-standard clips for commercial promotions and/or for fun.

Click to get the Android version of this special effect app from the App Store or Google Play.
Part 2: Best VFX Video Effects Editor Apps for iPhone & iPad
If you are a proud owner of an iOS device, the following iPhone and iPad video special effects apps are something you would definitely love to try:
1. Enlight Videoleap Video Editor
With built-in video editor and easy-to-use interface, this iPhone special effects app could be the program you have been looking for all along. The software allows keyframe-based animations , chroma compositing, practically limitless redo and undo iterations, and even non-destructive video editing to make your post-production tasks simple and fun.
With all these features and options, and several more to explore, Enlight Vdeoleap Video Editor leaves no stone unturned to help you produce industry-standard outputs right on your iDevice.

Click to get this app on App Store >>
2. Action Movie FX
With around 4.5-star rating on Apple App Store, this movie effects app called Action Movie FX has several Hollywood-style effects templates that let you give more dramatic look to the videos you record from your iDevice. Since the program is a mobile app, you can apply all the VFX right on your iPhone or iPad without transferring the footages to a computer for post-production treatments.
All the built-in effects that Action Movie FX is enriched with such as ALIEN BURST, CAR SMASH, BB-8 Spark, etc. have been designed by some of the most famous artists with ample amount of experience in the field of film production.
Click to get this app on App Store >>
3. Movie FX Maker
This video special effects app is helpful to apply FX on the images to use them as stickers. Although the program is free to use, the in-app purchases give you access to more advanced movie stickers that would allow you to bring life to the still images without having you to transfer them to your PC and/or using an expensive and complex apps like Photoshop.
All you need to do in order to apply special FX to the images is, capture photos on your iDevice, and add the effects Movie FX Maker has. Post modifications, the images can be shared on your favorite social networking site instantaneously.

4. Effects Cam – Visual Effects
Yet another video special effects app, Effects Cam allows you to add special effects like fire, blasts, explosions, etc. to your images in order to make them look live. The images can be captured right from your device’s camera, or imported from other sources like your PC, phone’s memory, etc. Once imported, you can pick any of the available special FX from the app’s library, and apply it to the photo(s).

Click to get this app on App Store >>
5. Videorama Text & Video Editor
Videorama Text & Video Editor is an iPhone video special effects app that lets you do various tasks such as trim videos, split them, remove unwanted segments, etc. In addition to this, the tool is also capable of adding and animating texts that can be used as captions for the images or motion clips for information.
Apart from the above, adding special video and sound effects is another lucrative feature that Videorama has because of which the app is most admired and used by majority of people across the globe.

Click to get this app on App Store >>
6. LumaFX
Although LumaFX is a paid video special effects app for iOS devices, it is worth investing. The software has many features that are mostly found in professional post-production tools. These features include color correction, slow motion effect, frame-by-frame animation using the keyframes, and much more.
In addition to all the above, LumaFX also allows you to add audio effects, thus making the videos more interesting and informative that could be broadcasted for commercial gains or shared among your known ones for fun.

Watch Video! Best Free Video Special Effects Apps on Apple Store
Part 2: Best VFX Video Effects Editor Apps for Android
If you are an Android lover and prefer using non-Apple devices, you have plenty of options when it comes to selecting the best movie effects app that could enable you to apply special effects to the videos your smart device has or captures using its camera.
In case you are looking for an efficient video special effects app for Android, those listed below are worth your attention:
1. Movie Booth FX Free
While using Movie Booth FX Free , all you need to do is, record a footage from your camera, and add special effects to it. The three main categories that this video special effects app ships along with include Action, Sci-Fi, and Horror. Depending on the type of footage you captured, and the kind of output you want to have, you can pick any of these categories, and apply your favorite effect that is available within it.

Although the program is free to install, various other options and features can be unlocked by paying for them with in-app purchases.
2. MovieRide FX
This video special effects app for Android has several templates that allow you to apply various VFX to the footages you record using your Android device. With the effects like Space Wars, Space Walk, Thunder Bolt, Storms, etc., you can virtually live in the movies, and act like a character. Although some of the effects that MovieRide FX has are paid, you definitely won’t regret buying them considering the precision and ease at which you can decorate your clips.

3. Movie Effects Maker

Movie Effects Maker, as the name suggests, allows you to add special effects to the images you click with your smartphone. With all the VFX options this movie effects app has, you can be virtually anyone you want. For instance, with the sci-fi and horror elements, you can create stickers out of your photos portraying yourself as a hero, add animated effects to your images to make them look live, and much more.
4. Extreme VFX

With this video special effects app, all you need to do is, record a footage using your Android smart device, and begin applying special effects to them until you are satisfied with the results. Since the app allows you to add multiple VFX to the clips, nothing seems impossible when it comes to decorating the videos, and making them more engaging and entertaining, especially with you playing as the main character.
Get this special video effect app from Google Play>>
Watch Video! Best VFX Video Effects Editor Apps for Android
Part 4: How to Add Special Effects to Videos in Filmora?
Although all the apps listed above are good, when it comes to creating movies with special effects for commercial usage and public broadcasting, nothing can beat the efficiency and robustness of a movie effects app that has been designed to run on desktop computers.
Even though there are many post-production professional applications by different vendors, Wondershare Filmora has the simplest UI, and follows the most straightforward approach that allows even the novice users to add VFX to their videos.
For Win 7 or later (64-bit)
 Secure Download
For macOS 10.14 or later
 Secure Download
Click here to get Filmora for PC by email
or Try Filmora App for mobile >>>
download filmora app for ios ](https://app.adjust.com/b0k9hf2%5F4bsu85t ) download filmora app for android ](https://app.adjust.com/b0k9hf2%5F4bsu85t )
The steps given below explain how to add special effects to your recorded footages with Wondershare Filmora:
1. Import Video and Add to Timeline
Launch Wondershare Filmora, click anywhere inside the Media Bin at the upper-left section, use the Open box to import the video you want to add VFX to, hover mouse to the thumbnail of the clip, click the + icon from the middle, and click MATCH TO MEDIA from the Project Setting box when/if it appears.

2. Add Effects and Elements
Place the Playhead (Skimmer) in the Timeline you want to apply effects from, click Effects from the standard toolbar at the top, select your preferred category from the left pane, hover mouse to the effect you want to add in the right window, and click the + icon from the center.

Optionally you can drag the effect in the Timeline to manage its duration. Next, go to Elements from the top, and repeat the process to add your preferred element to the footage.
Besides the included effects and elements in Filmora, you can find our more video effects on Filmstock effects store, including blockbuster, effects for holidays and vacations. Click to check the free video effects that you can get for free in Filmstock for Filmora.

3. Export the Output
Click EXPORT from the top-center section, go to the Local tab from the top of the Export box that opens up next, choose your preferred extension from the Format list in the left pane, select a destination location in the Save to field in the right window, click SETTINGS and make necessary adjustments (optional), and click EXPORT from the bottom-right corner of the box to begin rendering and to produce the video with the special effects applied to it.

Conclusion
With all the programs listed above, selecting the best video special effects app could be a challenging task. Thanks to Wondershare Filmora that not only enables you to add effects and elements to the videos, it is also fast, lightweight, and offers simple and easy-to-use interface that can be exploited to create professional-level outputs in comparatively less time.
For Win 7 or later (64-bit)
 Secure Download
For macOS 10.14 or later
 Secure Download
Click here to get Filmora for PC by email
or Try Filmora App for mobile >>>
download filmora app for ios ](https://app.adjust.com/b0k9hf2%5F4bsu85t ) download filmora app for android ](https://app.adjust.com/b0k9hf2%5F4bsu85t )

Ollie Mattison
Ollie Mattison is a writer and a lover of all things video.
Follow @Ollie Mattison
Also read:
- In 2024, Work Smarter, Not Harder Top Adobe Premiere Shortcuts and Tricks
- 2024 Approved Snap, Edit, Share The Top Mobile Video Editors for iPhone and Android Users
- New Adobe Systems Offers Premiere Pro CS6 for Mac Free Download Available for 2024
- Updated In 2024, Top Free M4A Editor Downloads Expert Reviews
- 2024 Approved No-Watermark Wonders Top 10 Free Online Video Editing Tools
- Updated Split, Cut, and Trim AVI Files Like a Pro The Ultimate Tutorial
- Updated 2024 Approved Are You Looking to Choose the Right Online Gaming Intro Maker without a Watermark Facility but Lost in the World of the Web? Then, the Solution Is with This Ultimate Guide to an Online Intro Maker for Gaming
- Updated 2024 Approved Flip, Spin, and Rotate 16 Best Free AVI Video Rotators for All Devices
- Updated Compress Videos Like a Pro 9 Best Free Tools for Windows 10 for 2024
- Updated Top Rated QuickTime Editors Free and Easy to Use
- New In 2024, AVI Video Cutter Reviews Top 16 Options for Precise Trimming
- New Top Video Editing Software Replacing Windows Movie Maker for 2024
- Updated In 2024, Free MOV Video Orientation Changers Top Rated
- New 2024 Approved The Ultimate Battle Adobe Premiere vs After Effects for Video Creators
- Merge Videos Without Ads 7 Leading Software Choices for 2024
- Updated In 2024, Here Are the Top Five Online Stop Motion Makers and a Brief Tutorial About How to Make a Stop Motion Video From Photos and Videos
- The Art of Stop Motion on Instagram A Comprehensive Guide for Creators for 2024
- In 2024, Reduce Shaky Footage Best Video Stabilization Apps
- In 2024, This Article Introduces Free Online Video Editing with Jaycut that Enables People to Upload Video, Audio, and More to Create Movies to Share Easily
- Updated Free WMV Video Merger Software Top Picks for 2024
- New 2024 Approved Create Amazing Videos Top Picks for All Users
- In 2024, The Ultimate List of Online Animation Creators for Jaw-Dropping Videos
- New Top Face Swapping Tools IPhone and Android Edition for 2024
- New Free Split Screen Video Creators Web-Based and Desktop Options for 2024
- Updated 2024 Approved Mac Movie Creation A Beginners Tutorial
- 2024 Approved S Best Free Video Compression Solutions for Windows 10 Users
- Updated Lyric Video Production Made Easy Top Web Tools for 2024
- New In 2024, Compress MPEG2 Videos Like a Pro A VirtualDub Tutorial
- Updated 2024 Approved Trim and Edit MKV Files with Ease Top Mac Tools 2023
- Updated Filmora Free Trial Vs. Full Version Which One to Choose, In 2024
- Updated 2024 Approved PC Video Editing Made Easy GoPro Quik and Its Alternatives
- New In 2024, Free Video Editing Apps and Software for Beginners Desktop/Online/Mobile
- New 2024 Approved The Ultimate Lip Sync Experience 5 Must-Try Apps
- Updated Add Depth and Dimension A Guide to Creating 3D Videos on Windows for 2024
- New 2024 Approved The Best Video Editors for Windows A Comprehensive Guide
- Updated Say Goodbye to Shaky Footage 8 Free Online Video Stabilization Solutions
- 4 Ways to Unlock iPhone 14 Plus to Use USB Accessories Without Passcode
- How to Transfer Data from Vivo S17e to BlackBerry | Dr.fone
- In 2024, How to enter the iSpoofer discord server On Apple iPhone 12 Pro Max | Dr.fone
- Updated In 2024, Top 10 AI Avatar Generators
- In 2024, How To Create an Apple Developer Account On iPhone 11 Pro
- How to Reset a Locked Xiaomi Redmi 12 Phone
- In 2024, 5 Ways to Track Nokia C02 without App | Dr.fone
- Top 9 Motorola G54 5G Monitoring Apps for Parental Controls | Dr.fone
- In 2024, Motorola G24 Power ADB Format Tool for PC vs. Other Unlocking Tools Which One is the Best?
- How To Upgrade or Downgrade iPhone 12 Pro Max Without Losing Data? | Dr.fone
- Updated Complete Tutorial to Make an Impressive Countdown Timer Video for 2024
- Latest way to get Shiny Meltan Box in Pokémon Go Mystery Box On Apple iPhone 14 Plus | Dr.fone
- In 2024, How Can I Catch the Regional Pokémon without Traveling On Motorola Moto E13 | Dr.fone
- Forgot Apple iPhone 11 Backup Password? Heres What to Do | Dr.fone
- How to Convert Images Into Video - Kapwing Tutorial
- In 2024, 3 Ways to Change Location on Facebook Marketplace for Samsung Galaxy M14 5G | Dr.fone
- Title: In 2024, Slow Motion Video Playback on VLC A Beginners Guide
- Author: Ava
- Created at : 2024-05-19 14:41:28
- Updated at : 2024-05-20 14:41:28
- Link: https://video-content-creator.techidaily.com/in-2024-slow-motion-video-playback-on-vlc-a-beginners-guide/
- License: This work is licensed under CC BY-NC-SA 4.0.


